Classrooms
Classroom Displays
MLC Classrooms in the WCC, Music Hall, and Music Center are equipped with a display that can be hooked up to your device. There are three general display types; interactive whiteboard, projector, and TV. Please see the Interactive Whiteboard page for information on those specific devices. Instructions on connecting to the projectors and TVs can be found below.
Displays (TVs)
-
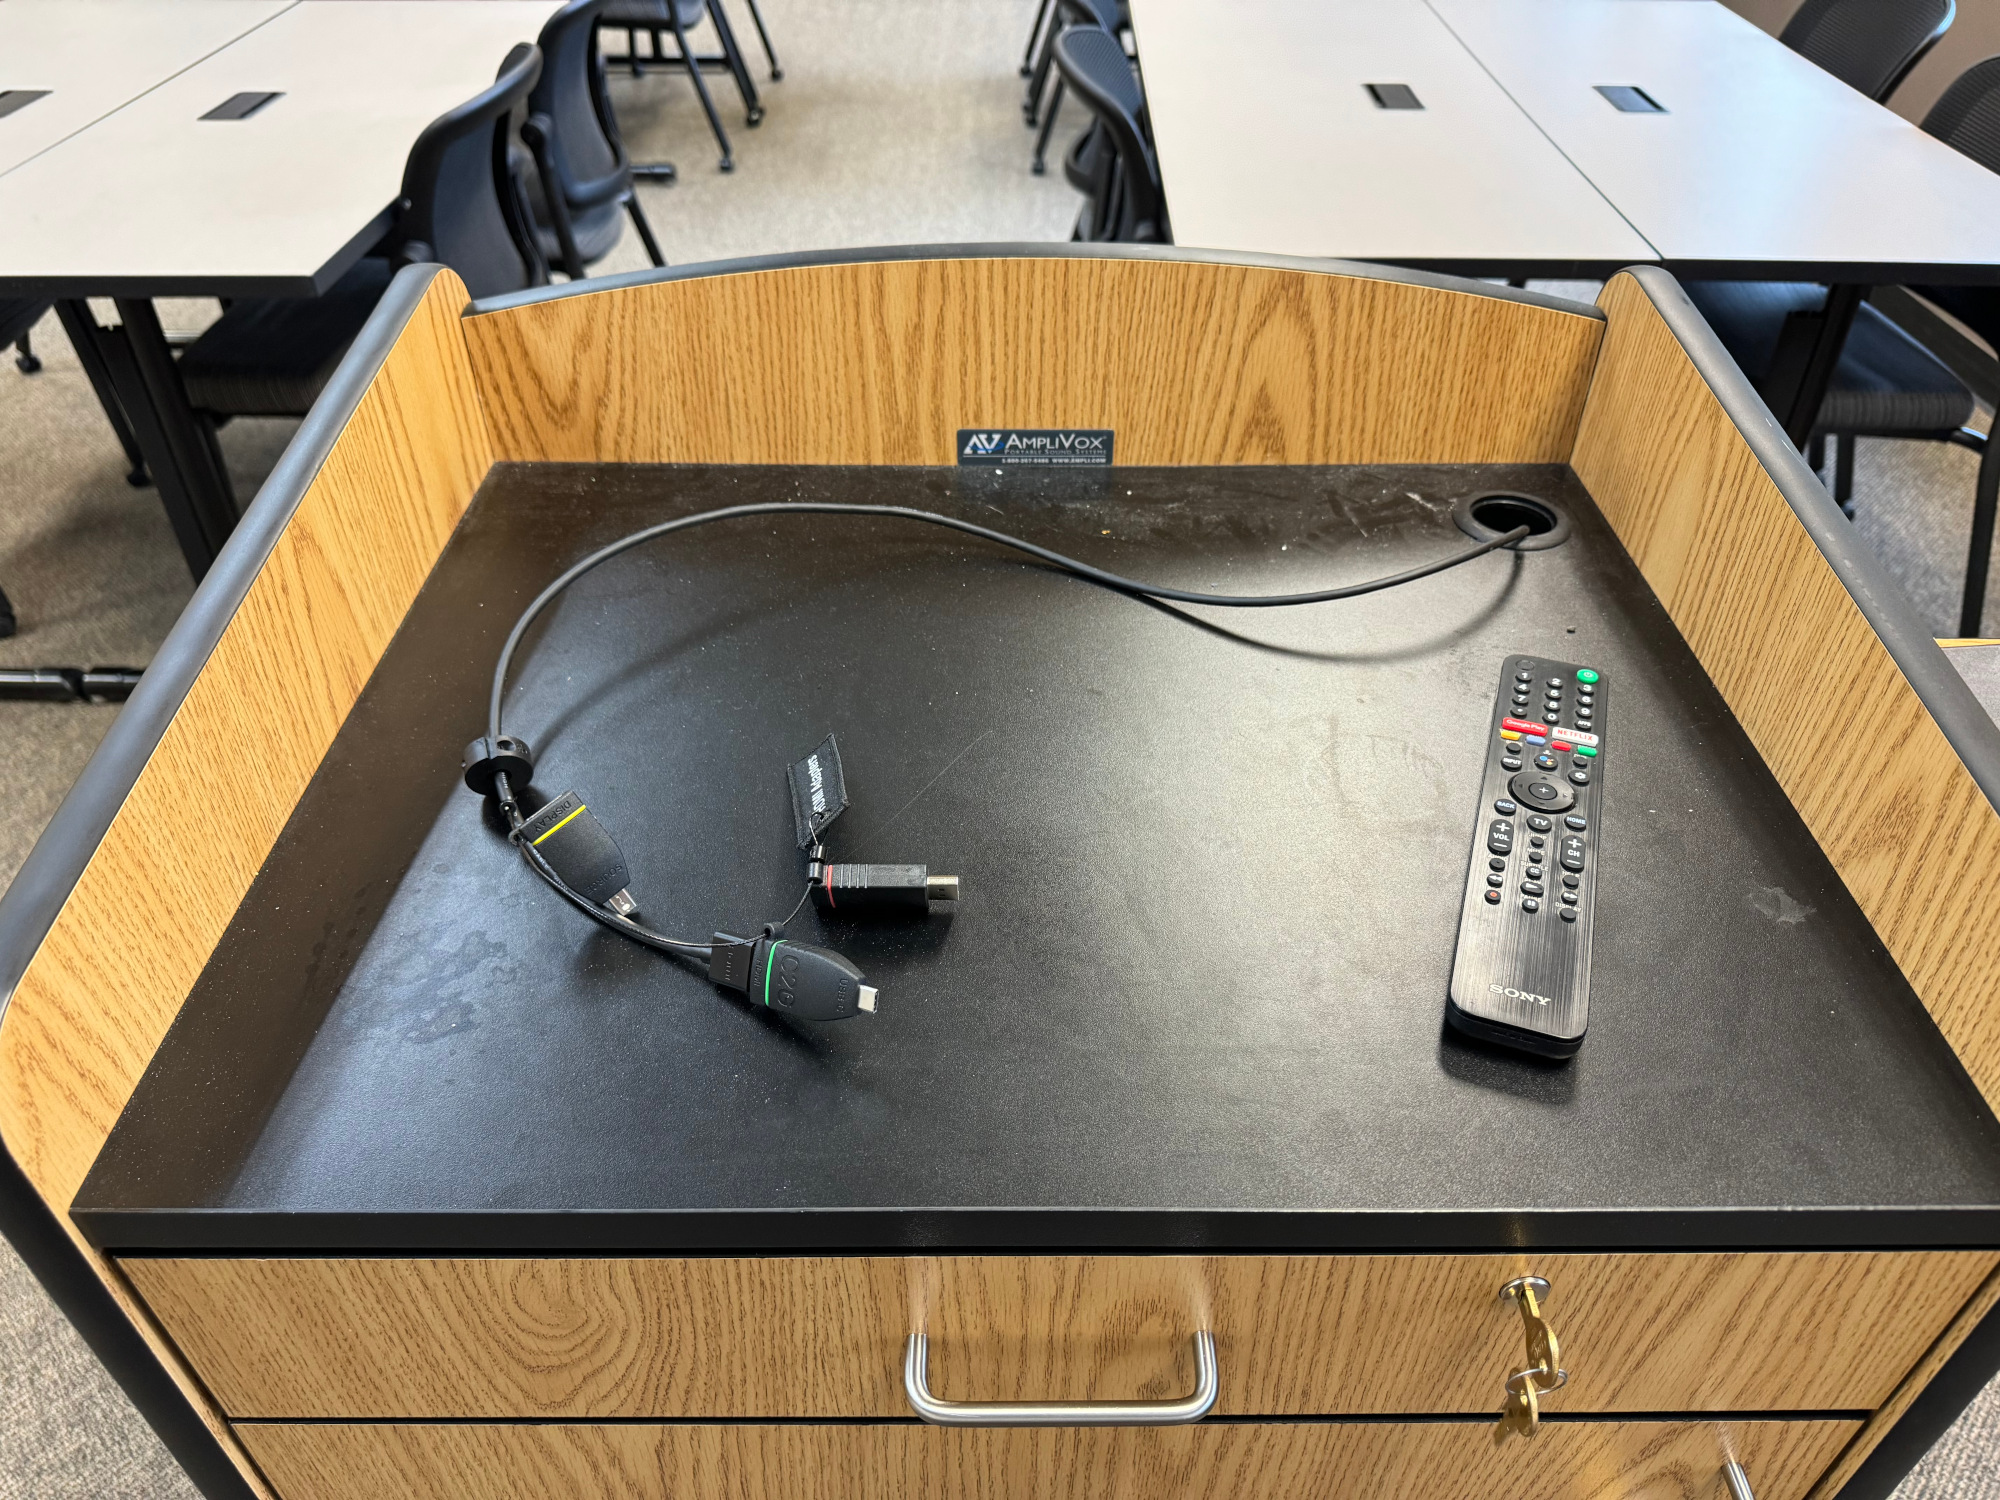
- Plug the HDMI cable (with an adapter, if required) into your device. The adapter ring is labeled if your device does not have an HDMI port.
- Turn on the display.
- The default display input is HDMI1. If your device's screen does not appear, use the Input button on the remote to select HDMI1.
- The best screen resolution for your device when using the displays is 1920x1080. Click here for instructions on how to change it.
- Some of the displays are mounted on adjustable mounts. Please keep them pushed as close to the wall as possible to reduce strain on the mounts. If you need adjustments made, please contact IT Services.
Projectors
- Plug the HDMI cable (with an adapter, if required) into your device. The adapter ring is labeled if your device does not have an HDMI port.
- Turn on the projector.
- The projector should default to the proper source to show your device. If your device's screen does not appear, use the Source Search button on the remote.
Sound
- As of Summer 2024, in most cases, sound is run through the display and not through a different sound system. If you need help switching your audio output, please watch this short YouTube video.
- Your device needs to be connected via the HDMI cable (with or without an adapter) for sound to work.
- Sound levels are controlled on your device and through the volume control on either the display or projector.
- There are still a small number of rooms with auxiliary sound systems. Please contact IT Services if you require their use and need help.
Document Cameras
There are currently two types of document cameras being utilized in classrooms on campus. Please reference either the room number or picture of the document camera to identify which type is in the classroom.
HDMI Document Camera
These document cameras can be found in WCC 168 and the Art Lab.
Instructions
- Turn on the TV and document camera.
- Use the input button on the TV remote and choose HDMI 2.
- Put whatever you'd like to display underneath the camera.
- Adjust the brightness using the arrows on the document camera.
- Zoom in or out using the grey knob on the end.
USB Document Camera
These document cameras can be found in MC 217, MC 123, MH 205, WCC 278, WCC 276, WCC 162, WCC 181, and other classrooms.
Instructions
- Turn on the TV.
- Plug your Surface Pro into the docking station.
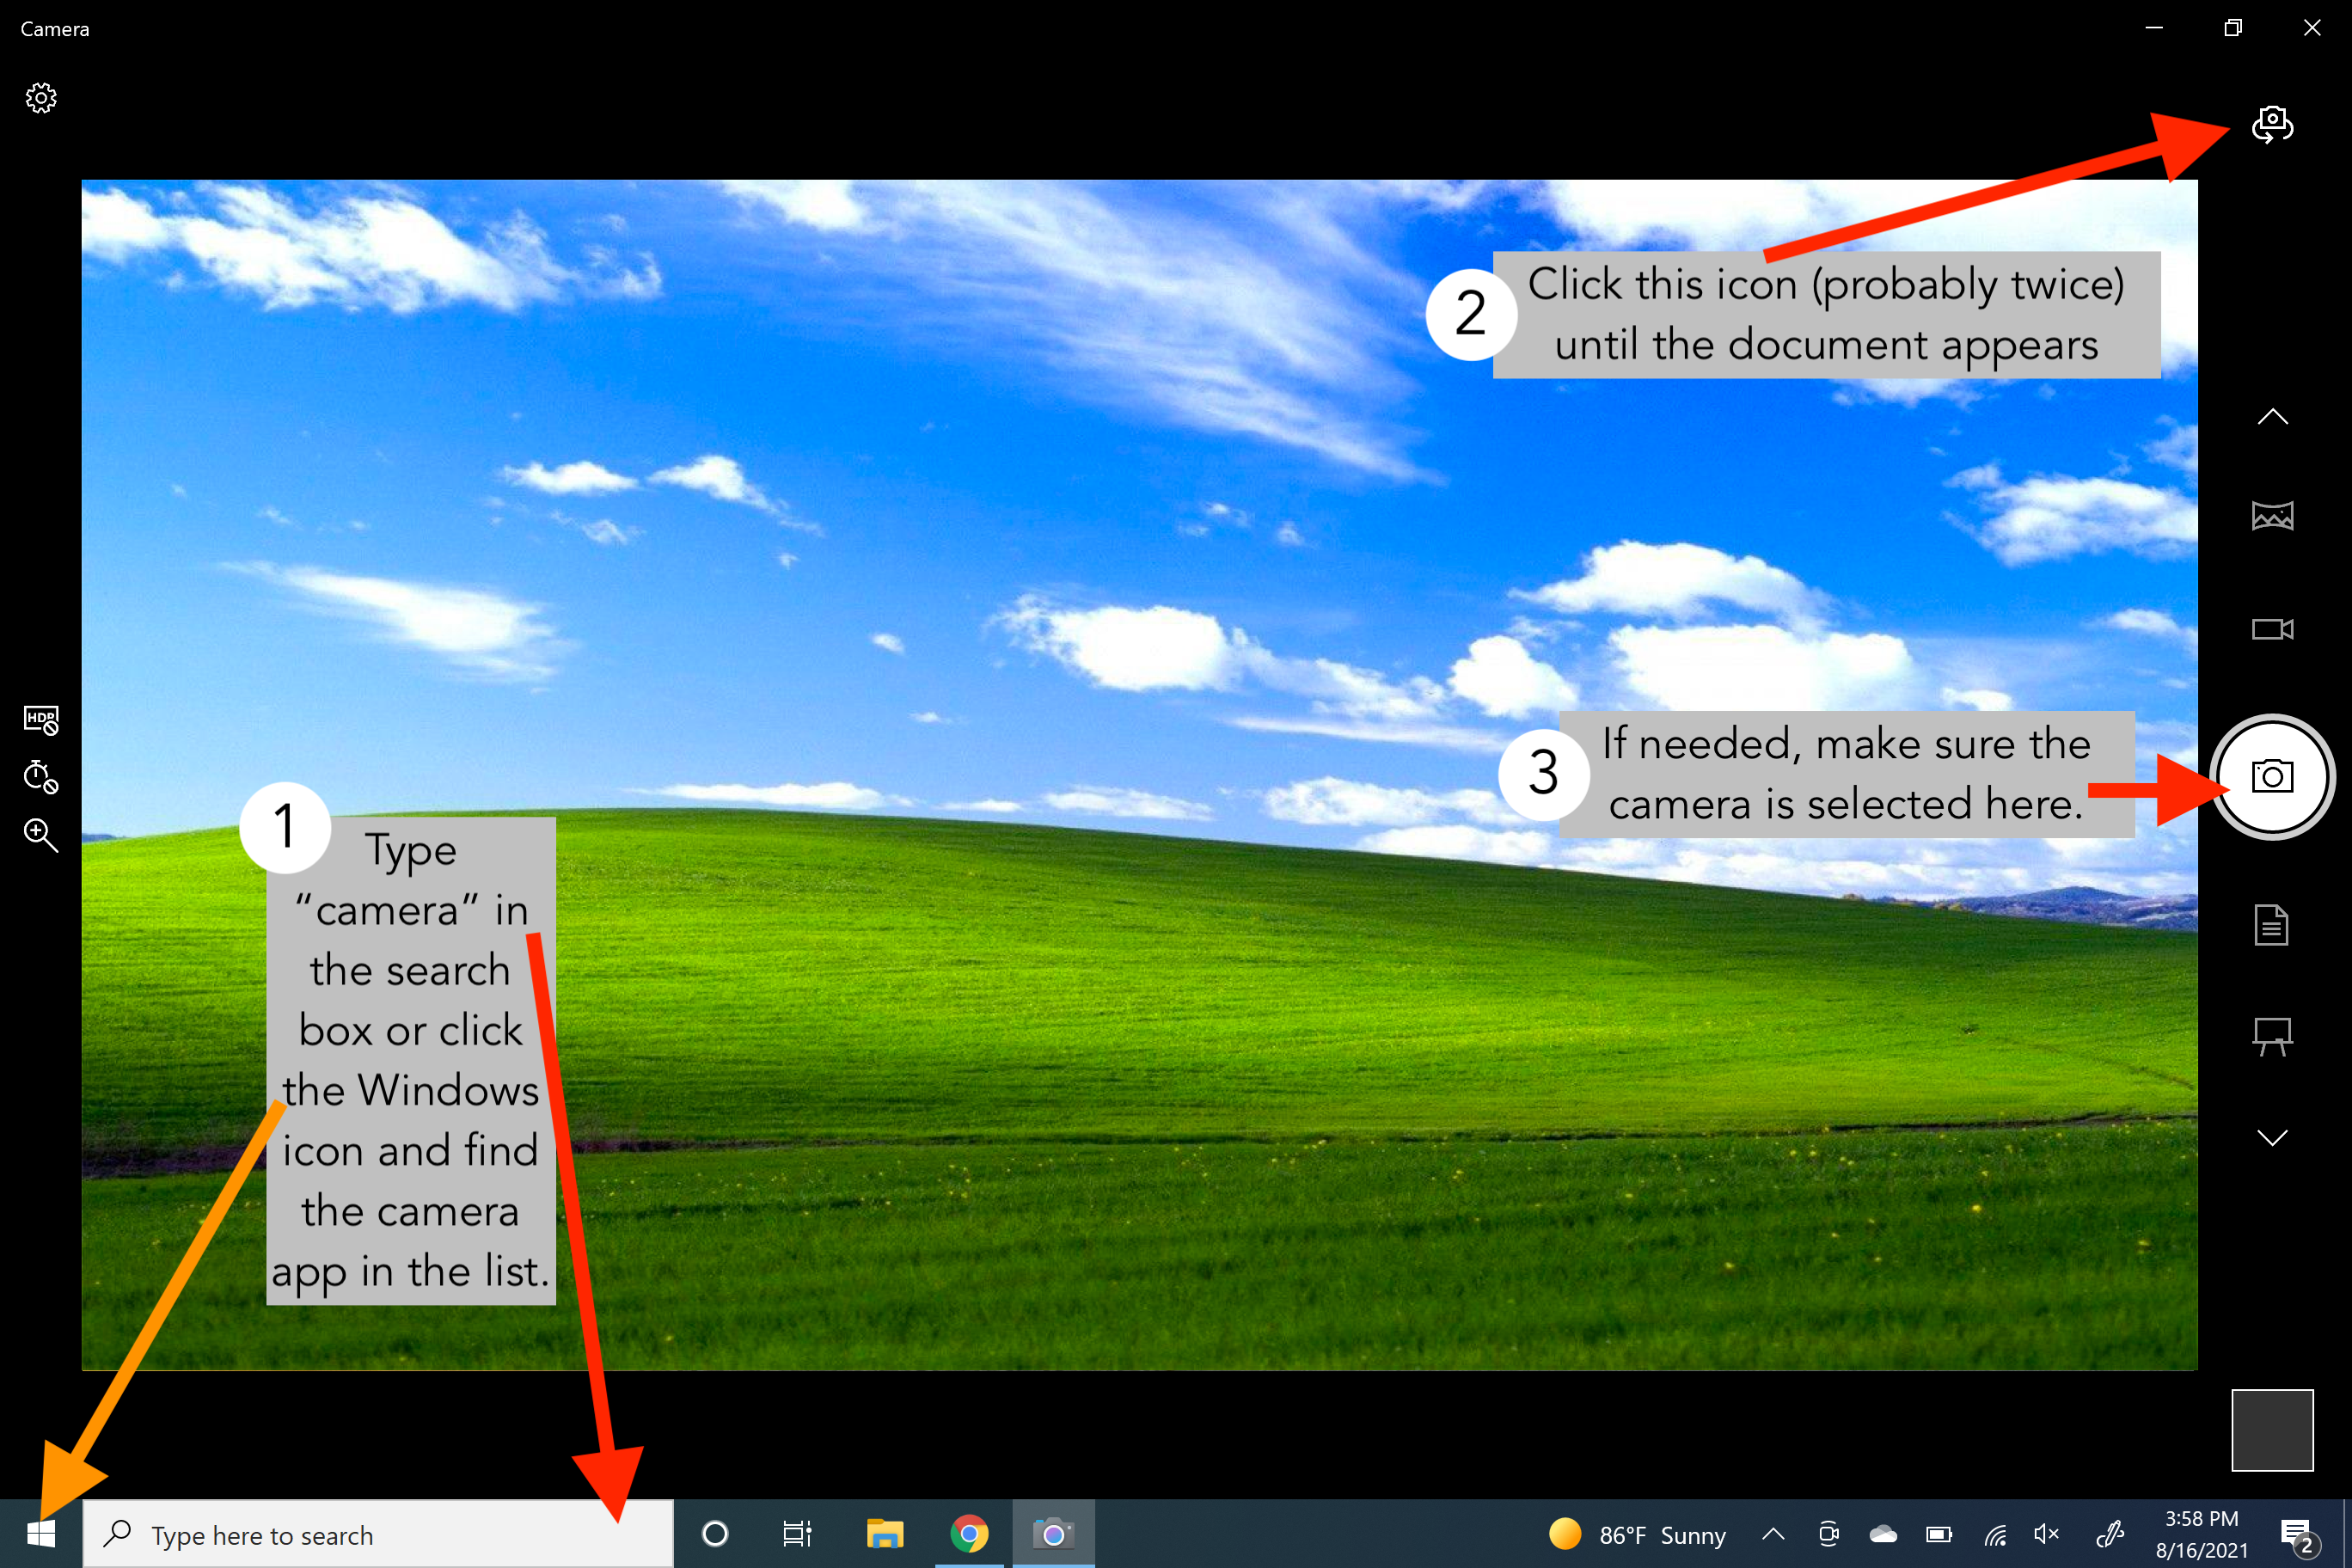
- Open the Camera App on your Surface Pro
- You can do this by typing camera into the search bar or clicking the Windows button in the lower-left corner and choosing Camera.
- The camera app will open on your Surface Pro. It will default to your webcam.
- Click the camera icon
 in the upper right corner until the document camera appears on the screen. You will probably need to click it twice.
 - If you are getting strange blue highlights on your image, make sure that the round camera icon
 is selected on the right side of the screen.
 - If the image on your screen appears upsidedown, press the teal button on the side of the document camera.
Interactive Whiteboards
Four of the WCC classrooms are equipped with interactive whiteboards (IWBs). These are sometimes also referred to as SMARTboards, interactive panels, touch screens, etc. There are currently two main types. Please reference the room numbers below to find out what type of board is in your room.
Newline Interactive Panel
Newline interactive panels can be found in WCC rooms 174 and 162.
Getting Started
-
- Turn on the IWB either via the remote or the power button on the front of the display.
- Turn on the TV(s) with the remote.
- Tap the IWB screen to start. You can use your finger or the stylus.
Using the Whiteboard
-
- Tap the Whiteboard icon on the IWB.
- Use your finger or the stylus to draw on the whiteboard.
- You do not need to connect a computer to the IWB to use the whiteboard feature.
- Whatever is drawn on the IWB will be displayed on the side monitor(s).
Displaying from a Computer
-
- Plug the USB from the docking station on the podium into your Surface Pro.
- Double-tap HDMI 1 to display your Surface Pro on the IWB.
- Whatever is on your device and the IWB will also be displayed on the side monitor(s).
- You can interact with your device from the IWB. It's basically a giant touch screen.
- The best screen resolution for your device is 1920x1080. Click here for instructions on how to change it.
Additional Features
-
- The Home
 icon on either side of the IWB screen will take you back to the main screen.
 - The Annotate
 icon on either side of the IWB screen will let you draw on whatever is on the screen.
 - The Marker
 icon on either side of the IWB screen launches the whiteboard.
 - The PC
 icon on either side of the IWB screen and on the home screen does not take you back to your Surface Pro. It tries to launch an internal PC, which is not a feature on our boards.
- The Home
