KnowledgeBase
- Faculty
- Students
- New Phones
- New VoIP Phone information
- MLC Phones
- Dialing
- Voicemail
- Transferring Calls
- User Control Panel
- Call Recording
- Feature Codes
- Ringtones
- Create A Phonebook
- Archives
- Classroom Technology
- Google Apps
- iTutoring
- Mobile Phones
- Moodle
- Printing
- Portal
- Website Documentation
- Website Style Guide
- Subsites
- Subsite Standard Layout
- Subsite Landing Pages
- Setting Up A New Subsite
- Post-Launch Tweaks
- Directory Subsite
- Working with Documents
- Linking to Other Subsites
- Adding Events to the Homepage
- Website Style Guide
- Wireless on Campus
- Environmental Services
- Network Services
- Windows 10 Upgrade Information
- 2018 WELS MN District Convention Tech Information
- Getting Started
- Your MLC Accounts
- Your Passwords
- Mobile Phones
- Adding Languages & Keyboards
- Spyware & Malware
- Filr
- Student Resources - Overview
- MLC Student-Owned Devices Policy
- Blackbaud Tips
- Copyright Infringement
- Acceptable Use Policy
Faculty
Sending Faxes
To send a fax on campus, follow the following steps:
-
Download the Fax Transmittal Form (Word)
-
Fill out the form
-
Take your fax along with the filled out form down to the front desk (WCC Link entry)
-
Talk with one of the receptionist and have them send the fax for you
If you have any questions, stop down at the front desk and ask!
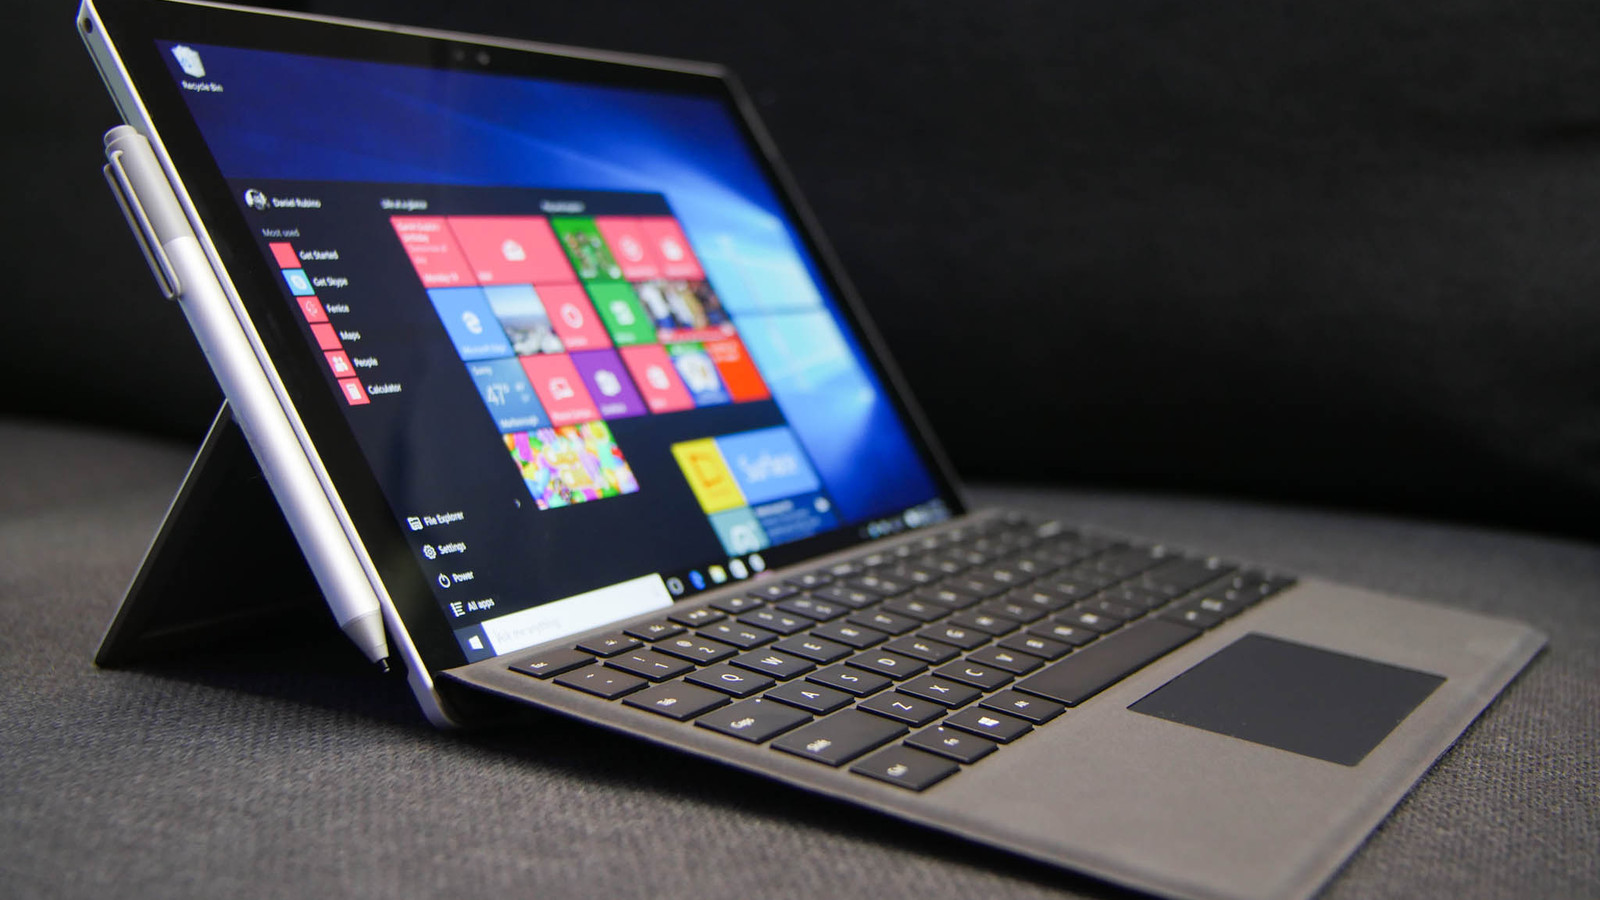
Surface Pro 4
The Microsoft Surface Pro 4 is the main faculty/staff laptop/tablet used on campus provided by Martin Luther College. It was deployed in Summer 2016. This page is meant to capture some of the tips, tricks, and information regarding your usage of the device.
Introduction
-
Surface Pro 4 introductory presentation by Prof. James Carlovsky - YouTube (April 2016)
-
Surface Pro 4 introductory presentation by Prof. James Carlovsky - Google Slides (April 2016)
-
Microsoft Surface Pro 4 product website - Microsoft
Additional Sessions
-
Faculty/Staff Orientation - YouTube/Google Slides (May 2016)
-
Surface Pen Introduction - YouTube/Google Slides (May 2016)
-
Wireless Teaching - YouTube/Google Slides (May 2016)
Questions & Answers
How can I play DVDs?
There is no built-in DVD player in the Surface Pro 4, but adding the ability to play CDs and DVDs is easy by utilizing an external DVD drive. Walmart and Amazon have many options available for a reasonable price if you have the need. Here are a list of a few (current as of May 3, 2016):
These drives are small enough to be slipped into a case and carried to the classroom as well. There are more than enough USB ports both in the classroom and in your office to accommodate an external DVD drive when needed.
Some external DVD drives will also be available to check out from Network Services.
How can I power my Surface while in the classroom?
The Surface Dock at your office desk provides power along with all of the additional port options. You do not need to use your power adapter in your office at any time (and, indeed, cannot because the Surface Dock uses the same port on your Surface).
The hope is that, for the vast majority of cases, the battery inside of the Surface Pro 4 will be sufficient to get through a class (or three) in most cases.
However, because power is provided by the Surface Dock in your office, you are encouraged to keep your power adapter with you while going to class or traveling. Network Services is going to work to provide ease of access in the classrooms to power strips so that plugging and unplugging power adapters will be easy enough to do. This will benefit the students and guests who will be presenting in the classrooms as well.
In the case that you feel there is a need for an additional power adapter, genuine Microsoft adapters can be purchased from Amazon or a 3rd party adapter can be purchased as well.
If you have questions, please feel free to talk with Network Services.
Can you recommend a case?
There are MANY cases available on sites like Amazon, but here are a few that might work for people:
How can I print?
We are continuing to use Micro Focus iPrint and PaperCut to manage our printers and print queues on campus. Three printers will be installed on all Surface devices one campus:
-
NS Konica 554e - black and white copier in Network Services
-
NS Konica C224e - color copier in Network Services
-
Print Shop Sharp M623N - black and white printer in Print Shop (defaults to holding print jobs)
You should also have the closest printer installed and set as the default for your machine. Often this is labeled similar to [Location] HP M602 or similar.
In order to successfully print, you need to be connected to the Academic Network. This can be accomplished in two ways:
-
connect to a wired Ethernet connection in your office (via your Surface Dock)
-
connect to the MLC Academic WLAN utilizing your MLC Account credentials
If you are not connected to the Academic Network, you will not be able to print successfully. As always, please contact Network Services with any questions. If you are connected to the MLC Guest WLAN, you will not be able to print at this time.
Can I use the MLC Academic WLAN?
In early May 2016 we switched the way that our wireless system handles wireless authentication. You should now be able to easily, and consistently, utilize the MLC Academic WLAN by selecting it from the list of wireless networks and inputting your MLC Account credentials (if prompted).
The first time you connect to the MLC Academic WLAN, you will be asked to accept the identity of the server. Do so. After that you should not be prompted until the next time we change the security of our RADIUS server on campus.
If you change your MLC Account password, you are going to need to follow the instructions found on the MLC Academic WLAN information page.
What happened to logging into Novell?
Historically, Martin Luther College has utilized the Novell Client for allowing access to files stored on our network file servers. However, that has now changed for mobile devices going forward.
We will now be utilizing Micro Focus Filr. This should give you equivalent, not identical, access as the Novell Client did in the past. You can find out more by visiting our Filr page here on the knowledge base. If you are concerned about anything, please contact Network Services.
However, if you want to be able to use the Novell Client, Network Services can install it for you.
It is recommended to install the Filr Desktop Application on your devices, and for the Surface Pro 4 you will want to install the Windows X64 Client.
Adjunct Instructor Tech Requirements
While teaching at or for Martin Luther College, you will be required to own and maintain a device meeting the following minimum requirements (which are based off of the current devices being used by faculty members on campus). You can choose to use whichever device you like and a best-effort attempt will be made by Network Services to help you.
If you have specific questions, please contact Network Services.
Classroom Presentation Requirements
Most classrooms on campus are equipped with a USB 3.0 docking station for use by faculty, staff, students, and the public for presenting using a device. For more specific information on classroom technology, you can visit the Classroom Technology area of this knowledge base.
Your device will need one of the following ports to use the docking stations:
-
USB 3.0 A-style connector or adapter
Computer
-
Operating System: Microsoft Windows 10 or Apple macOS Mojave
-
Processor/CPU: Intel Core m3 or AMD equivalent (or faster)
-
RAM: 4 GB minimum/8 GB recommended
-
Storage: 128 GB minimum/256 GB recommended
Currently the faculty are using Microsoft Surface Pro 4 (released in 2015) tablets on campus. Older and lower-specced machines may work, but it is recommended to have a newer and faster machine if possible. If you have an Apple computer, please read their support site for more information on Mojave-compatible Macs.
Chromebooks & Tablets & Other Devices
While it is recommended to have a machine meeting the above requirements, some other devices may work for your teaching. However, the above devices have been tested to be compatible with our presentation systems and work well with Moodle (our online learning environment). If you have specific questions about a device, please reach out to Network Services.
Students
Networking
Residential students have a number of options for connecting their devices to the campus-wide network and gaining access to both MLC-offered services and the greater Internet. Depending on your room, and the device you wish to connect, the steps you follow to gain access will be slightly different. You can find a variety of topics, information, and instructions here to help you but ultimately, if you have questions or issues, you can contact Network Services for help.
Before continuing on, please read the MLC Student-Owned Devices Policy.
Connecting
Wireless
Martin Luther College currently offers access to three wireless networks throughout campus including (starting Fall 2018) in dorms rooms around campus. Two of these networks are applicable to students. Click on the links below to find out how to connect to each network.
For information on which network to choose, check below based on the type of device you are connecting with.
Wired
While wireless routers are now prohibited in the dorms, wired connections are still supplied for those instances where it makes sense to connect a device using an Ethernet connection. How you will go around connecting is dependent on how your room is setup.
To utilize the wired connections it is recommended to use a device that has access to a web browser as registration takes place using a webpage. If you have need to connect a device without a web browser to a wired port, please contact Network Services.
Wireless Access Points
If your room has one of our wireless access points installed, you will find two Ethernet ports available for your use either on the bottom or the top (depending on the orientation of the device). You are free to connect your device to either of these ports and it will, initially, connect you to the MLG Guest Network. Here you can register your device and have basic access to the Internet and other MLC services.
However, after you have registered your device, you will need to contact Network Services to have your port switched to the MLC Student Network. Please include the following information:
-
Your Name
-
Dorm Name
-
Room Number
-
Port Connected (either
DATAorPoE OUT + DATA)
Standard Ethernet Ports
These ports will switch to the proper network depending on if your device is registered or not. The switching can sometimes take a few minutes. After you have successfully registered your device on the MLC Guest Network, your port will switch to the MLC Student Network within a few minutes.
Quick Start Guide
-
Hook your computer up to the network jack using your own Ethernet cable (cables are available from the Bookstore).
-
Open your web browser (e.g. Firefox, Chrome, Internet Explorer, Edge, Safari, Opera, etc.).
-
Follow the registration instructions (you will need your MLC Account username and password to register).
-
Go take a walk to give the system time to register your machine if it doesn't seem to work at first.
Devices
Some devices have specific requirements and will work better than others on certain networks. The following section will outline some of the issues to keep in mind when it comes to using your devices on campus.
Laptops/Phones/Tablets/Desktops
These are, perhaps, the easiest devices to support on campus. The main issue to remember is that you will need to connect to the MLC Guest WLAN first before moving to the MLC Student WLAN. Successful registration on the MLC Guest WLAN will last for 7 days while the MLC Student WLAN registration will last for nearly a half-year.
If you are having issues connecting, it is often useful to forget the network and then try connecting again. Changing your MLC Account password will cause connection issues as well.
Gaming Consoles
Most gaming consoles do not support WPA2 Enterprise authentication, which is required to connect to the MLC Student WLAN. As such, you can attempt to use the MLC Guest WLAN for access (if you have a web browser in order to register) or to connect via a wired connection and register that way. You will have a much better experience using a gaming console connected to a wired connection and registered on the MLC Network.
If your console does not have a web browser (both the Xbox One and Playstation 4 DO), then you will need to contact Network Services with the following information so that the console can be registered successfully:
-
Name
-
Dorm Name
-
Room Number
-
Type of Connection (either wired or wireless; if wired, which port you are connected to if connect to an access point)
-
Console MAC Address (for either the wired or wireless adapter)
-
Console Type
Your device will be registered, and your port switched (if connected to an access point) during the next business day.
We cannot guarantee each and every game/game console will be able to be successfully played/used here on campus. We will make our best effort to get things to work, but as this is a campus instead of a single home, some things cannot be supported.
Streaming/Smart Devices/Printers/Televisions
Streaming/smart devices, most of which do not support the needed encryption to log into the MLC Student WLAN. As such, the streaming devices (Amazon Echo, Google Home, Chromecasts, Apple TV, Apple HomePod, Roku, etc.) will need to be registered in order to connect to the MLC Guest WLAN since the devices normally have no web browser or even a screen.
As such, you will need to contact Network Services with the following information so that the console can be registered successfully:
-
Name
-
Dorm Name
-
Room Number
-
Type of Connection (either wired or wireless; if wired, which port you are connected to if connect to an access point)
-
Device MAC Address (for the wireless adapter)
-
Device Type
You can connect to a wired connection as well, just include your wired MAC address.
Some features of these devices require you to be on the same network as the devices you are using or controlling. For example, wireless printers will be available to anyone using the same network you are connected to. If you have specific needs, please contact Network Services and work with the staff there.
Frequently Asked Questions
Why can't I play my Xbox/Playstation?
It is possible you are connected to the Guest Network/MLC Guest WLAN and that device has more restrictions than the Student Network/MLC Student WLAN. You will need to connect to the correct network, register your device, or contact Network Services for help.
Can I use my own wireless router in the dorms?
No. Please do not.
What is a MAC address?
It is the hardware identifier for the network device on your machine. It is sometimes called a MAC address, hardware address, network address, or similar things. Often you can find the information needed in your device settings, printed on the box, on a sticker on the device, or on a network connection screen. They often look like pairs of letters and numbers separated by colons.
Look for something like this: aa:bb:cc:11:22:33.
This information is vital and is needed in order for the network to be able to recognize your device and give it the access you require. Providing even a single inaccurate digit or number is enough to stop a device from connecting properly. Often the information is found while setting up a network connection on the device.
I can't connect my device to the network, what should I do?
If you are having issues, the best option is to contact Network Services to get the discussion started on how to best meet your needs.
Can you open a port for me?
As long as your gaming device is registered properly on the network, you should not need to request any additional network ports to be opened.
Be warned, some features of modern gaming devices are built with the idea that you are connected to a minimally shared internet connection in your home. However, this is not the case with a network shared among hundreds of students. If a feature is not working, please contact our office so that we can try and look into it but we are not able to guarantee operation of all features.
Where can I get an Ethernet cable?
The MLC Bookstore sells cables, along with Walmart in New Ulm as well.
What if I want/need to hook up multiple devices using a wired connection and have only one port?
You will need to purchase a network switch, NOT a router. Switches are usually quite cheap and easy to order online.
Does MLC filter Internet access?
MLC maintains firewalls and a filtering service.
MLC provides Internet access for all students, staff, and faculty with the purpose of enabling and enriching your academic experience. While it is available for personal and recreational purposes, we contract a service that runs on our firewalls that filters out pornographic and gambling sites.
The firewalls also filter by port. Ports that are not needed for common web applications are blocked to prevent attacks on your computers from the outside. This may prevent you from playing some multiuser games and other web applications that use non-standard ports in their setup.
Direct outbound SMTP (port 25 mail) is also blocked from the dormitories to prevent computers that have been infected with viruses from sending emails to propagate the virus. Outbound SMTP email is only allowed through MLC's mailhost which does antivirus checking prior to sending. You can, however, send and receive mail though any web based email system that uses ports 80 or 443.
Laundry Facilities
The laundry facilities on campus are free to use by all student currently living on campus. Each dorm has at least one laundry room (with Augustana having two very close to each other) and the laundry facilities are open 24 hours a day.
In Spring 2017, the laundry facilities were updated with new washers and dryers along with the ability to check the availability of machines and be notified when a load is done or a machine is available. This uses a site called LaundryView.
LaundryView Links
Instructions
Visit The Campus Clothes Line for instructions, videos, and tips for using the laundry facilities and taking care of your clothing while on campus. You can also download some PDFs for your convenience:
Service Requests
If a machine is broken or not working properly, there are a number of things you can do:
-
Let your RA know that the machine is broken
-
Enter a support request with CSC ServiceWorks
There should be directions in the laundry room for how to submit such a support request. You can also download a mobile app for either Android or iOS and scan the bar code on the front of the machine from the mobile app to start the process.
Mobile App Links
XFINITY on Campus
One of the benefits students receive while residents at Martin Luther College is access both to an XFINITY cable TV subscription. For help with your physical XFINITY cable TV subscription, please contact the Student Life office.
However, an added bonus is the availability of both live TV and TV-on-demand through XFINITY on Campus. This enables students who are currently living on campus to enjoy the benefits of their XFINITY subscription on their desktop, laptop, mobile devices, and even their television. This is offered for no additional costs to students.
You will need to know your MLC Account username and password because that is what you will use to log into the XFINITY applications (both on the web and on your devices). Please make sure that you are using your MLC Account credentials. If you have problems logging into MLC's central authentication website, please file a support request.
You can find the XFINITY Stream app on various app stores and also access everything at the XFINITY on Campus website at https://www.xfinityoncampus.com.
XFINITY on Campus Links
Student Resources
The Network Services staff welcomes your questions. We are here to help. You can find out the best way to get in touch by contacting Network Services.
-
All students have computer network accounts.
-
A student account provides access to email, word processing, spreadsheet & database functions, library catalog, other utilities and Internet access.
-
Security on the network is important. You will be required to change your password every few months. You will not be allowed to reuse passwords. Do not give your password to anyone else. You should immediately notify Network Services if you have reason to believe that someone has obtained unauthorized access to your account. If you forget your password, come to Network Services. You will be required to have picture ID to have your password changed. Your username and password is you. You will be held liable for anything done under your username.
-
Each student has 250 megabytes (MB) of disk storage on the network. When you reach your limit some applications will not run. In this circumstance you will be advised to delete files to make space.
-
Printing to network printers is metered at a cost of $0.05 per page. Each student is given a credit of $12.50 (250 pages) at the beginning of each semester. If you need additional printing, you may make a deposit for print credit at the Network Services Office (WCC 293) during business hours. Unused print credit will not be refunded in cash except for those who have made cash deposits. To check on your print credit status, login with our Portal username and password at http://papercut.mlc-wels.edu.
-
Note that electronic mail (email) is not guaranteed to be private. Network Services will not intentionally inspect the contents of email or disclose the contents to anyone other than the sender or the intended recipient, unless required by law, the policies of MLC, or to maintain the functioning of the MLC network. MLC Network Services reserves the right to cooperate fully with MLC administration, local, state, and federal officials in any investigation relating to email on the MLC network or owned accounts.
-
Usage of college owned software is metered and logged as a part of our agreements with the software manufacturers. Internet traffic is monitored and logged. Anyone using this system expressly consents to such monitoring.
More Resources
Purchasing Software
Instructions
Students, faculty and staff at Martin Luther College have the opportunity to purchase software at discounted rates. To do so, follow these instructions:
-
Visit http://portal.mlc-wels.edu and login with your MLC Account
-
Click on
Tools > Purchase Software -
Purchase software from the 3rd party site
You will be logged into your account and can purchase any of the available software titles from that page. This includes, most importantly, Microsoft Office.
Frequently Asked Questions
What’s the catch?
There are a few things you need to keep in mind:
-
You need to save the installer you download for your software
-
You need to keep a record of any product keys you are given
After a given number of days, you will no longer have access to the download of the installer or your product key. If you lose either, you will need to purchase the software again. Network Services does not and cannot keep a record of that information for you.
Do I get to keep the software?
As long as you keep the download and product key you can keep the software. As stated above, if you lose either you will need to purchase the software again.
Printing
Students, Faculty, and Staff all have access to print services around campus. We utilize Novell iPrint and PaperCut to handle the print and print accounting services respectively. You can find our local installations below:
-
MLC PaperCut Server: http://papercut.mlc-wels.edu
Printing is available in all computer labs on campus.
More Information
-
Print Credit - information about checking and adding print credit
-
Printing Overview - how printing works on campus
-
Troubleshooting - how things can go wrong
New Phones
New VoIP Phone information
The new phone system uses what is called 'Voice over Internet Protocol' (VoIP) which means that the conversations travel over the internet. Specifically, here at MLC, these conversations travel over the same data lines that our computers and printers use. These signals are digital as opposed to the old phone system which runs over separate phone lines and uses an analog signal.
Our system is running on Asterisk which is a free and open source framework for communications applications. It has many features and is continually being improved by a worldwide community of programmers. We will utilize the applications that suit our needs. Below you will see a number of topics that will help you become familiar with the phone and some of the applications and features. Contact Jim Rathje for further information and help with your phone.
MLC Phones
Grandstream GXP2130

-
Line keys
-
We have 2 line keys, you can have 2 separate conversations of which one is on hold
-
-
Soft keys
-
depending on what you are doing, different menus will appear on these soft keys
-
-
Menu/OK key
-
Unordered List Item displays menu of information such as call history, status, contacts, etc.
-
-
Speaker
-
Allows switching between handset and speaker
-
-
Volume
-
Volume control for speaker and handset
-
-
Send
-
Place call after dialing number
-
-
Message Waiting
-
Flashes red when there is a new voicemail
-
-
Message
-
Dials your voicemail box
-
-
Contacts
-
Displays your phone books. The LDAP Directory has the MLC extensions preprogrammed
-
-
Hold
-
Places a call on hold
-
-
Navigation keys
-
Navigate through menu options
-
-
Transfer
-
Transfer call to another number or parking lot
-
-
Conference
-
Use to create a 3-way conference
-
-
Headset
-
Switch to headset if connected
-
-
Mute
-
Mute your speaker, handset or headset
-
If pressed when you are not in a call, this places your phone in the 'do not disturb' mode and sends all call immediately to voicemail
-
-
Multi-Purpose keys
-
These keys have been preprogrammed as call appearance buttons or busy lamp field (BLF) for office groups allowing you to pick up calls for each other. They are unprogrammed for indidividuals.
-
On classroom phones they have been pre-programmed as speed dial buttons for Network Services, HR, Nurse, etc.
-
Dialing
Internal extension information
Faculty and staff have 3 digit extensions in the range 100-399. You can use the LDAP Directory on the phone to search for extensions of faculty and staff, or use the phone link on portal
-
Note - To leave a voicemail for faculty or staff, without ringing their phone, dial * then their extension. i.e. *XXX
Classrooms are all 4 digit extensions:
-
On campus classrooms begin with the digit 4 followed by the room number i.e. 4XXX. For example to call WCC287, dial 4287
-
ECLC classrooms begin with the digit 5 followed by the room number i.e. 5XXX
Local Calls
Calls to the exchanges below are considered to be local. All phones are allowed to place local calls. To place a local call dial 9 followed by the 7 digit number. (9 XXX XXXX)
-
217, 228, 233, 240, 276, 354, 359, 404, 441, 543, 601, 766
Long Distance Calls
Long distance calls are only allowed on faculty and staff phones. Phones in common areas or classrooms cannot place long distance calls. No long distance access codes are needed. To place a long distance call dial 9 then 1 followed by the area code and 7 digit number. (9 1 XXX XXX XXXX)
Voicemail
Faculty and staff phones are configured for voicemail. Phones in common areas and classrooms do not have voicemail boxes.
-
To access your voicemail from your phone, press the message button on your phone or dial *97, enter the password
-
To access your voicemail from someone else's phone dial *98, enter the extension, enter the password
-
To access from outside the building, call your DID, if you have one, 233-9156 or have the receptionist transfer you to your extension if you called 345-8221. When the voicemail greeting answers, press *, enter your password.
All voicemail messages are also emailed as a .wav file to your MLC email address. You can listen to your voicemail messages on any computer or smart device with audio capabilities. (Note- deleting the email does not delete the message from your voicemail box.)
Voicemail guide and setup
Use this printable guide
Transferring Calls
When in an active call…
-
Press the transfer button or the soft key labeled Transfer on the display
-
Dial the extension number of the receiving party. (Note: dial * then the extension to send the caller directly to voicemail)
-
Choose between the soft keys BlindTrnf (blind transfer) or AttTrnf (attended transfer)
-
If BlindTrnf was selected, the call was transferred and you may hang up
-
If AttTrnf was selected, the caller is placed on hold while you call the extension. Use this in a situation where you want to screen callers. If the person does not answer, press Cancel then Resume on the soft key label to be connected back with the caller. If the person does answer, press the Transfer soft key to complete the transfer, or the Split soft key to go back to the caller when the transfer is refused.
User Control Panel
The User control panel (UCP) is a web based GUI that allows you to set up dashboards and customize widgets that allow you to view and control call events, forwarding, history, conferences, fax, and voicemail to name a few.
If you are a first time user, request access from Jim Rathje by email at rathjeja@mlc-wels.edu
To access your UCP (currently accessible only from campus) follow this link https://pbx.mlc-wels.edu/ucp/
| Initial login |
|---|
| Adding a widget |
| Call Forward |
| Call History |
| Voicemail |
Call Recording
If you feel that you have a need to record conversations, contact network services for access.
Once given permission (request permission from network services), you can record any call that you are on by pressing *1 while on the call. Call recordings are accessed through your User Control Panel (UCP)
Feature Codes
Managing Call Forwarding Feature Codes
A phone user can dial feature codes in conjunction with forwarding numbers to turn call forwarding on or off for different conditions. Forwarding numbers can be local extensions or remote phone numbers.
| Code | Action |
|---|---|
| *72 | Activate call forward ALL - extension will not ring, call is immediately forwarded. If the call is not answered, voicemail is handled by the forwarding number i.e. cell phone voicemail |
| *73 | Deactivate call forward ALL |
| *90 | Activate call forward BUSY - call is forwarded if the line is busy |
| *91 | Deactivate call forward BUSY |
| *52 | Activate call forward NO ANSWER -extension will ring 3 times, then call is forwarded for 3 rings. If call is not answered, voicemail for the extension is engaged. |
| *53 | Deactivate call forward NO ANSWER |
Voice Mail
Voicemail can also be accessed by pressing the key with the envelope on your phone.
| Code | Action |
|---|---|
| *97 | Access voicemail from your extension. |
| *98 | Access voicemail from selected extension. Allows you to access your voicemail, or someone else's from any extension |
Managing Do Not Disturb
This feature can also be toggled by pressing the mute button.
| Code | Action |
|---|---|
| *78 | DND Activate |
| *79 | DND Deactivate |
| *76 | DND Toggle |
Managing Call Recording
| Code | Action |
|---|---|
| *1 | Toggle In-Call Recording |
Information Services
| Code | Action |
|---|---|
| *69 | Call trace |
| *65 | Speak your extension |
| *60 | Speaking clock |
Speed Dial Programming
You can program multiple speed dial numbers on your phone. When prompted, enter the speed dial location, followed by the telephone number
| Code | Action |
|---|---|
| *75 | Set up the speed dial location and number |
| *0X or *0XX | Access and dial the number stored in location X or XX, etc |
Ringtones
Our phones are capable of using the default system ringtone and 3 additional ringtones that can be customized by the administrator (network services). We are currently experimenting with ringtones, trying to find professional sounding ringtones. Each of you may select any one of the four available ringtones. The video below walks you through the process.
Note: You may need to set these each day until I figure out how to keep it from resetting each day.
Create A Phonebook
View the video below to create a phonebook of frequently called numbers. Feel free to experiment with the fields that are available. Use as many or few as you wish.
Archives
Submitting Items to Archives
MLC Archives maintains a digital inbox where digital files can be submitted so that they are able to be moved and properly maintained for future use. Here are the instructions on how to use it.
If you use the OES Client, you can submit items after logging into the OES Network on campus so that drives are mapped to your machine.
-
Log into the OES Client on your machine
-
Navigate to the Archives Inbox, usually the S: drive (OES Client users), or the Archives Inbox Net Folder (Filr users)
-
If you do not see the S: drive (OES Client users) or the Archives Inbox Net Folder (Filr users), please contact Network Services
-
Copy and paste anything that you are submitting into a folder labeled with your name and the current date. Then copy and paste that new folder into the Archives Inbox
-
That's it, there is nothing else for you to do
Please be sure that you are submitting copies into the Archives Inbox of any items you may need in the future. You will not be able to retrieve items from the Archives Inbox.
Having all of your archival items submitted into the Archives Inbox will allow the staff to look at the files and archive them permanently in the future.
Classroom Technology
Most classrooms at Martin Luther College are equipped with various types of technology which allow faculty, staff, students, and guests to enhance the learning experience while on campus. Below you will find various links to instructions on how to use the technology available in the rooms.
Troubleshooting
You can attempt these steps to troubleshoot some issues with the universal docking stations in most classrooms.
- Disconnect and reconnect the USB cable to your device
- Disconnect the USB cable from device and power adapter from docking station, wait for a minute, then reconnect the power, wait for 30 seconds, and reconnect USB cable to device
- Make certain that the correct sound output device is selected for universal docking station
- Reinstall universal docking station display driver
If none of those steps fix the issue, please contact MLC Network Services.
Using Your Personal Laptop
Most classrooms are setup specifically to allow faculty members at Martin Luther College to quickly and easily get ready for their class. This currently includes a docking station specific to the model of laptop currently in-use. However, classrooms can be setup to allow personal laptops to be used for presentations.
If you need that capability, please contact Network Services with your support request.
The following instructions commonly work across campus when a universal docking station is available.
Video Through Projector
-
Install the appropriate driver for the universal docking station display driver for your operating system
-
Connect the USB cable from the universal docking station to your computer (and let your operating system install any additional drivers)
-
Turn on the projector using the white Epson remote
-
Turn on the Epson document camera using the switch in the upper-right corner
-
Select
RGB2on the Epson document camera to switch video to display from your laptop -
Use the projector remote's Source Search to select the proper source on the projector if it is not working
Audio Through Speakers
Audio is sent out through the universal docking station. When you connect the USB cable, you will also have access to the sound system in the room. You might need to change the output on your device.
-
Control the volume using the
PCknob on the wooden sound box
Internet Access
-
You will want to use the MLC Guest WLAN for internet access while on campus
-
If you do not know the current access code for registering as a guest on campus, please contact the front desk, Network Services, or talk to a faculty or staff member
If you run into issues, please stop in Network Services to ask for assistance.
Universal Docking Station Display Driver
MLC utilizes the Plugable UD-3900 Dual Display Universal Docking Station in most of the classrooms around campus.
Install the Driver
If you are coming on campus to teach or present, you will need to install the appropriate driver package for your operating system:
Install the appropriate driver, restart the machine, then connect the docking station via USB and set your display settings as needed.
Windows 10 Users
If you are using a device with a modern release of Windows 10, the drivers will often install automatically after a short while as long as you are connected to the wireless network on campus. If you run into issues, you can use the above link to install the drivers manually, but it is recommended that you let Windows 10 attempt the install automatically first.
For macOS High Sierra Users
Running macOS 10.13 High Sierra and the docking stations can cause some odd problems. First, you will probably only see your display on the projector or TV. If you try to mirror the display, it will crash the machine and you will need to unplug the docking station to get it working again.
You need to set the display to act independently (extended displays).
You can read more about the issue here. If you have installed macOS 10.13.4 - 10.13.6, the display will not work. You will either need to ask for assistance for help on bypassing the docking station or you will need to update to macOS 10.14 or newer.
Reinstall the Driver
In order to successfully remove the driver, you will need to follow these instructions (specific to Microsoft Windows right now):
-
Go to Programs and Features
-
Select and uninstall/remove any programs that mention DisplayLink
-
Download and run the DisplayLink Installation Cleaner (you will need to select the window that appears and hit Enter once or twice, be patient and follow the on-screen instructions)
-
Restart your machine
-
Download the latest driver and install it
You should now be able to connect the USB cable again and be able to utilize the docking station as needed.
Wireless Projectors
Martin Luther College has a small number of wireless projectors deployed around campus.
Miracast
Miracast is a standard for wireless connections from devices to displays. Windows 10 has built-in support for Miracast and the Surface Pro 4 supports the standard out-of-the-box. Please check the documentation for your device in order to find out how to connect to a Miracast display.
These current classrooms have built-in support for Miracast in the projectors:
-
Music Center 217
-
Music Center 123
-
WCC 203
-
WCC 262
-
WCC 260
-
WCC 221
Epson EasyMP Network Projection
In the following classrooms you will need to install and setup the Epson EasyMP Network Projection application in order to wireless display content:
-
Board Room (Library)
-
WCC 219
-
WCC 216
-
Basement Meeting Room (Chapel of the Christ)
If you have a need, please contact Network Services ahead of time in order to have the application installed.
Google Apps
Martin Luther College utilizes Google Apps for Education for email, calendaring, and some document sharing. All faculty, staff, and students have access to a personal account for their use. These pages contain information on using your MLC Google Apps account.
Google Apps Links
Gmail as Default
In many instances, you will need to setup your MLC Google Account as your default email account in whatever operating system you are using. However, in Chrome, another option is available by installing the Send from Gmail extension.
This extension is maintained by Google so it is safe to use.
Default Gmail in Chrome
Follow these steps to setup Gmail as the default email handler in Google Chrome.
-
Visit http://gmail.com in Google Chrome and click the protocol handler icon
 in your browser's address bar
 -
Make sure
Allowis selected and then clickDone

That's it! Now and in the future when you click on a mailto: link, it will automatically open in Gmail.
You can also view a video on how to do this on YouTube.
Getting Started
As a student, you will have access to private web pages on the MLC Portal through your personal MLC Account login. Throughout your enrollment as a student at MLC you will use the Portal to view grades and transcripts, as well as many other functions that will be necessary for you as a student.
Please treat your Portal password as a valuable resource. Do not share it with anyone, as it gives access to your private records. No one at MLC will ever ask for your password, so if you get email requests or requests by any other means for your password, do not supply it. This is a phishing attempt by someone to gain access to your account. You should NEVER supply your password to ANYONE, EVER! Legitimate entities do not request passwords.
Your MLC Account
Your MLC Account is used for many web properties at Martin Luther College including Portal and Moodle. Follow the instructions below to get logged in and setup.
Initial MLC Account Credentials
You should have received an email upon creation of your MLC Account. Follow the instructions in that email to retrieve your MLC Account username and set your password. If you run into issues or did not receive the setup email, please contact Network Services.
I Have Forgotten My Username and/or Password
If you have a current MLC Account but do not know your username and password, you will need to have access to the personal email address you supplied when you applied to Martin Luther College. With that account, you can visit https://sspr.mlc-wels.edu and use that email to retrieved your username and reset your password.
You can attempt the retrieval/reset multiple times using different email addresses.
If you continue to have issues, please contact Network Services.
Logging into your MLC Account
You will need to visit the MLC Portal at http://portal.mlc-wels.edu to login. You will need to click the Login link/button found near the upper-right portion of the page under the main navigation area. You can input your credentials on the resulting login page.
Once you have successfully logged in, you may be required to change your password. Your new password will need to have as a minimum 8 characters. You should get in the habit of creating strong passwords that include a combination of upper case, lower case, numbers, and symbols.
You will also be required to read and agree to the MLC Acceptable Use Policy the first time you log in.
If you are having troubles logging in the first time, please contact Network Services to receive help.
Your MLC G Suite Account
Initial MLC G Suite Account Credentials
Your MLC G Suite Account password is different than your MLC Account password. To retrieve your initial credentials, follow these steps:
-
Log in on the MLC Portal at http://portal.mlc-wels.edu
-
Navigate to Directory > By Person using the top navigation bar
-
Click on the
Metab to view your directory entry -
Take note of your Campus E-mail address (that will be the username for your MLC G Suite Account)
-
Click on the key to display your initial password, write it down
Your should now have your MLC G Suite Account username and password.
Logging into your MLC G Suite Account
MLC has created G Suite accounts for all students, which included Gmail accounts. Your MLC G Suite Account username is formed with your MLC Account username followed by @mlc-wels.edu, (i.e. smithjr@mlc-wels.edu). This MLC G Suite Account username will also serve as your MLC campus email address.
Note: Before you begin, it is recommended to log out of any other Gmail accounts on your computer.
To access your MLC G Suite Account (specifically Gmail), follow these instructions:
While it is possible to use a different email account for your online course work than your MLC Gmail account, it is strongly recommended that you use your MLC G Suite Account since it is a “G Suite for Education” account which allows you to make use of Google Drive (including Google Docs, Sheets, Slides, Forms, etc.) which might be needed for work in some courses. Also, some MLC instructors and administrative personnel will only contact you via your MLC email address and the default email address in your Moodle profile is automatically set to your MLC email address.
If you are insistent on using your traditional email address for your online coursework, instead of your new MLC Gmail address, then please setup your MLC Gmail account so it will automatically forward any messages sent to it on to your traditional email address. Please follow these instructions from Google to setup your forward address.
If you are having issues logging into your MLC G Suite Account, please contact Network Services for assistance.
Leaving MLC
At this time, Network Services does not have any plans to remove your MLC Google Account. This policy may change in the future, but you should continue to have access to your MLC Google Account even when you leave campus after graduation.
However, there are reasons why you might want to move your information to a personal account in the future. Below you will find some general information on how you might do that.
Moving Your Data
Forgotten Password
If you cannot retrieve your password through Google's options, you can always send a support request to MLC Network Services so that they can help you.
iTutoring
This page houses troubleshooting information for students and proctors for the iTutoring work being done on campus.
Getting Started
These are the most basic steps to getting started:
-
Find an open computer with an attached webcam.
-
The computer should be logged into the
iTutoringNovell account. -
Sign in at Google Hangouts with your MLC iTutoring Google username and password.
-
Wait for the call to come in from the student.
When You Are Done
When finished, do the following:
-
End the call.
-
Shutdown the computer.
Troubleshooting
-
Make certain you are logged in only with your MLC iTutoring Google Account.
-
Check that the video, microphone, and headphones are all working as soon as possible. This usually can take place as soon as the call has initiated from both ends.
-
Check the microphone by looking for the “green dots” over your video in Google Hangouts.
-
If you have issues, unplug and plug the microphone back in on the front of the computer.
-
Make sure that
2- High Definition Audio Deviceis chosen for the microphone within Hangouts.
-
-
Check your headphones by listening for any sounds coming from the computer.
-
If you have issues, unplug and plug the headphones back in on the front of the computer.
-
-
Check your video by looking for your video to show up within Google Hangouts.
-
You might need to disconnect and initiate the call again.
-
-
-
If you are having issues connecting to Hangouts, then open another browser and make sure that you have access to other parts of the internet.
-
You might need to initiate the call on your end (instead of the student calling you) if problems persist.
-
Sometimes stuff just doesn't work. Google is constantly making changes to Hangouts and other parts of their infrastructure so there might just be issues that can't be eliminated from time to time.
Setting Up WCC 221
-
Turn on the computers with attached webcams
-
Log into the computers using the
itutoringNovell account -
Open Google Chrome (should be found near the bottom of the screen)
-
Go to Google Plus and leave it at the log in page
The computer is now ready for the incoming student to use. It is usually most efficient to go around the room and perform each step on each computer before moving to the next. If you need help with the password for the itutoring Novell account, please contact Network Services.
Mobile Phones
Information about school-owned mobile phones will be added to this area.
Moodle
Martin Luther College uses Moodle as our learning management system. Many online and on-campus classes utilize this system on a daily basis.
Currently MLC has the current setup:
- Moodle 3.2+ running on SLES 12
- PostgreSQL 9.1+ running on SLES 11 SP4
Your MLC Accounts
When you are at MLC you have a couple of different accounts:
-
MLC Account
-
MLC G Suite Account
If this is your first time accessing these accounts, please read the MLC Accounts Getting Started Guide.
MLC Account
Your MLC Account is also sometimes called one of the following:
-
Portal Account
-
Moodle Account
-
Novell Account
-
eDirectory Account
Your MLC Account is the main account that protects much of your data and information. This password will change periodcally and you will be prompted to do so when logging into Portal, Moodle, or the Novell network on campus.
What You Can Access
Frequently Asked Questions
I have changed my name but my MLC Account username matches my former name. What can I do?
At this time our policy is not to change usernames. We can update your last name in our directory server and within Moodle, but you will need to file a support request.
Please state what your former name was, what your current name is, and the best way to let you know when the work is done.
MLC G Suite Account
Your MLC G Suite Account gives you access to all of the services offered from our G Suite for Education subscription. This includes, but is not limited to:
-
Gmail
-
Google Calendar
-
Google Sites
-
YouTube
-
Google Plus
-
Google Classroom
-
Google Groups
Your MLC G Suite Account will always end with @mlc-wels.edu and should not be confused with any other personal or professional Google accounts you might have access to. :)
Password Help
Please visit the Your Passwords article for information on how to change or recover your MLC Account and/or MLC G Suite Account passwords.
Access Your Courses in Moodle
Logging into Moodle
-
Enter your MLC Account username and password where requested on the resulting screen and then click the
Log inbutton -
If you have problems accessing Moodle, you can attempt to reset your MLC Account password, or contact Network Services for help
-
If you receive a message that your password has expired, follow the prompts to reset your password
Once you are able to login, your Moodle home page should appear and your courses should appear below in a My courses block. If this block is missing, or some courses are missing, most likely the course instructor has not yet made that course visible to students. If you have specific questions, please contact Prof. Rachel Feld. Click on the course you wish to enter and it should appear.
Configuring the Moodle Mobile App
Moodle offers a downloadable mobile app for many platforms. You can find links on the Moodle Mobile site.
After you have the app installed, you'll need one important piece of information:
-
Site address: https://moodle.mlc-wels.edu/moodle
After the app confirms that you are connecting to a Moodle site (hence the need for the /moodle at the end) the you'll be prompted or your MLC Account username and password. After that you should have access to the MLC Moodle instance via the mobile application.
WARNING: Not all features of Moodle are available through the mobile app.
Your Passwords
At MLC you have two primary accounts to keep track of: your MLC Account and your MLC G Suite Account. This page will outline some information on passwords for those two accounts.
MLC Account
We have recently rolled-out the ability for students, faculty, and staff to request a password reset without the need to contact Network Services directly. Here is how you can do it:
Change Your Password
-
visit the MLC Self Service Password Reset site
-
enter your current MLC Account username and password
-
click
Login -
on the next page, click on
Change Password -
follow the instructions to create your new password and then click
Change Passwordnear the bottom of the page -
wait for the system to complete the password change and then you are ready to go
Reset Forgotten Password
-
visit the MLC Self Service Password Reset site
-
click on
Forgotten Password -
enter your personal email address and click
Search -
an email will be sent to your personal email address (usually the email address you supplied to us when you applied)
-
check your personal email address and either click on the link in the email or copy-and-paste the resulting code into the text field on the forgotten password site and click
Check Code -
follow the instructions to create your new password and then click
Change Passwordnear the bottom of the page -
wait for the system to complete the password change and then you are ready to go
Find My Username
Because you need your MLC Username in order to reset a forgotten password, we have also supplied the ability to find out your MLC username as well.
-
visit the MLC Self Service Password Reset site
-
click on
Forgotten Username -
enter your personal email address and click
Search -
the resulting page will give you your MLC username and an email will also be sent to your personal email address
As a tip, if it is not finding your username, attempt to enter your maiden name if you have married since you last attended Martin Luther College.
Updating Recovery Email and/or Last Name
If you need to update information about yourself including your personal email address and/or your name, please submit an update to your personal by the Information Verification page on Portal. Once your request has been approved, your changes will make their way to the appropriate system.
Your personal email address is used for account information retrieval, so supplying us with an email address you will maintain access to regardless of where you are currently living or serving. Also, if possible, avoid using Yahoo or AOL accounts as they seem to have the most trouble consistently receiving emails from third party systems like our own.
Periodically Changing Your Password
Every 6 months you will be prompted to change your password. Please do so or you could be locked out of your account and need to request a password reset (following the instructions above) in order to gain access to your account again.
MLC G Suite Account
MLC offers each member of the campus family a G Suite for Education account to have and use. These accounts are provided by Google and currently have their own password functionality attached to them separate from your MLC Account.
If you have issues accessing your account, please use Google's own recovery site to attempt to recover your username and/or password. You can also find more documentation on Google's support site under the article titled Change or reset your Google Account password.
You will not be prompted to change your password unless we have reason to believe that your account has been compromised.
If you are still having issues, please file a support request with Network Services.
Printing
Students, Faculty, and Staff all have access to print services around campus. We utilize Novell iPrint and PaperCut to handle the print and print accounting services respectively. You can find our local installations below:
- MLC PaperCut Server: http://papercut.mlc-wels.edu
Printing is available in all computer labs on campus.
Print Credit
MLC uses PaperCut to handle the print credit and print resource reporting.
Logging Into Your PaperCut Account
-
Visit http://papercut.mlc-wels.edu from an MLC-managed computer (office computer, wired faculty laptop, computer lab desktop)
-
On the resulting page, login with your MLC
usernameandpassword -
You are now logged in

What You Can Do
From this site you can do the following things:
-
Check your current print credit amount
-
See how many total print jobs and pages your account has printed
-
Check your resent transactions and print jobs
-
See if you have any jobs pending release
-
Find a link to submit a support request
-
Log out
Adding Print Credit
Please stop in at Network Services during our open hours to have someone add print credit to your account. We currently accept the following payment types for print credit:
-
Cash
-
Check
Troubleshooting
-
If you cannot log in, or have forgotten your password, please file a support request
-
If your jobs are not printing, it is possible that you are out of print credit
-
See above for how to add print credit to your account
-
Printing Overview
The purpose of this page is to give a “10,000 foot” overview of how printing works on campus. This is mainly for informational purposes.
What Happens to Your Print Job
-
Your computer submits a job to iPrint with the name of the printer you want to print to, your computer or Novell username
-
iPrint submits the job to PaperCut for approval based on the username attached and the print job type (color, duplex, etc.)
-
The print job is now being held by iPrint until it hears back from PaperCut
-
-
PaperCut now checks the print job
-
It checks if the username is in the system, how much the print job “costs”, and if the person has the needed print credit available to complete the job
-
If PaperCut fails a check, it will cancel the job on iPrint and nothing will print
-
-
If iPrint gets the “all clear” from PaperCut, then the print job is released to the printer you chose and is printed
Print Troubleshooting
Here are some simple things to check if printing is not working as you would expect or hope.
-
Are you printing to the printer you expect? Some machines have more than one printer installed. Check to make sure that the proper printer is selected from the print dialog and that you know where that printer is located.
-
Can PaperCut know who you are? PaperCut will get sent your computer's username or your Novell username depending on whether you are logged into the Novell Client or not. If PaperCut is receiving the wrong username for any reason, then the print job can fail.
-
Do you have enough print credit to print the current job? Greyscale pages are $0.05/page and color pages are $0.25/page. You need to have that print credit available before you send the print job for it to be successful. It will not print a partial job.
-
Something else maybe? Have no clue what is going on? File a support request with Network Services and describe what happened as clearly and completely as you can so that we can take a look into it.
Portal
The MLC Portal acts as the Student Information System for Martin Luther College. Network Services developers and maintains Portal to serve the needs of many different constituencies on campus. If you have any questions or feature requests, please contact Network Services so that they can start that process.
Below you will find many help articles about using Portal.
Logging Into Portal
To log into the MLC Portal, go to http://portal.mlc-wels.edu and input your login credentials in the upper left area of the page. Your initial login credentials are as follows:
-
Username: First 6 letters of your last name followed by your first initial and then middle initial (all lowercase). For example, John H. Johnson's username would be johnsojh.
-
Password: First 4 letters of your last name with the first letter capitalized followed by the last 4 digits of your Social Security Number. For example, if John H. Johnson's SSN was 111-111-1111, his initial password would be John1111.
Remember, these login credentials are only for your initial login the first time you use your MLC Account. After that, you will be required to change your password periodically. You can always view our current password policy to see what the password requirements are on campus.
You will also be required to read and agree to the MLC Acceptable Use Policy on at least the first occasion you login.
Still Having Trouble?
If you are still having issues, you can always contact Network Services for help.
Finding Your Initial Google Apps Password
Here are the steps to find your initial Google Apps password:
-
login at http://portal.mlc-wels.edu
-
navigate to
Directory > By Personin the left sidebar or top dropdown menus -
select the
Metab on the resulting screen (theMetab will only show up if you are logged in) -
click Retrieve Password next to your campus email address and your initial password will be displayed
You will need to change your password the first time you log into your MLC Google Apps account. This initial password is only useful the first time you log into your MLC Google Apps account.
Website Documentation
General Information
Website Style Guide
The following documents comprise the MLC Web Style Guide for writers. Basically, MLC uses the Northwestern Publishing House Style Guide and Dictionary with additions specific to MLC.
The recommended way to use these guides is this way:
-
look to the MLC House Style Guide
-
look to the Northwestern Publishing House Dictionary for quick-look items
-
look to the Northwestern Publishing House Style Guide for additional items
-
use your judgement/look at other parts of the website/ask the MLC editor
MLC Specific Files
-
MLC House Style Guide (updated 2017-11-17)
Northwestern Publishing House Style Guide
-
NPH Style Guide (2014)
-
NPH Dictionary (2014)
Subsites
Subsites are the individual areas of the website that web editors have control over. The easiest way to think of a subsite is that it is a small, autonomous website that lives on top of the create WordPress installation. Most often, a subsite will be specific to one part of the college's work.
So http://mlc-wels.edu/library will be a subsite. So is http://mlc-wels.edu/network-serivces or http://mlc-wels.edu/graduate-studies. Someone who has editing privileges for the Library subsite does not necessarily have privileges for the Graduate Studies subsite.
They help us logically separate areas of the website along with providing a framework for permissions.
Styling
When creating your subsite, start with the least amount of design and then work forward. This means start with:
-
text
-
images
WordPress is really great at those two things. From there, work on the text and images you are using. After that is complete, continue to work on the text. When you are finally really REALLY happy with your text, have someone else take a look at it. When that is all said and done, it might be time to look at adding some visually-interesting widgets or color.
Remember, less is almost always more. Doing the least amount of work is preferable than starting with too much. Look for ways to clearly communicate using text and images first and only after that has failed (or you are EXTREMELY happy with what you have) is it time to look into what you might be able to do with the Advanced Editor.
Subsite Standard Layout
For most other pages within a subsite (besides the initial landing page), you must follow the standard layout.
The Standard Layout
The standard layout is made up of the following:
-
Page title above the content (pulled from the name of the page within WordPress)
-
Content area below the page title (on the left-hand side)
-
Navigation area for the subsite at the top of the right-hand column
-
Contact Us and Directory will be the final two links in your sub-navigation menu (if applicable)
-
No full-width widgets from the Advanced Editor
Subsite Navigation
Along with that, the navigation will be handled in the following way:
-
Name of the subsite will be on the top of the navigation (e.g.
Libraryfor the Library's subsite) -
Navigation items can be no more than three deep (otherwise it starts to look very messy)
-
You can choose to have the navigation created automatically or to create custom menus (recommendation is for custom menus)
-
The first link in the navigation will be
Homeand will link back to the landing page for the subsite -
The last two links will be
Directoryand/orContact Us(if appropriate)
A Directory and Contact Us link will only be provided if it is meaningful for the area of the website. Contact Us is meant mainly for contact information specific to a department/office and not to individuals within that office.
Customization Opportunities
Besides having complete control over the content within your subsite, you can also add widgets below the mandated navigation for the subsite.
Subsite Landing Pages
As a web editor you have the ability to create a landing page for each subsite. A landing page is nothing more than a page with a simplified styling using widgets to create a unique layout for that specific subsite. Here are some guidelines for creating your landing page.
Creating A Landing Page
-
Create a new Page (name it something that you will remember)
-
Go into the Enfold Theme settings
-
Choose your newly created page under
Frontpage Settings(and clickSave All Settings) -
Edit the page you created at the start
-
Change
Sidebar SettingstoNo Sidebar -
Change
Title Bar SettingstoHide both -
Save your page
Now you are free to use the Advanced Layout Editor to setup your landing page the way you like.
Items Each Landing Page Needs
Everything else is up to you but you will need a title and some sort of navigation so that visitors are able to get to the information they need. There are a number of options for navigation, so you are free to play around with those. Remember, pages in your subsite besides the landing page will be required to follow the standard layout.
Helpful Hints
Setting Up A New Subsite
This includes naming conventions, setting up ACLs, applying theme, and setting up menus.
Creating a New Subsite
-
tagline needs to be
Martin Luther College
Applying the Theme
-
log into the subsite dashboard
-
go to
Appearance > Themesand activate the MLC Theme theme -
click on
Customizeor selectMLC Themefrom the sidebar (if you are not taken there already) -
click on
Import/Exportwithin the MLC Theme Theme Options page -
click on
Upload Theme Settings File -
upload mlc_theme-settings-2016-2-12-v1.txt and click on
Insert Settings File -
click on
Theme Optionsand then choose the correct frontpage withinFrontpage Settings -
click the
Save all changesbutton -
check the site to see if the theme was successfully applied
After that is complete, note any issues with the styling that will need to be taken care of.
Importing Menus
Importing Menus
-
go to
Appearance > Menus -
delete any menus titled
Action Links,Main Menu,Tools, and/orResources -
select
Tools > Import, then click onWordPress
Main Menu
-
set
About,Academics,Admissions,Arts, Athletics, andDonateas Mega Menu (check Use as Mega Menu box) -
check This column should start a new row for
About > About,Academics > Academics,Admissions > Admissions,Arts > Arts, andDonate > MLC Day -
enable as MLC Theme Main Menu at bottom
-
click
Save Menu
Action Links
-
select
Action Linksmenu fromAppearance > Menus -
select MLC Theme Secondary Menu near bottom in Theme locations
-
click
Save Menu
Socket Menu
Setting Up the Footer
Footer - column 1
Text - No Title
<div class="noLightbox textaligncenter nomobile">
<a href="http://mlc-wels.edu">
<img src="https://mlc-wels.edu/wp-content/themes/mlc/images/mlc-logo-white.png" alt="Martin Luther College Seal" width="302" height="177" />
</a><br /><br /><br /><br />

<a href="http://wels.net/" target="_blank">
<img src="https://mlc-wels.edu/wp-content/themes/mlc/images/wels-logo.png" alt="WELS: Christ's Love, Our Calling" width="150" height="51" />
</a></div>
Footer - column 2
Custom Menu - Resources
Make sure you give it the title of Resources.
Footer - column 3
Custom Menu - Tools
Make sure you give it the title of Tools.
Footer - column 4
Text - Connect
-
check Automatically add paragraphs
<strong>Martin Luther College</strong>
1995 Luther Court
New Ulm, MN 56073
1 (507) 354-8221

<strong>Need Help?</strong> <a href="https://mlc-wels.edu/contact" title="Click here to request information">Request Information</a>

[av_font_icon icon='ue8f4' font='entypo-fontello' style='' caption='' link='manually,https://www.facebook.com/mlcwels' linktarget='_blank' size='50px' position='left' color='#e1e1e1'][/av_font_icon] [av_font_icon icon='ue8f2' font='entypo-fontello' style='' caption='' link='manually,http://twitter.com/connect2mlc' linktarget='_blank' size='50px' position='left' color='#e1e1e1'][/av_font_icon] [av_font_icon icon='ue8f0' font='entypo-fontello' style='' caption='' link='manually,http://vimeopro.com/martinluthercollege/promotional-videos' linktarget='_blank' size='50px' position='left' color='#e1e1e1'][/av_font_icon] [av_font_icon icon='ue909' font='entypo-fontello' style='' caption='' link='manually,http://instagram.com/martinluthercollege' linktarget='_blank' size='50px' position='left' color='#e1e1e1'][/av_font_icon]
Text - no title
<a href="https://mlc-wels.edu/streams" class="noLightbox">
<img src="https://mlc-wels.edu/wp-content/themes/mlc/images/mlc-tv.jpg" alt="MLC TV Streaming Video" class="border" />
</a>
"Little Things"
Setting Changes
General
-
go to
Settings > General -
change
Taglineto Martin Luther College -
change
Timezoneto Chicago -
change
Week Starts Onto Sunday -
click
Save Changes
Discussion
-
go to
Settings > Discussion -
uncheck Allow link notifications from other blogs (pingbacks and trackbacks) on new articles and Allow people to post comments on new articles in
Default article settings -
select Gravatar Logo as
Default Avatar -
click
Save Changes
Post-Launch Tweaks
Website 2016.1
New Enfold Styles
There will be a new style file to upload to each subsite and enable with some style tweaks to make everything a little more readable. This will include removing the strong styling from the quick CSS because it has been moved to the overall CSS file for the entire site.
Please make certain to set the following:
-
Frontpage Settings
-
And where do you want to display the Blog?
Take note of what they were set to before you apply the styling.
-
log into the subsite dashboard
-
click on
Customizeor selectMLC Themefrom the sidebar (if you are not taken there already) -
click on
Import/Exportwithin the MLC Theme Theme Options page -
click on
Upload Theme Settings File -
upload mlc_theme-settings-2016-2-12-v1.txt and click on
Insert Settings File -
click on
Theme Optionsand then choose the correct homepage withinFrontpage Settingsand blog/news page withinAnd where do you want to display the Blog? -
click the
Save all changesbutton -
check the site to see if the theme was successfully applied
Footer Changes
-
remove “beta.” from the link in the footer widgets (column 1) for the MLC logo
-
remove “beta.” from the link in the footer widgets (column 4) for MLC Streams
-
change link for
Calendarin Tools menu to https://mlc-wels.edu/master-calendar -
add
Feedbacklink in foot socket menu (very bottom-right) -
remove
Directionsand addPrint Servicesto Resources menu (column 2)
Main Menu Changes
Will be uploading a new main menu structure, there are many changes to make.
-
add “Home ” before each of the repeated headings in each menu (except
AthleticsandDonate)
Directory Subsite
Pictures
-
Should be a headshot of only the individual
-
The head of the individual should be centered (as much as possible)
-
Image size should be (in pixels)
255×300or510×600to match the rest of the images -
All images should be saved as JPEGs (*.jpg or *.jpeg)
Working with Documents
Working with WordPress and document files (think PDFs, Word documents, etc.) can be little disconcerting. You will find some simple instructions on this page to keep in mind when you want to load files for users to download.
What Format
Basically, it comes down to this:
-
Can the information be easily put into a webpage? If so, make it a webpage.
-
If it is a document that is not meant to be changed by the user, then use PDF.
-
If it is a document that is meant to be changed by the user, then use a Word document or appropriate editable format.
Those are simplistic terms, but you get the idea. Start by deciding if it could be a webpage, then if it should, and if it falls through … then choose your document format.
Where Does It Live?
In Plone it was easy to link directly to a document and just replace it in the future, preserving the URL so that anyone can have access to the latest document in the future just by virtue of changing the underlying file. However, WordPress does not have an easy or preferred way to do this, so a person needs to think about where the document needs to live and how it will be presented.
Documents should be linked to from a page that contains information about the document (context around why it is important, what a person can do with it, etc.), and then anytime someone needs to link to a specific document, they should be linking to that page with the context.
Example
You want to link to the Single Major Early Childhood Education program plan. It might be tempting to link to the PDF directly, but the next time that program plan changes and a new one is uploaded, that link will be bad and your user will get a 404 error message.
The better option is to use some verbiage similar to “You can find the single major Early Childhood Education program plan on the Program Plans page” and link the words “Program Plans page” directly to the Program Plans page. That way when a new program plan is uploaded, that link will still be accurate.
Uploading Documents
There are two options for uploading media (the end result is the same):
-
Through the WordPress Media Library (found under
Mediaon the sidebar of your dashboard). -
Through the
Add Mediabutton within the editing interface.
In each case, the object is to upload the file(s) you want to use and then link them within a page or post.
Upload Using Media Library
-
Log into the dashboard of your WordPress subsite
-
Click on
Mediaon the sidebar -
Click
Add Newon the resulting page -
Drag-and-drop files into the area where indicated or click
Select Filesand find the documents you want to upload
Now your files are uploaded into the Media Library of your WordPress subsite.
Upload Using Editing Interface
-
Log into the dashboard of your WordPress subsite
-
Edit a page or post (either an existing page/post or a new one)
-
Click the
Add Mediabutton on the editing toolbar -
Select the
Upload Filestab on the resulting popup -
Drap-and-drop files into the area where indicated or click
Select Filesand find the documents you want to upload
Now your files are uploaded into the Media Library of your WordPress subsite.
Inserting Documents
Now that the files are uploaded, here are the basic steps to inserting links to documents within a page or post.
-
Edit a page or post (either an existing page/post or a new one)
-
Click the
Add Mediabutton on the editing toolbar -
From the
Media Librarytab, choose the document you want to link to (which should already be uploaded, for follow steps above) -
When the item is selected, give it a
Title(which will end up being the words that are linked in the end) -
Click
Insert Into Pageto have it added to the page/post you were working on -
Do it over again for each of the other documents
That's it! Now when you publish your page/post, you will find that there is link and that clicking it will open/download your document.
Potential Problems
-
The
Titleattribute of a document is important because it directly controls what words will be linked within the page/post you are working on. Always check to make sure the title is meaningful and will help the user understand what they are clicking. -
Every time you upload a document, it is stored in a folder that is tied to the date it is uploaded. There is no way to overwrite a file, you will need to upload a new file and link to that instead. You can always go through the
Media Libraryand delete old files that are no longer useful.
Linking to Other Subsites
A current list of subsites for the campus website are available in two different areas:
Adding Events to the Homepage
This documentation will help you add events to the feed on the homepage and the calendar of events found at http://mlc-wels.edu/calendar as well.

-
Log into WordPress dashboard for the homepage
-
Click on
Eventson the sidebar -
You can click on
Add Newto create a new event or edit exiting events similar to posts or pages -
Add any information you would like to the resulting event listing
From the Events section of the dashboard your can also add information about different Venues, Organizers, and Event Categories that are used often.
Website Style Guide
The following documents comprise the MLC Web Style Guide for writers. Basically, MLC uses the Northwestern Publishing House Style Guide and Dictionary with additions specific to MLC.
The recommended way to use these guides is this way:
-
look to the MLC House Style Guide
-
look to the Northwestern Publishing House Dictionary for quick-look items
-
look to the Northwestern Publishing House Style Guide for additional items
-
use your judgement/look at other parts of the website/ask the MLC editor
MLC Specific Files
-
MLC House Style Guide (updated 2017-11-17)
Northwestern Publishing House Style Guide
-
NPH Style Guide (2014)
-
NPH Dictionary (2014)
Wireless on Campus
Wireless on Campus
Martin Luther College maintains three wireless networks throughout the main campus and the Early Childhood Learning Center:
Click the above links for more information. Here is a brief overview of the three wireless networks so that you know which to look for.
MLC Guest WLAN
The MLC Guest WLAN is the wireless network found throughout campus for those who are not currently a student, faculty member, or staff member at Martin Luther College. It does require the acceptance of terms and conditions for use along with a passcode. If you have need of the passcode, please contact Network Services or ask faculty or staff member.
MLC Academic WLAN
The MLC Academic WLAN is meant for use by faculty and staff at Martin Luther College and requires that person's MLC Account credentials along with a registered device. If you think you need to have access to this network, please contact Network Services.
MLC Student WLAN
The MLC Student WLAN is meant for use by current students at Martin Luther College and requires a registered device (see the informational page specific to the MLC Student WLAN for instructions) and a current MLC Account username and password. If you are having issues connecting to this network, please contact Network Services.
MLC Guest WLAN
The MLC Guest WLAN is the main wireless network on campus for guests on campus. It is an open network that requires users to register via a captive portal before users are able to access the Internet. The MLC Guest WLAN has access to a limited number of campus-specific web properties, so internal users should instead log into the MLC Academic WLAN or MLC Student WLAN.
Who Can Connect
This is open to guests, faculty, staff, and students to connect to and use at any time. You do not need to have your device registered in the past, or have a campus-owned device either.
Guests will need to have a passcode (which can change periodically). Please contact the front desk or talk with another member of the campus for the current passcode. They will need to log into the MLC Portal and then visit Portal > Information > Network Guest Codes to retrieved the current passcode.
How To Connect
Any computing device with a web browser and a wireless network adapter are able to connect to the MLC Guest WLAN wireless network. The following instructions will help you get started.
-
Connect To the MLC Guest WLAN with your computing device and open a web browser.
-
Read the Acceptable Use Policy, scroll to the bottom of the screen and click on the “I agree” button to proceed.
-
Choose who you are.
-
Guest: Please enter your full name and the passcode you received from someone on the faculty or staff of Martin Luther College.
-
MLC User: Please enter your MLC Account username and password.
-
You now have access to the internet for a 24 hour period as a guest or 7 days as an MLC user.
If, at any point, you have any issues. Please stop by Network Services on the second floor of the Wittenberg Collegiate Center.
Problems
I do not know the passcode needed as a guest.
Guests will need to have a passcode (which can change periodically). Please contact the front desk or talk with another member of the campus for the current passcode. They will need to log into the MLC Portal and then visit Portal > Information > Network Guest Codes to retrieved the current passcode.
I cannot get the captive portal page to come up.
Often this is an issue when the device's DNS settings are not being set automatically by our internal systems. This can happen if you (or your network admin at your school or work) have set the DNS servers manually, or there is an issue with your device.
Either reset your DNS settings or contact Network Services.
MLC Academic WLAN
Who Can Connect
In order to connect to the MLC Academic WLAN, you need two things:
-
a current MLC Account with authorization to connect
-
a device that is registered on the MLC Academic Network
This allows Network Services to restrict who can attach to the network and which of their devices. If you have the need to be able to connect to the MLC Academic WLAN, please stop in and talk with Network Services.
How To Connect
Connecting should be as easy as selecting the network, entering your MLC Account username and password when prompted, and accepting the certificate offered by the RADIUS server on campus. What order those things happen in is dependent on your computer, but all of those things will need to happen.
Problems
What happens when I change my MLC Account password?
When you change your MLC Account password, your Windows 10 machine will not prompt you to change your password that you use to connect to the MLC Academic WLAN. This causes your computer to not successfully connect to the network. Here are the steps to fix that (and we are working on a more permanent fix).
-
click on the wireless network icon in the lower-right of the screen
-
select
Network setting -
choose
Manage known networks -
choose
MLC Academic WLAN -
click
Forget
After that, you can connect to the MLC Academic WLAN as before.
I am using a Chromebook, Chrome OS, a Linux distribution, or some other operating system!
You are going to have to do more manual setup to get things working. Here are some settings you can look for!
-
EAP method: PEAP
-
EAP Phase 2 authentication: Automatic or MSCHAPv2
-
Server CA certificate: Do not check/validate
Then use your MLC Account username and password from there.
MLC Student WLAN
Who Can Connect
The MLC Student WLAN is meant for use by currently-enrolled students at Martin Luther College with a currently-active MLC Account.
How To Connect
To successfully connect to the MLC Student WLAN, you will first need to connect and register on the MLC Guest WLAN. You will also want to wait a couple of minutes before attempting to connect to the MLC Student WLAN
After you have successfully registered your machine above, then do the following:
-
On your device, choose the MLC Student WLAN from the list of available wireless networks.
-
You should be prompted for some account credentials, use your MLC Account credentials to log into the network.
-
Wait to be connected!
That is, often, as simple as it needs to be. These instructions have been tested on Windows 7, Windows 10, Apple macOS El Capitan, and iOS 9. Future versions of those operating systems will also be verified.
Problems
I just changed my MLC Account password and cannot connect!
Some operating systems (Windows 10 has been known to have issues) will not prompt you to change the saved password when connecting after you have changed your password. You will need to remove that saved account and reconnect. Here are some simple instructions:
-
click on the wireless network icon in the lower-right of the screen
-
select
Network settings -
choose
Manage Wi-Fi settings -
scroll to the bottom of the page that pops up select
MLC Student WLAN -
click
Forget
Then follow the connection instructions above.
I am using a Chromebook, Chrome OS, Android, a Linux distribution, or some other operating system!
You are going to have to do more manual setup to get things working. Here are some settings you can look for!
-
EAP method: PEAP/Protected EAP
-
EAP Phase 2 authentication: Automatic or MSCHAPv2
-
Server CA certificate: Do not check/Do not validate/No CA certificate is required or leave as Default
-
Identity: your MLC Account username
-
Password: your MLC Account password
-
Anonymous Identity: leave blank
Then use your MLC Account username and password from there.
There are often other words used depending on the specific operating system you are using. Feel free to contact Network Services if you have questions. Also, some devices do not support WPA2 Enterprise authentication methods, so check with your manufacturer.
I just cannot seem to connect.
There are a number of reasons that this might happen, so often the best option is to contact MLC Network Services so that they can look into any account issues you might be having.
Also, make certain to register on the MLC Guest WLAN before attempting to connect to the MLC Student WLAN.
Environmental Services
Environmental Services is responsible for facility and grounds maintenance and safety.
Work Orders
Please visit https://help.mlc-wels.edu/books/environmental-services/page/work-orders for up-to-date information.
Network Services
Windows 10 Upgrade Information
On July 29, 2015 Microsoft released the latest version of their main desktop operating system, Windows 10. This upgrade is being presented to customers as a free upgrade for Windows 7, 8, and 8.1 users. However, at this time, it is NOT recommended to accept this upgrade for school-owned computers.
Current Issues
Here are the lists of current issues we know of in regards to Windows 10 and services offered by MLC Network Services:
-
Novell Client 2 SP4 for Windows (IR1) has been released and is the first version compatible with Windows 10.
Our current Novell network requires you to uninstall the current Novell Client and install the latest version (AT LEAST Novell Client 2 SP4). Even after doing this, you will see a red X on top of each mapped drive. Novell is aware of this issue and will release a fix as soon as they can. -
Novell Client 2 SP4 for Windows (IR1) has been released and is the first version compatible with Windows 10.
If you computer falls asleep, sometimes it will not allow you back into your user account (it will just sit there and spin with the new, pretty cursor). -
Newest iPrint update fixes this issue as of 2015-10-01!
Our printing service is not currently compatible with Windows 10. You will need an updated version of the iPrint Client before you can print using Windows 10. -
We are investigating issues with our currently-offered antimalware/antispyware package from Microsoft.
-
We do not know what incompatibilities there might be wth Smart Notebook or other corresponding software.
We are planning on migrating to Windows 10 as soon as we have our heads around the issues listed above (along with some more that are specific to deployment and management).
If you have upgraded to Windows 10 and are having issues, please contact our office so that we can try and help you as soon as possible.
Workarounds
2018 WELS MN District Convention Tech Information
These instructions will help you use the technology services available on campus during the 2018 WELS Minnesota District Convention being held at Martin Luther College in New Ulm, MN from June 12-14, 2018.
Guest Wireless Access
Guest wireless access is available in all public areas, including the gymnasium, classroom buildings, and dorm lobbies (but not dorm rooms even though we are working on this deployment right now). To connect, you will want to follow these steps:
-
Choose the
MLC Guest WLANas the wireless network for your device. -
Open a web browser (if your device has not already) and attempt to navigate to a site.
-
You should be taken to MLC's registration server (lovingly called Reggie). Scroll to the bottom and accept the acceptable use policy.
-
Choose Guest User and use
sprinter(all lowercase) as the passcode when prompted. Please also include your full name where prompted. Continue forward.
You should now have access to the MLC Guest WLAN for the next 24 hours. If you have an active MLC Account, please use that login option instead to received 7 days of access.
Guest Network Access in Dorms
For those staying in the dorms, you can also have guest network access while on campus. Follow these steps to register your device while plugged into one of the wired Ethernet jacks in your dorm room:
-
Connect your device to one of the wired Ethernet jacks provided in your room. You might need to hunt for it, and you will need a Ethernet cable (which can be purchased from Walmart if you do not have one).
-
Open a web browser (if your device has not already) and attempt to navigate to a site.
-
You should be taken to MLC's registration server (lovingly called Reggie). Scroll to the bottom and accept the acceptable use policy.
-
Choose Guest User and use
sprinter(all lowercase) as the passcode when prompted. Please also include your full name where prompted. Continue forward.
You will need to be patient as the network switches might need to switch you to the proper network in order to do this. If you are having some issues, please restart your machine and attempt to register again.
Contact Network Services
If you are having issues, please contact MLC Network Services at (507) 233-9100, visit us on the 2nd floor of the WCC, or email us at support@mlc-wels.edu.
Getting Started
As a student, you will have access to private web pages on the MLC Portal through your personal MLC Account login. Throughout your enrollment as a student at MLC you will use the Portal to view grades and transcripts, as well as many other functions that will be necessary for you as a student.
Please treat your Portal password as a valuable resource. Do not share it with anyone, as it gives access to your private records. No one at MLC will ever ask for your password, so if you get email requests or requests by any other means for your password, do not supply it. This is a phishing attempt by someone to gain access to your account. You should NEVER supply your password to ANYONE, EVER! Legitimate entities do not request passwords.
Your MLC Account
Your MLC Account is used for many web properties at Martin Luther College including Portal and Moodle. Follow the instructions below to get logged in and setup.
Initial MLC Account Credentials
You should have received an email upon creation of your MLC Account. Follow the instructions in that email to retrieve your MLC Account username and set your password. If you run into issues or did not receive the setup email, please contact Network Services.
I Have Forgotten My Username and/or Password
If you have a current MLC Account but do not know your username and password, you will need to have access to the personal email address you supplied when you applied to Martin Luther College. With that account, you can visit https://sspr.mlc-wels.edu and use that email to retrieved your username and reset your password.
You can attempt the retrieval/reset multiple times using different email addresses.
If you continue to have issues, please contact Network Services.
Logging into your MLC Account
You will need to visit the MLC Portal at http://portal.mlc-wels.edu to login. You will need to click the Login link/button found near the upper-right portion of the page under the main navigation area. You can input your credentials on the resulting login page.
Once you have successfully logged in, you may be required to change your password. Your new password will need to have as a minimum 8 characters. You should get in the habit of creating strong passwords that include a combination of upper case, lower case, numbers, and symbols.
You will also be required to read and agree to the MLC Acceptable Use Policy the first time you log in.
If you are having troubles logging in the first time, please contact Network Services to receive help.
Your MLC G Suite Account
Initial MLC G Suite Account Credentials
Your MLC G Suite Account password is different than your MLC Account password. To retrieve your initial credentials, follow these steps:
-
Log in on the MLC Portal at http://portal.mlc-wels.edu
-
Navigate to Directory > By Person using the top navigation bar
-
Click on the
Metab to view your directory entry -
Take note of your Campus E-mail address (that will be the username for your MLC G Suite Account)
-
Click on the key to display your initial password, write it down
Your should now have your MLC G Suite Account username and password.
Logging into your MLC G Suite Account
MLC has created G Suite accounts for all students, which included Gmail accounts. Your MLC G Suite Account username is formed with your MLC Account username followed by @mlc-wels.edu, (i.e. smithjr@mlc-wels.edu). This MLC G Suite Account username will also serve as your MLC campus email address.
Note: Before you begin, it is recommended to log out of any other Gmail accounts on your computer.
To access your MLC G Suite Account (specifically Gmail), follow these instructions:
While it is possible to use a different email account for your online course work than your MLC Gmail account, it is strongly recommended that you use your MLC G Suite Account since it is a “G Suite for Education” account which allows you to make use of Google Drive (including Google Docs, Sheets, Slides, Forms, etc.) which might be needed for work in some courses. Also, some MLC instructors and administrative personnel will only contact you via your MLC email address and the default email address in your Moodle profile is automatically set to your MLC email address.
If you are insistent on using your traditional email address for your online coursework, instead of your new MLC Gmail address, then please setup your MLC Gmail account so it will automatically forward any messages sent to it on to your traditional email address. Please follow these instructions from Google to setup your forward address.
If you are having issues logging into your MLC G Suite Account, please contact Network Services for assistance.
Your MLC Accounts
When you are at MLC you have a couple of different accounts:
-
MLC Account
-
MLC G Suite Account
If this is your first time accessing these accounts, please read the MLC Accounts Getting Started Guide.
MLC Account
Your MLC Account is also sometimes called one of the following:
-
Portal Account
-
Moodle Account
-
Novell Account
-
eDirectory Account
Your MLC Account is the main account that protects much of your data and information. This password will change periodcally and you will be prompted to do so when logging into Portal, Moodle, or the Novell network on campus.
What You Can Access
Frequently Asked Questions
I have changed my name but my MLC Account username matches my former name. What can I do?
At this time our policy is not to change usernames. We can update your last name in our directory server and within Moodle, but you will need to file a support request.
Please state what your former name was, what your current name is, and the best way to let you know when the work is done.
MLC G Suite Account
Your MLC G Suite Account gives you access to all of the services offered from our G Suite for Education subscription. This includes, but is not limited to:
-
Gmail
-
Google Calendar
-
Google Sites
-
YouTube
-
Google Plus
-
Google Classroom
-
Google Groups
Your MLC G Suite Account will always end with @mlc-wels.edu and should not be confused with any other personal or professional Google accounts you might have access to. :)
Password Help
Please visit the Your Passwords article for information on how to change or recover your MLC Account and/or MLC G Suite Account passwords.
Your Passwords
At MLC you have two primary accounts to keep track of: your MLC Account and your MLC G Suite Account. This page will outline some information on passwords for those two accounts.
MLC Account
We have recently rolled-out the ability for students, faculty, and staff to request a password reset without the need to contact Network Services directly. Here is how you can do it:
Change Your Password
-
visit the MLC Self Service Password Reset site
-
enter your current MLC Account username and password
-
click
Login -
on the next page, click on
Change Password -
follow the instructions to create your new password and then click
Change Passwordnear the bottom of the page -
wait for the system to complete the password change and then you are ready to go
Reset Forgotten Password
-
visit the MLC Self Service Password Reset site
-
click on
Forgotten Password -
enter your personal email address and click
Search -
an email will be sent to your personal email address (usually the email address you supplied to us when you applied)
-
check your personal email address and either click on the link in the email or copy-and-paste the resulting code into the text field on the forgotten password site and click
Check Code -
follow the instructions to create your new password and then click
Change Passwordnear the bottom of the page -
wait for the system to complete the password change and then you are ready to go
Find My Username
Because you need your MLC Username in order to reset a forgotten password, we have also supplied the ability to find out your MLC username as well.
-
visit the MLC Self Service Password Reset site
-
click on
Forgotten Username -
enter your personal email address and click
Search -
the resulting page will give you your MLC username and an email will also be sent to your personal email address
As a tip, if it is not finding your username, attempt to enter your maiden name if you have married since you last attended Martin Luther College.
Updating Recovery Email and/or Last Name
If you need to update information about yourself including your personal email address and/or your name, please submit an update to your personal by the Information Verification page on Portal. Once your request has been approved, your changes will make their way to the appropriate system.
Your personal email address is used for account information retrieval, so supplying us with an email address you will maintain access to regardless of where you are currently living or serving. Also, if possible, avoid using Yahoo or AOL accounts as they seem to have the most trouble consistently receiving emails from third party systems like our own.
Periodically Changing Your Password
Every 6 months you will be prompted to change your password. Please do so or you could be locked out of your account and need to request a password reset (following the instructions above) in order to gain access to your account again.
MLC G Suite Account
MLC offers each member of the campus family a G Suite for Education account to have and use. These accounts are provided by Google and currently have their own password functionality attached to them separate from your MLC Account.
If you have issues accessing your account, please use Google's own recovery site to attempt to recover your username and/or password. You can also find more documentation on Google's support site under the article titled Change or reset your Google Account password.
You will not be prompted to change your password unless we have reason to believe that your account has been compromised.
If you are still having issues, please file a support request with Network Services.
Mobile Phones
Information about school-owned mobile phones will be added to this area.
Adding Languages & Keyboards
Our campus utilizes a number of extra language keyboards for various classes. Below you will find instructions on how to add additional language keyboards to your computer.
Windows 8/8.1
Adding
-
on the Start Screen, click the hourglass icon to bring up the Windows Search box
-
type “language” in the search box and then click on
Add a language to this device -
click
Add a languageand then choose the language you desire from the resulting list -
you will now be back at the Time and language screen, click on the new language and then Options
-
from here you can add additional keyboards for this language if desired
Using
-
on the Start Screen, click the hourglass icon to bring up the Windows Search box
-
type “language” in the search box and then click on
Switch input language -
in the lower part of the resulting area, you will see the Keyboard option … click that
-
you can now choose from any of the installed keyboards
Windows 7
Adding
-
click the Start button
-
click Control Panel
-
click on Clock, Language, and Region
-
click the Change keyboard or other input methods link
-
in the resulting window, click on Change keyboards…
-
in the next window click Add…
-
click the + next to language you want and then again next to Keyboard
-
check the box next to the keyboard you wish to install and then click OK, OK, OK (to close all of the windows)
Using
-
you should now see the language button in your task bar on the bottom of the screen (will probably say
ENright now), you can click this to change your language and keyboard
OS X
Adding
-
open System Prefereces
-
select Language & Region
-
select Keyboard Preferences…
-
click the + near the lower-left of the screen
-
choose the language you desire from the list and then the keyboard type you wish to add
Using
-
you should see a flag on the toolbar at the top of your screen, click it
-
choose the language/keyboard you wish to use
Spyware & Malware
Malware is the single largest source of problems for students (and faculty!) who bring their machines to us for repair.
Spyware, rootkits, and trojans are waiting to infect your system. While you can never completely protect yourself, we strongly encourage preventitive maintenance. Using these utilities regularly will go a long way towards keeping your system clean.
Also, please check for updates to your operating system and any software you have on your machine. Quite often, those updates plug security holes which spyware and malware can exploit in order to infect your machine.
If you notice strange behavior, don't be afraid to ask for help. Generally, the longer you wait, the more difficult malware is to remove.
Pay Utilities
-
VIPRE Antivirus from GFI Software
-
Norton from Symantec
-
Malwarebytes from Malwarebytes
Free Utilities
-
Microsoft Security Essentials from Microsoft - RECOMMENDED for Windows 7
-
Malwarebytes from Malwarebytes (scanning and fixing is free)
Filr
Micro Focus Filr is a service offered by MLC Network Services to give students, faculty, and staff access to their files stored on the campus file servers wherever they are … on (almost) whatever device they want!
Here are some other resources about Filr to look at:
The Basics
You'll need to know what your MLC Account login credentials are, so have those handy. When you are ready, then do the following:
-
visit http://filr.mlc-wels.edu in your browser
-
provide your MLC Account username and password when prompted
That's it! You are now logged into MLC's Filr instance and can take a look around. Here is a brief look at what you have access to:
My Files
This is a look at your personal files stored on campus. You can find WINDATA, which is also know as the I: drive, where you have been storing things when logged into the campus network. You can also create folders and add new files as well. Click around into folders, on files, download files, view information, and much more!
Shared with Me
Sharing is one feature of Filr, so you can share files with those a part of the campus family. This is where you will find the files that have been shared with you from other people.
Share by Me
Here you can find all of the files you have shared with me. Check to see who you have shared them with, what their status is, and share new files as well.
Net Folders
Here are the folders usually found in the Groups folder, or the G: drive. These folders are shared with many individuals and need to be explicitly setup but Network Services. If you feel you are missing access to key folders and files here, please contact Network Services so that they can look into it.
Filr Applications
Filr is not just a website, it is also a number of applications available on a number of computing platforms to give you access to your files from a number of devices.
Desktop Applications
Filr is available for Microsoft Windows and Apple OS X. This application provides access directly from your computer wherever you have an internet connection. You are then able to download those files explicitly, or access them only the you need them.
To install the application, do this:
-
log into the Filr website (see above)
-
click on your name in the upper-right of the page
-
click on Download Filr Desktop App
-
choose your platform, download, and install
That's it. Follow the instructions from there. The one piece of information you will need is the site URL:
Otherwise, it is pretty straight forward.
Password Changes
When your MLC Account's password is changed, you also need to change the password for Filr or else it will not work properly. Often this will mean that all of your files will not show up and that files will not be synchronized back to the server or changes moved either. Here are some basic steps to change your password on the desktop applications:
-
Right-click on the Filr icon in the status bar
-
Click on Logout
-
Right-click on the Filr icon in the status bar
-
Click on Login
-
Enter the new password when prompted
You will need to be connected to the internet for this to work properly. If you continue to run into issues, please contact Network Services.
Mobile Applications
You can find the Filr app on your mobile app stores for iOS, Android, and Windows Phone. Visit those app stores and search for Filr to download and install.
he one piece of information you will need is the site URL:
If you have any questions, please contact Network Services.
Fall 2017 Filr and Microsoft Word 2016 Bug on Windows with Fall Creators Update
Fall 2017 has brought another bug, this one much narrower in scope than the bug this past summer. This only affects Windows 10 devices with the Fall Creators Update and saving from Microsoft Word 2016.
You can keep up with their work by visiting this TID from Micro Focus.
This bug can manifest in a number of ways:
-
Create a new document in Word 2016 and then attempt to save into any folder within Filr results in a 0K document which cannot be opened and will “bluescreen” your device, resulting in an unintended restart of your device.
-
Attempting to save any changes to a document open in Word 2016 the changes not being saved and the same “bluescreen” and restart as above..
There are possibly other conditions, but these are the two commonly affecting users. Documents currently inside of Filr are able to be opened safely, and you can open, change, and save using other applications on your device (has been tested with Excel, PowerPoint, and Notepad successfully). You also need to have the Fall Creators Update installed.
Workarounds
Workarounds for this issue include the following:
-
Save a new document, or the Save as … document copy, to your Desktop, close Word 2016, then copy-and-paste the document from your Desktop to the appropriate folder in Filr.
-
Open a document in Word 2016, make your changes, Save as … to the Desktop and then copy-and-paste the document from your Desktop to the appropriate folder in Filr.
-
Have Network Services install the Open Enterprise Server Client on your machine so that you can log into the OES file servers (will only work when on campus and connected to the physical network or the MLC Academic WLAN).
-
Do not complete the Fall Creators Update until a fix is found.
You can watch a short video on the issue along with the first workaround on YouTube.
After the document has been moved to the appropriate folder within Filr, it will synchronize as normal. You can also download, open, modify, and then upload the changed file to the Filr website similar as you would work with a Word document in Google Drive.
Student Resources - Overview
The Network Services staff welcomes your questions. We are here to help. You can find out the best way to get in touch by contacting Network Services.
-
All students have computer network accounts.
-
A student account provides access to email, word processing, spreadsheet & database functions, library catalog, other utilities and Internet access.
-
Security on the network is important. You will be required to change your password every few months. You will not be allowed to reuse passwords. Do not give your password to anyone else. You should immediately notify Network Services if you have reason to believe that someone has obtained unauthorized access to your account. If you forget your password, come to Network Services. You will be required to have picture ID to have your password changed. Your username and password is you. You will be held liable for anything done under your username.
-
Each student has 250 megabytes (MB) of disk storage on the network. When you reach your limit some applications will not run. In this circumstance you will be advised to delete files to make space.
-
Printing to network printers is metered at a cost of $0.05 per page. Each student is given a credit of $12.50 (250 pages) at the beginning of each semester. If you need additional printing, you may make a deposit for print credit at the Network Services Office (WCC 293) during business hours. Unused print credit will not be refunded in cash except for those who have made cash deposits. To check on your print credit status, login with our Portal username and password at http://papercut.mlc-wels.edu.
-
Note that electronic mail (email) is not guaranteed to be private. Network Services will not intentionally inspect the contents of email or disclose the contents to anyone other than the sender or the intended recipient, unless required by law, the policies of MLC, or to maintain the functioning of the MLC network. MLC Network Services reserves the right to cooperate fully with MLC administration, local, state, and federal officials in any investigation relating to email on the MLC network or owned accounts.
-
Usage of college owned software is metered and logged as a part of our agreements with the software manufacturers. Internet traffic is monitored and logged. Anyone using this system expressly consents to such monitoring.
More Resources
MLC Student-Owned Devices Policy
Students at MLC are expected to have a student-owned computing device available for use in class. It is up to the individual instructor as to how devices will be used in their classrooms. Not every instructor will use the devices on a daily basis, but only when it enhances the learning experience in some way.
Functionality of Devices
The goal of any device is to be usable in a variety of contexts. Because of this it is recommended to purchase a device that is durable and has a long battery life. It will need to handle the rigors of student life on campus. It is wise to discuss the specifications of any device under consideration with the chosen vendor, who will help in the difficult balance between cost, efficiency, and robustness (i.e. consider specifications as well as cost when purchasing).
The main use of devices in class often centers around the use of word processing, spreadsheet, and presentation tools, along with a web browser (the learning management system on campus is accessed through a web browser). Access to a modern web browser is a requirement.
Please note: Google Apps for Education is web-based and is free to all instructors and students at MLC. It includes word processing, spreadsheet, and presentation tools. In addition, recent versions of Microsoft Office are available through MLC Network Services for both Microsoft Windows and Apple OS X computers at a greatly reduced price.
Recommended Devices
MLC does not publish a recommended device list for students to choose from, but we do list some recommended minimum specifications to enable students to make an informed decision around which device(s) to purchase. You are free to choose the specific model/brand you desire along with insurance and/or service agreements through your vendor.
Laptops/Notebooks/Convertibles
In general, laptops/notebooks are the most commonly purchased device for use in the classroom. There are a number of different brands/manufacturers to choose from with a variety of price-points. Laptops in general are larger, heavier, and have a shorter battery life than some other devices, such as tablets, but balance that with built-in keyboards, optional touch screens, higher performance, and ability to run some legacy software.
Specifications to Look At
-
Modern Operating System
-
Microsoft Windows 10 or later
-
Apple OS X 10.13 High Sierra or later
-
Google Chromebook
-
Various Linux Distributions (Ubuntu, Fedora, openSUSE, etc.)
-
-
4 GB RAM (memory) or greater
-
128 GB hard drive (HDD or SSD) or greater (not applicable to Chromebooks)
-
Webcam and Microphone
-
6 hours of battery life or greater
Tablets
Tablets are usually smaller, less powerful, simpler devices than laptops/notebooks. Often they have better battery life to go along with being easier to slip into your bag to take to class. While often considered secondary devices to a desktop or laptop in your room, they are becoming more and more capable as time goes on, but be aware of the limitations of using these devices. There are some educational programs and other tools that will not run on tablets.
Specifications to Look At
Specifications are hard to quantify when it comes to tablet devices. The main thing to keep in mind is to purchase newer devices that are loaded with a recent version of the tablet’s operating system.
As of May 2016, these are the most recent versions of common operating systems:
-
Apple iOS 12 or later
-
Google Android 6.0 or later
-
Windows 10 or later
Desktops
More common years ago, some students still use desktops in their dorm room and have a separate device to take to class when needed.
Specifications to Look At
-
Modern Operating System
-
Microsoft Windows 10 or later
-
Apple OS X 10.13 High Sierra or later
-
Google Chromebox
-
Various Linux Distributions (Ubuntu, Fedora, openSUSE, etc.)
-
-
4 GB RAM (memory) or greater
-
128 GB hard drive (HDD or SSD) or greater (not applicable to Chromebooks)
-
Webcam and Microphone
FAQs
-
Do I need to load any software on my device prior to coming to MLC? Many devices come with a lot of preloaded software when purchased. Additional software may be needed depending on the activities the student chooses to engage in. Many free software alternatives, such as Google Apps, are available and students are encouraged to make use of them. Instructors will inform students of any specific apps that are required for their classes. Also, each student is required to carry security software to detect, prevent, and mitigate viruses, malware, spyware, and other nefarious software. What program to specifically install is up to the student, but there are free offerings available from many vendors.
-
Is it essential that I have Microsoft Office software (Word, PowerPoint, Excel) on my device? While having these programs on your device might be beneficial due to their greater functionality compared to some free alternatives, they are not required. All devices need to be able to access and work with word processing, presentation, and spreadsheet files. The specific program you use is up to you.
-
If I wish to have Microsoft Office software available on my device, should I purchase this before or after coming to MLC? If the software is not included with the purchase of your device, it is suggested that you purchase the software after coming to MLC since it is available at a much lower cost to students through MLC. Further information is available on the MLC Network Services website.
-
What should I do if there is a problem with my device while at MLC? You are welcome to check with Network Services for direction.
-
What responsibility will MLC take if my device is stolen and/or broken at MLC? The student is responsible for the maintenance, repair, and security of his/her own device. MLC carries no insurance on the personal belongings of students.
-
May the students use 3G/4G/LTE as well as WiFi? Yes, students may use their own data plans. There is no guarantee provided as to the signal strength of cellular providers on campus. MLC also has available to students a wireless network, which is safe and monitored.
Blackbaud Tips
Workstation repeatedly wants to update after the update has been applied.
Open file explorer and navigate to to C:\Users\MLC\AppData\Local\VirtualStore\Program Files (x86)\Blackbaud and delete the Blackbaud folder.
Copyright Infringement
As required by law, Martin Luther College (MLC) is notifying all students of the copyright law concerning music and video. Please read the following.
Sharing Music and Videos
In simple terms, possession of a song or movie that you have not paid for is illegal. You should not share or accept copies of music or videos with another individual. Copying a CD or DVD or creating a digital copy (MP3, MPEG-1, MPEG-2, etc.) and sharing it with anyone is a violation of copyright law. Many peer-to-peer (P2P) programs like Bit Torrent, LimeWire, Ares, and KaZaA allow computers to share files, including music and video, with no regard to restrictions placed on the material by the copyright owners. Most commercially produced music and videos are copyright protected and cannot be freely shared. This is the law. You should be aware that P2P networks are monitored by the Recording Industry Association of America and actions have been taken, both civically and legally against those found to be in violation. MLC is required to provide the names of those who have violated copyrights if notified. Keep in mind that ALL internet traffic is logged and can be traced to an individual IP address.
Summary of Civil and Criminal Penalties for Violation of Federal Copyright Laws
Copyright infringement is the act of exercising, without permission or legal authority, one or more of the exclusive rights granted to the copyright owner under section 106 of the Copyright Act (Title 17 of the United States Code). These rights include the right to reproduce or distribute a copyrighted work. In the file-sharing context, downloading or uploading substantial parts of a copyrighted work without authority constitutes an infringement.
Penalties for copyright infringement include civil and criminal penalties. In general, anyone found liable for civil copyright infringement may be ordered to pay either actual damages or “statutory” damages affixed at not less than $750 and not more than $30,000 per work infringed. For “willful” infringement, a court may award up to $150,000 per work infringed. A court can, in its discretion, also assess costs and attorneys' fees. For details, see Title 17, United States Code, Sections 504, 505.
Willful copyright infringement can also result in criminal penalties, including imprisonment of up to five years and fines of up to $250,000 per offense.
For more information, please see the Web site of the U.S. Copyright Office at http://copyright.gov, especially their FAQ's at http://copyright.gov/help/faq.
Legal Sources of Online Content
Not all free sources of content are illegal. Some sites provide content at no charge; they are funded by advertising or represent artist who want their material distributed for free, or for other reasons. The link following has many sites, maintained by EDUCAUSE, that offer legal downloads, both free and at a cost: http://educause.edu/legalcontent.
Acceptable Use Policy
This Acceptable Use Policy (AUP) document, including the following list of Prohibited Activities, is an integral part of your access to the network at Martin Luther College. If you engage in any of the activities prohibited by this AUP document Martin Luther College may suspend or terminate your account.
Martin Luther College's Acceptable Use Policy for Network Services is designed to help protect Martin Luther College, Martin Luther College's network users and the Internet community in general from irresponsible or, in some cases, illegal activities. The AUP is a non-exclusive list of the actions prohibited by Martin Luther College. Martin Luther College reserves the right to modify the Policy at any time, effective upon posting here.
Prohibited Uses of Martin Luther College Systems and Services
-
Transmission, distribution or storage of any material in violation of any applicable law or regulation is prohibited. Copying, storing, and/or distributing copyrighted materials without appropriate authorization. Unauthorized copying may constitute plagiarism or theft. While music and video “sharing” programs make copyrighted material available (see legal alternatives below), it is still illegal to copy, store and distribute copyrighted materials without authorization.(see summary of civil and criminal penalties below) This includes, without limitation, material protected by copyright, trademark, trade secret or other intellectual property right used without proper authorization, and material that is obscene, defamatory, constitutes an illegal threat, or violates export control laws.
-
Advertising, transmitting, or otherwise making available any software, program, product, or service that is designed to violate this AUP which includes, but is not limited to, the facilitation of the means to send Unsolicited Bulk Email, initiation of pinging, flooding, mail-bombing, denial of service attacks, causing congestion on the network by activities such as propagating “chain letters”, “broadcasting” messages to groups or individuals, introducing any computer viruses, worms, Trojan Horses, spy ware, and playing of interactive network multi-user games.
-
Unauthorized attempts by a user to gain access to any account or computer resource not belonging to that user (e.g., “cracking”).
-
Sharing login information and passwords with others. Be careful about making personal information about yourself and others available on the internet.
-
Unauthorized access, alteration, destruction, or any attempt thereof, of any information of any Martin Luther College end-users by any means or device.
-
Using Martin Luther College's services to interfere with the use of the Martin Luther College network authorized users.
-
Using the network for any purpose which violates federal/state laws.
-
Using the network for commercial purposes.
-
Misrepresenting your identity in the use of the network.
-
Using an IP address not assigned to you.
-
Sending or storing patently harassing, intimidating, abusive, or sexually explicit material.
-
Intercepting or altering network packets or data transmissions.
Unacceptable uses of the network may result in reprimand, loss of Internet access, loss of your network account, or other disciplinary actions. In cases where unacceptable use severely impacts performance or security, Network Services will immediately suspend an individual's access privileges to maintain reasonable service for the rest of the network. This policy is subject to amendment.
Summary of Civil and Criminal Penalties for Violation of Federal Copyright Laws
Legal Sources of Online Content
Not all free sources of content are illegal. Some sites provide content at no charge; they are funded by advertising or represent artist who want their material distributed for free, or for other reasons. The link following has many sites, maintained by EDUCAUSE, that offer legal downloads, both free and at a cost: http://educause.edu/legalcontent.