F1: Set Up and Manage Your Course
- Permanently Deleting Old Courses
- Beginning Moodle Videos
- Set Course to Hide/View
- View Course as Student
- Beginning of Semester Checklist
- End of Semester Checklist
- Using Master Copies
- View Class Roster
- Edit Multiple Due Dates
- Adding a TA
- Finding a Course
- Open a Course for One Student
Permanently Deleting Old Courses
Most online instructors do not want to delete a course site right after they have taught it since they might want to refer back to it the next time they teach the course. However, after teaching a course several times, several previous course sites will have accumulated, and it is appreciated if you mark the oldest ones for deletion.
Instructions
- Access your course in Moodle.
- Select Edit settings from the gear icon in the upper-right (or the Administration block if available) to open the Edit Course Settings window.
- In the Course full name box, add the word Delete in front of the course number so Delete is the first thing in the box.
- i.e. Delete EDT1001 01: Digital Literacy (201617 2)
- Scroll to the bottom and select Save and display.
Rachel Feld will periodically search in Moodle for courses that begin with the word Delete and will permanently delete them from Moodle. You can also email Rachel and let her know you've marked some courses for deletion so that they're removed more quickly.
Caution: Once a course is deleted, it is erased and cannot be retrieved.
Beginning Moodle Videos
- Finding Your Way Around
- Dashboard
- What is a Course?
- Course Layout
- Editing Course Sections
- Editing Icons
- Adding and Editing Text
- Course Blocks
- Drag and Drop Files
- Activity Completion
- Uploading Files
- Using the File Picker
- Adding Images
- Activity Chooser
- Adding a URL
- Starting a Discussion Forum
- Posting an Assignment
- Gradebook
Set Course to Hide/View
By default, all courses are initially hidden from student view. Courses are automatically made visible to students 1 week prior to the beginning of the semester. If you wish for your course to be hidden after the 1-week mark, follow the instructions below.
Instructions
4 STEPS
1. The first step is to open your course and click Settings
2. Next to Course visibility, choose show or hide.
If show is selected, all students, instructors, and TAs can see the course on their Moodle dashboard. If hide is selected, only instructors can see the course on their Moodle dashboard.
3. Scroll down and click Save and display
4. That's it. You're done.
Notes
- You can check if your course is hidden or shown by looking at your dashboard. Courses that are hidden say that they are hidden underneath the course name.
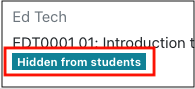
- After setting your course to view, you might end up with orphaned activities, making it look like content has disappeared. See Fixing Orphaned Activities to remedy this issue.
- Online instructors are encouraged to make their courses visible to students a few days prior to the start of the semester so that students can become familiar with the course layout and content.
- At the end of the semester, courses should be hidden from student view to protect copywritten material.
At the conclusion of a course or the semester, courses should be hidden from student view to protect copywritten material.
Instructions
- Log into Moodle and click on the course that you'd like to make viewable.
- From the course homepage, click on the gear menu in the upper right corner and choose Edit Settings.
- Under the General heading, locate the dropdown menu to the right of Course visibility.
- Choose Hide.
- Scroll to the bottom of the page and choose Save and display.
View Course as Student
This feature allows instructors to see the course home page and activities as if they were a student.
Instructions
- After logging in to Moodle, enter the course you'd like to view as a student.
- Click the down arrow to the right of your profile picture in the upper right corner and choose Switch role to...
- Click Student
- You can now view your course from the perspective of a student. This is visually indicated by the blue word student under your username.
- To return to your normal role, click the down arrow to the right of your profile picture in the upper right corner and choose Return to my normal role.
- Note that the view is not a perfect replication of some items like viewing grades. For a completely accurate student view, please use a sample student account.
Requesting a Sample Student
- Contact Rachel Feld to request a sample student account.
Beginning of Semester Checklist
Please use the following checklist to help get your online Moodle course up and running.
-
Edit Course Content
- Please make all edits, with the exception of due dates, in your master copy. Due dates should be set in your semester course after the content is imported.
Please use the following checklist to help get your On-Campus Moodle site up and running.
-
Locate your course for the coming semester
- Course sections are created 6 weeks before the start of the semester.
-
Request a Meta-Course (if needed)
-
Import Course Content
-
Edit Course Content
-
Add a TA (if needed)
-
Check your Course Roster
-
Make your Course Visible
End of Semester Checklist
Please use the following checklist to help guide you through the end of your online course.
Please use the following checklist to help guide you through the end of your on-campus course.
Using Master Copies
Master Copies of courses are used in both the undergraduate and graduate programs to help keep track of the most current course content and also facilitate sharing content without compromising student data. They are similar to a backline master used to make worksheet copies, except for a whole course. The following information will help you successfully navigate and work with your course master copy.
- You should have one master copy for each course you teach and each way that you teach it. For example, someone might teach EDU0001 during a regular semester and also online during a summer semester. Each of those courses will have a unique master copy.
- Master copies should be updated prior to the semester starting, with the exception of due dates. Currently, due dates do not transfer well and should be changed after the course import.
- Master copies are not linked to semester copies, so changes that get made do not get transferred automatically. You can make needed updates throughout the semester or if significant changes have been made that you'd like to retain, fill out this form so the support team can assist.
- Master copies will never be removed, while semester copies will be regularly removed after a set period of time.
- If you need to share your course with another instructor for review, collaboration, or other purposes, please share the master copy. This protects student data.
View Class Roster
Class rosters are available to view prior to the semester via Portal or during the semester via Portal or Moodle.
Instructions for Viewing the Roster in Portal
- Visit the MLC Portal by clicking Portal in the top menu of your Moodle page or by going to portal.mlc-wels.edu.
- If you are not automatically logged in, click the Login button near the top right corner and use your Moodle username and password to log in.
- After logging in, click Scheduling and choose Schedule Browser.
- Click your name.
- Scroll down below the course schedule and click the blue people icon
 to the left of the course name.
- If you do not see any courses in the schedule, you likely need to switch the semester being shown. Click the semester name on the right side underneath the gear menu and choose a different semester.
- The summer semester is semester 3.
- If you do not see any courses in the schedule, you likely need to switch the semester being shown. Click the semester name on the right side underneath the gear menu and choose a different semester.
- Your course roster will be displayed on the resulting page.
- For further directions on emailing your students, please see Initial Communication with Students.
Instructions for Viewing the Roster in Moodle
- After logging into Moodle, click on the course whose roster you want to view.
- From the menu on the top, click Participants.
- If the resulting list is blank, the course has not yet been populated with students. Courses are typically populated with students 4 weeks prior to the start of the course. This process is automatic.
-
- Both the Portal and Moodle rosters will be updated as new students enroll in the course.
- If a student drops a course, that change takes place once the information is changed in the database, and the database syncs with Moodle.
Moodle Enrollment Process
- When students enroll in an MLC course, they are automatically enrolled in the corresponding Moodle course. Instructors and students do not need anything to enroll in Moodle courses.
- Enrollments appear in Moodle 4 weeks prior to the start of the semester. Any enrollment changes made after the 4-week mark will appear in Moodle the next time the database and Moodle sync, which happens numerous times a day.
- If a student drops a course via the MLC Records Office, the roster change will automatically take place in Moodle.
- Enrollment changes are not instantaneous. They can take up to 24 hours to appear. For the most accurate enrollment, view your course roster in Portal.
Edit Multiple Due Dates
The Edit Dates report lets you review and update due dates, cut-off dates, and other timed events for multiple assignments, activities, or resources all on one screen. This feature is especially helpful if you’re reusing a previous course.
Instructions
-
- Log into Moodle and select your course from the Dashboard.
- Click Reports on the top green menu.
- Click Dates on the resulting screen.
- Click the drop down menu by Activity Type to filter your view by activity.
- Click your course sections to expand the content of each section, or click Expand All to view everything.
- The date options for each course item will be displayed under each item. Make adjustments as needed.
- When you’re done adjusting the date, click the blue Save changes button.
Adding a TA
A Teachers' Assistant (TA) can be added to courses to assist with various instructional duties.
Instructions
10 STEPS
1. The first step is to open the course and click Participants
2. Click Enrol users
3. Click Select users
4. Type the username/email address of your TA
5. Click the student's name
Note: Many students have similar names. Please be careful when choosing the student. The email address is the best unique identifier.
6. Click to the side to close the search box
7. Click in the Assign role drop-down menu
8. Select Teaching Assistant - Grading or Teaching Assistant - Editing
Grading allows your TA to enter grades, but not adjust course content. Editing gives your TA the same course content editing options that you have as the instructor.
9. Click Enrol users
10. That's it. You're done.
Important Notes
- You can view and edit your TA's role from the Participants list. Click the pencil to edit or remove their role.
- Follow the steps above for each additional course your TA needs access to.
- If working with separate groups within your course, make sure your TA is also a member of those groups.
Finding a Course
Courses in Moodle can be found on your Moodle Dashboard and on the Site Home page. Use the following tips to quickly find the course you're looking for.
- You can save your frequently used courses to the Starred Courses section of your dashboard by starring them. This will add them to the very top section of your dashboard. Courses can be starred and unstarred as the semesters change.
- The Recently accessed courses section of your dashboard automatically populates with the courses you use most often. You can use the arrows at the top right of the section to see additional courses.
- The Course Overview section shows all the courses that you're enrolled in as an instructor or student. Make sure the filter in the top left corner is set to All if you're looking for a course you've not accessed previously. There are arrows in the bottom right corner of this section to see all the pages.
- If you click Site Home from the menu on the left side of the page, there's a search bar that can be used to find courses that, for whatever reason, are not appearing on your Dashboard. The course number (i.e. EDT0001) is the most efficient search term for locating a course.
Open a Course for One Student
In general, courses should be hidden after they are completed. Sometimes, a student might need access to a closed course if they have an incomplete or are studying for their comprehensive exam. Instead of setting the course to view, which opens it up for all students, follow the directions below to open the course for an individual student. The access should be removed when the student no longer needs the content.
Instructions
Opening the Course
-
-
- Log into Moodle and click on the course you want to make visible to the student.
- From the course home page, click on Participants in the left hand menu.
- In the list, locate the student who needs access to the course.
- In the Roles column, click the pencil icon next to "Student".
- Click the down arrow to see the drop-down menu choices and choose Single Viewer.
- Click the save icon

-

Closing the Course
-
-
- Log into Moodle and click on the course you want to make visible to the student.
- From the course home page, click on Participants in the left hand menu.
- In the list, locate the student who needs access to the course removed.
- In the Roles column, click the pencil icon next to "Student".
- Click the x next to Single Viewer.
- Click the save icon
-