# Groups
# Where Groups Can be Used
# Group Types
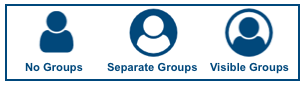
#### No Groups
Groups will not be used for this activity. This is the default setting.
#### Separate Groups
Groups will be used for this activity. Students can only see the content of their own group. The other groups and their content are not visible to them.
#### Visible Groups
Groups will be used for this activity. Students can see the content of their group and all the other groups, but can only interact with the content from their own group.
[](https://help.mlc-wels.edu/uploads/images/gallery/2019-09/Moodle-Groups.png)
# Setting Up a Group
In Moodle, groups are set up for the whole course, but only impact those activities that are set to use groups. Groups can be changed throughout the course as needed.
##### Instructions
- Log in to Moodle and enter your course site.
- Click **Participants** on the top green menu.
- Click the **Enrolled users** menu near the upper left corner of the Participants window and choose **Groups**.
- From here you have two choices; to auto-create groups or manually create them.
##### Auto-Create Groups
- Click **Auto-create groups** near the bottom of the screen.
- Fill out the options for your groups:
- ***General***
- **Naming Scheme:** This is how your groups will be named. You can use @ to create letter name groups or # to create numbered groups. Click the blue question mark next to the text box for more information.
- **Auto create based on:**
- **Number of groups:** you specify how many groups you want
- **Members per group:** you specify how many students you want in each group
- **Group/member count:** how many groups or members per group you want, based on your choice above
- **Group messaging:** allow or prohibit group members to use the Moodle messenger to communicate with their whole group.
- ***Group Members***
- **Select members with role:** typically you should choose *student*.
- **Select members from group:** only use if you want to create a group within a group.
- **Allocate members:** choose how the groups will be divided
- **Prevent last small group:** if checked, no group will be smaller than the number you set above, but might be larger.
- **Ignore users in groups:** if checked, the group will contain only users that are not already in another group.
- **Include only active enrollments:** if checked, any students with suspended accounts will not be included in the groups.
- ***Grouping***
- **Grouping of auto-created groups:** allows you to put all newly created groups into a grouping
- **Grouping name:** the name for the new grouping
- Click **Preview** if you want to look at the groups before creating them, or **Submit** to simply create them.
##### Create Group
- Click **Create Group** near the bottom of the screen.
- Fill out the options for your group:
- ***General***
- **Group name:** How the group will be identified in Moodle.
- **Group ID number:** Leave this blank.
- **Group description:** optional
- **Enrollment key:** behaves like a password for students to access groups. Typically not used.
- **Group messaging:** allow or prohibit group members to use the Moodle messenger to communicate with their whole group.
- **Hide picture:** if a picture is uploaded below, choose to show or hide the group picture.
- **New picture:** allows you to upload a group picture/icon to identify the groups.
- Click **Save changes.** The group will then appear in the list of groups on the next screen.
- Click the name of the group in the list.
- Click **add/remove users** to put students into the group you created.
- On the next screen, click the name of a student you want to add to the group and click **Add**. Repeat as necessary for all desired group members.
- Click **Back to groups**.
# How Groups Behave
In assignments
In discussion forums
In wikis
In workshops
# Using Groupings
# Adding or Removing an Individual Student from a Pre-Existing Group
##### Adding a Student
1. Log in to Moodle and enter your Moodle course.
2. Click on **Participants** on the left-side column.
3. Click the **Gear** **Menu** on the right side near the top and choose **Groups**.
4. Select the group you want to add the student to from the list of groups.
5. Click **Add/Remove Users** on the right.
6. On the resulting screen, find the student in the **Potential Members** list on the right and click to select them.
- If your course has lots of students, they might not appear in the list. Use the search box below the box.
7. Click **Add**.
8. Repeat as necessary to add additional students.
9. Click **Back to Groups** at the bottom of the page.
##### Removing a Student
1. Follow steps 1-5 above.
2. Locate the student in the **Group Members** list on the left and click to select them.
- - If your course has lots of students, they might not appear in the list. Use the search box below the box.
3. Click **Remove**.
4. Repeat as necessary to remove additional students.
5. Click **Back to Groups** at the bottom of the page.