# How Do I?


# Activate My Course

Courses need to be activated before they appear in Moodle. You may activate any course that you are listed as the instructor for.

#### Instructions

1. Visit [portal.mlc-wels.edu](https://portal.mlc-wels.edu/nwpp/)
2. Log in to your MLC account by clicking the **Login** button in the top right corner. Use the same username and password as you do for Moodle.
3. From the **Scheduling** tab, choose **Moodle Courses**.
4. Click the **Activate** button next to the name of the course you'd like to activate.
5. The **Activate** button will disappear and a message indicating the course has been activated will take its place.

- Activated courses are deployed to Moodle on a schedule and may take up to 24 hours to appear in your Moodle course list.
- If your course does not appear after 24 hours, please contact [Rachel Feld](mailto:feldrm@mlc-wels.edu).

# See Moodle as a Student

#### Requesting a Sample Student

- [Contact Rachel Feld](mailto:feldrm@mlc-wels.edu) to request a sample student account.

#### Enrolling a Sample Student

# Uploading a File from Google Drive


# Set Course to Hide

At the conclusion of a course or the semester, courses should be hidden from student view to protect copywritten material.

#### Instructions

1. Log into Moodle and click on the course that you'd like to make viewable.
2. From the course homepage, click on the gear menu in the upper right corner and choose **Edit Settings**.
3. Under the **General** heading, locate the dropdown menu to the right of **Course visibility.**
4. Choose **Hide.**
5. Scroll to the bottom of the page and choose **Save and display**.

# Import Course Content

Course content from previous offerings can be imported for reuse. The entire course can be imported or just selected parts.

*11 STEPS*

#### Importing a Whole Course

*If something is not appearing correctly in your course, please do not import your course again. This will create a duplicate of <span style="text-decoration: underline;">everything</span> in your course. First, try [adjusting your course section numbers](https://help.mlc-wels.edu/books/moodle-for-faculty/page/fixing-orphaned-content). If that doesn't fix the problem, please contact support.*

### Here's an interactive tutorial

<div id="bkmrk-%2A%2A-best-experienced-" style="max-width: 100%; width: 450px; margin: 0 auto;">*\*\* Best experienced in Full Screen (click the icon in the top right corner before you begin) \*\**</div>[https://www.iorad.com/player/2410797/Import-Course-Content](https://www.iorad.com/player/2410797/Import-Course-Content)

<iframe allow="camera; microphone; clipboard-write" allowfullscreen="allowfullscreen" frameborder="0" height="500px" src="https://www.iorad.com/player/2410797/Import-Course-Content?src=iframe&oembed=1" style="width: 100%; height: 500px;" width="100%"></iframe>

*12 STEPS*

1\. The first step is to open your **Moodle** **Dashboard** and click on the course for the current semester (the one you want to import content into)

![Step 1 image](https://www.iorad.com/api/tutorial/stepScreenshot?tutorial_id=2410797&step_number=1&width=450&height=400&mobile_width=450&mobile_height=400&apply_resize=true&min_zoom=0.5)

2\. Click **More**

![Step 2 image](https://www.iorad.com/api/tutorial/stepScreenshot?tutorial_id=2410797&step_number=2&width=450&height=400&mobile_width=450&mobile_height=400&apply_resize=true&min_zoom=0.5)

3\. Click **Course reuse**

![Step 3 image](https://www.iorad.com/api/tutorial/stepScreenshot?tutorial_id=2410797&step_number=3&width=450&height=400&mobile_width=450&mobile_height=400&apply_resize=true&min_zoom=0.5)

4\. Click **Import**

![Step 4 image](https://www.iorad.com/api/tutorial/stepScreenshot?tutorial_id=2410797&step_number=4&width=450&height=400&mobile_width=450&mobile_height=400&apply_resize=true&min_zoom=0.5)

5\. Scroll and click **Search courses**

![Step 5 image](https://www.iorad.com/api/tutorial/stepScreenshot?tutorial_id=2410797&step_number=5&width=450&height=400&mobile_width=450&mobile_height=400&apply_resize=true&min_zoom=0.5)

6\. Type the **course number** of the course you want to import

![Step 6 image](https://www.iorad.com/api/tutorial/stepScreenshot?tutorial_id=2410797&step_number=6&width=450&height=400&mobile_width=450&mobile_height=400&apply_resize=true&min_zoom=0.5)

7\. Click **Search**

![Step 7 image](https://www.iorad.com/api/tutorial/stepScreenshot?tutorial_id=2410797&step_number=7&width=450&height=400&mobile_width=450&mobile_height=400&apply_resize=true&min_zoom=0.5)

8\. Scroll and click to select the course you want to import

![Step 8 image](https://www.iorad.com/api/tutorial/stepScreenshot?tutorial_id=2410797&step_number=8&width=450&height=400&mobile_width=450&mobile_height=400&apply_resize=true&min_zoom=0.5)

9\. Click **Continue**

![Step 9 image](https://www.iorad.com/api/tutorial/stepScreenshot?tutorial_id=2410797&step_number=9&width=450&height=400&mobile_width=450&mobile_height=400&apply_resize=true&min_zoom=0.5)

10\. If you want to import all of the course content, scroll and click **Jump to final step** If you only want to import part of the content, follow the other tutorial

![Step 10 image](https://www.iorad.com/api/tutorial/stepScreenshot?tutorial_id=2410797&step_number=10&width=450&height=400&mobile_width=450&mobile_height=400&apply_resize=true&min_zoom=0.5)

11\. Click **Continue** You can safely ignore all technical information and warnings

![Step 11 image](https://www.iorad.com/api/tutorial/stepScreenshot?tutorial_id=2410797&step_number=11&width=450&height=400&mobile_width=450&mobile_height=400&apply_resize=true&min_zoom=0.5)

12\. That's it. You're done.

<div id="bkmrk-tutorial-completed.-" style="max-width: 100%; width: 450px; margin: 0 auto;"><div style="margin-top: 20px;"><div style="position: relative; text-align: center;">![Step 12 image](https://www.iorad.com/api/tutorial/stepScreenshot?tutorial_id=2410797&step_number=12&width=450&height=400&mobile_width=450&mobile_height=400&apply_resize=true&min_zoom=0.5)<div class="step-info notranslate" style="position: absolute; top: 0; left: 0; z-index: 2; width: 100%; height: 100%; display: flex; align-items: center; justify-content: center; backdrop-filter: blur(10px); color: #000000;"><div style="display: block; width: 100%; height: 100%; flex-shrink: 0; background: white; text-align: left; background-image: none; background-repeat: no-repeat; background-position: center; background-size: cover;"><div style="background-color: #ffffff; width: 100%; height: 100%; padding: 35px 25px; display: flex; flex-direction: column; overflow: hidden; color: inherit; box-sizing: border-box;"><div style="display: block; height: 45px; font-style: normal; font-weight: 400; font-size: 18px; line-height: 20px; flex-shrink: 0; color: inherit;">Tutorial completed.</div><div style="display: block; margin-top: 3px; font-style: normal; font-weight: 400; font-size: 15px; line-height: 20px; flex-grow: 1; color: inherit; overflow: overlay;">Congratulations on finishing this tutorial.</div></div></div></div></div></div></div>#### Important Notes

- An extra **Announcements** discussion forum will appear that should be [deleted](https://bookstack.mlc-wels.edu/books/moodle/page/layout-and-navigation-basics).
- If **orphaned sections** appear, please [adjust the number of sections in the course](https://help.mlc-wels.edu/books/moodle-for-faculty/page/fixing-orphaned-activities).


#### Importing Specific Items

1\. Follow steps 1-9 above.

2\. After the proper course has been chosen in step 9, use the checkboxes to mark what kind of material you'd like to import into the course. *Include activities and resources* is the most common option.

3\. Use the checkboxes on the next page to indicate which specific materials you want to import. By default, all the materials are checked. Use the **Select All/None** options at the top to quickly check or uncheck the boxes. Then choose the individual items to import.   
 \* If you are not able to click on a specific box, look above it for a category header in bold. Check that category header to choose the items underneath it.

4\. Click **Next.**

5\. Confirm your choices on the next screen. If they are correct, choose **Perform import.** You can also choose **Previous** to go back and choose different items.

6\. Continue with steps 8 and 9 above.

# Remove Course Sections from a Meta-Site

Meta-courses can be reused from one semester or year to the next by removing the sections that are attached from the previous semester and then attaching the sections for the new semester.

#### Instructions

1. If you have not previously used a meta-site, please see [these instructions](https://help.mlc-wels.edu/books/moodle/page/using-a-meta-course).
2. Log into Moodle and enter the meta-site.
3. Click on the **Participants** tab on the left menu.
4. Click on the **Gear** in the upper right corner and choose **Enrollment methods**.
5. From the resulting list, locate the section names from previous semesters.
6. Click the **trash can** to the right of the course section you want to remove.
7. On the resulting page, verify you have chosen the correct section and click the blue **Continue** button.
8. Repeat steps 5-7 until all previous sections have been removed. Do not remove **Manual enrollments** or **Guest access**.

# How Students Can Contribute Files or Links

If you wish to have students contribute to your Moodle site, it is possible, but not very intuitive. This method allows students to post files and links without altering access rights and permissions.

<iframe allowfullscreen="allowfullscreen" height="314" src="//www.youtube.com/embed/12t0AxdH_as" width="560"></iframe>

# Adding a Link to a Webpage in your Moodle Course

Nearly anything with a web link can be shared to your Moodle course page.

##### Instructions

- Log into Moodle and enter your course site.
- Click the **Gear** in the upper right corner and choose **Turn Editing On**.
- Scroll to the course section where you want the link to be. Click **Add an activity or resource**.
- On the pop-up window, scroll to the bottom of the list. Choose **URL** and click **Add**.
- On the next screen, you'll see a few text boxes. You must fill in the top two. 
    - Name: what students will see on the Moodle course page.
    - External URL: the link you want students to visit. It is easiest to copy and paste this.
- Scroll to the bottom and click **Save and return to course.**

# Use Groups in a Discussion Forum

Groups can be used in a Discussion Forum to limit the number of posts an individual student interacts with. This can be especially helpful in courses with a large number of students.

### Using Separate or Visible Groups

#### Instructions

1. First, you need to [set up groups](https://help.mlc-wels.edu/books/moodle/page/setting-up-a-group) within the course.
2. After groups have been set up, you need to set the discussion forum to use groups. This can be done either from the Discussion Settings or the course home page.

##### Method #1 - Discussion Settings

1. Either [add a new discussion forum](https://help.mlc-wels.edu/books/moodle/page/layout-and-navigation-basics#bkmrk-adding-course-conten) or [turn editing on ](https://help.mlc-wels.edu/books/moodle/page/layout-and-navigation-basics#bkmrk-turning-editing-on)and choose **Edit settings** from the forum's edit menu to edit an existing forum.
2. From the settings page, scroll down to **Common module settings**. Click the title to expand the menu if the options are not visible.
3. Next to **Group mode**, choose the [group setting](https://help.mlc-wels.edu/books/moodle/page/group-types) you want for the forum.
4. If you have set [groupings](https://help.mlc-wels.edu/books/moodle/page/using-groupings) in your course, an option for choosing the grouping will appear.
5. After you have chosen the group settings, scroll to the bottom of the page and click one of the **Save** buttons.

##### Method #2 - Course Home Page

1. [Turn editing on](https://help.mlc-wels.edu/books/moodle/page/layout-and-navigation-basics#bkmrk-turning-editing-on) within the course.
2. Next to each discussion forum, a small person icon should appear. Hovering the mouse over the icon will indicate which group mode the forum is currently set to.
3. Click the icon to cycle through the 3 group settings. See the image below for what each icon represents.

### Removing Groups

If a student is unable to post to a discussion forum and gets an error about not being in a group, likely groups have inadvertently been set within the discussion forum. Follow these instructions to remove the group setting from the discussion forum. This can be done either from the Discussion Settings or the course home page.

##### Method #1 - Discussion Settings

1. [Turn editing on ](https://help.mlc-wels.edu/books/moodle/page/layout-and-navigation-basics#bkmrk-turning-editing-on)in your course and choose **Edit settings** from the forum's edit menu.
2. From the settings page, scroll down to **Common module settings**. Click the title to expand the menu if the options are not visible.
3. Next to **Group mode**, choose **No groups**.
4. After you have chosen the group settings, scroll to the bottom of the page and click one of the blue **Save** buttons.

##### Method #2 - Course Home Page

1. [Turn editing on](https://help.mlc-wels.edu/books/moodle/page/layout-and-navigation-basics#bkmrk-turning-editing-on) within the course.
2. Next to each discussion forum, a small person icon should appear. Hovering the mouse over the icon will indicate which group mode the forum is currently set to.
3. Click the icon to cycle through the 3 group settings. See the image below for what each icon represents.

[![Moodle-Groups.png](https://help.mlc-wels.edu/uploads/images/gallery/2019-09/scaled-1680-/Moodle-Groups.png)](https://help.mlc-wels.edu/uploads/images/gallery/2019-09/Moodle-Groups.png)

# Turning In Grades

At the end of each semester, grades need to be reported for each student. Grades are reported on Portal by following one of the methods below.

#### Manually Submitting Grades

1. Visit [portal.mlc-wels.edu](https://portal.mlc-wels.edu) and log in with your MLC username and password.
2. Select **Grades** from the top menu and click on **Enter Grades**.
3. Click on the name of the course you want to enter grades for and a listing of your students should appear.
4. Next to each student's name, select the appropriate letter grade.
5. Click **Submit** on the bottom of the page.

#### Importing Final Grades to Portal from Moodle

- Log in to Moodle and enter your course site.
- Click **Grades** in the top menu.
- From the dropdown menu, click **Export**.

![Screenshot 2024-12-04 at 12.51.01 PM.png](https://help.mlc-wels.edu/uploads/images/gallery/2024-12/scaled-1680-/screenshot-2024-12-04-at-12-51-01-pm.png)

- On the next screen, from the "Export as" menu, choose **MLC Portal**.

[![Screenshot 2024-12-04 at 12.53.11 PM.png](https://help.mlc-wels.edu/uploads/images/gallery/2024-12/scaled-1680-/screenshot-2024-12-04-at-12-53-11-pm.png)](https://help.mlc-wels.edu/uploads/images/gallery/2024-12/screenshot-2024-12-04-at-12-53-11-pm.png)

- Click **Export Grades**.
- A new tab will open with the Portal website. If prompted, log into Portal using your MLC username and password.
- The listing of students will be populated with letter grades based on their grade in Moodle. You can make adjustments to the grades as needed. 
    - *Be sure to check that Moodle has rounded the way you want to round. Moodle calculates to more decimal places than are shown by default, which can impact which letter grade is imported to Portal.*
- Click **Submit** on the bottom of the page.

#### Other Information

- Grades are due by the date listed on the [MLC faculty/staff calendar](https://portal.mlc-wels.edu/nwpp/Information/calendar.php) or the Graduate Faculty Handbook.
- You do not need to enter all grades at the same time.
- Once you submit a grade for a student, you cannot change it yourself. Instead, you need to fill out a[ Change of Grade Form](https://mlc-wels.edu/academics/academic-forms#tab-id-3) and send it to the [MLC Records office](https://mlc-wels.edu/directory/?page_id=5&cn-cat=29). If you have any questions about this, please contact the MLC Records Office at (507)-354-8221.
- After you have submitted grades, you can inform your students that they can view their final grade on Portal. They should follow [these instructions](https://help.mlc-wels.edu/books/moodle-for-students/page/viewing-final-grades) to view their grade.

#### Exporting the Gradebook

- It is a good idea to export your gradebook from Moodle to an Excel spreadsheet so that the data is saved in case you decide to delete the course site.
- To export the gradebook, please do the following: 
    - Enter your course site.
    - Click **Grades** from the left menu.
    - From the dropdown menu, choose **Export to Excel Spreadsheet.**
    - Scroll to the bottom and click **Download**.
    - Move the downloaded gradebook file from your download folder to another folder on your computer.

# Adding a TA

A Teachers' Assistant (TA) can be added to courses to assist with various instructional duties.

#### Instructions

<div id="bkmrk-%2A%2A-best-experienced-" style="max-width: 100%; width: 800px; margin: 0 auto;">*\*\* Best experienced in Full Screen (click the icon in the top right corner before you begin) \*\**</div>[https://www.iorad.com/player/2415641/Add-a-TA](https://www.iorad.com/player/2415641/Add-a-TA)

<iframe allow="camera; microphone; clipboard-write" allowfullscreen="allowfullscreen" frameborder="0" height="500px" src="https://www.iorad.com/player/2415641/Add-a-TA?src=iframe&oembed=1" style="width: 100%; height: 500px;" width="100%"></iframe>

*10 STEPS*

1\. The first step is to open the course and click **Participants**

![Step 1 image](https://www.iorad.com/api/tutorial/stepScreenshot?tutorial_id=2415641&step_number=1&width=800&height=600&mobile_width=450&mobile_height=400&apply_resize=true&min_zoom=0.5)

2\. Click **Enrol users**

![Step 2 image](https://www.iorad.com/api/tutorial/stepScreenshot?tutorial_id=2415641&step_number=2&width=800&height=600&mobile_width=450&mobile_height=400&apply_resize=true&min_zoom=0.5)

3\. Click **Select users**

![Step 3 image](https://www.iorad.com/api/tutorial/stepScreenshot?tutorial_id=2415641&step_number=3&width=800&height=600&mobile_width=450&mobile_height=400&apply_resize=true&min_zoom=0.5)

4\. Type the **username/email address** of your TA

![Step 4 image](https://www.iorad.com/api/tutorial/stepScreenshot?tutorial_id=2415641&step_number=4&width=800&height=600&mobile_width=450&mobile_height=400&apply_resize=true&min_zoom=0.5)

5\. Click **the student's name** Note: Many students have similar names. Please be careful when choosing the student. The email address is the best unique identifier.

![Step 5 image](https://www.iorad.com/api/tutorial/stepScreenshot?tutorial_id=2415641&step_number=5&width=800&height=600&mobile_width=450&mobile_height=400&apply_resize=true&min_zoom=0.5)

6\. Click **to the side** to close the search box

![Step 6 image](https://www.iorad.com/api/tutorial/stepScreenshot?tutorial_id=2415641&step_number=6&width=800&height=600&mobile_width=450&mobile_height=400&apply_resize=true&min_zoom=0.5)

7\. Click in the **Assign role** drop-down menu

![Step 7 image](https://www.iorad.com/api/tutorial/stepScreenshot?tutorial_id=2415641&step_number=7&width=800&height=600&mobile_width=450&mobile_height=400&apply_resize=true&min_zoom=0.5)

8\. Select **Teaching Assistant - Grading** or **Teaching Assistant - Editing** <u>Grading</u> allows your TA to enter grades, but not adjust course content. <u>Editing</u> gives your TA the same course content editing options that you have as the instructor.

![Step 8 image](https://www.iorad.com/api/tutorial/stepScreenshot?tutorial_id=2415641&step_number=8&width=800&height=600&mobile_width=450&mobile_height=400&apply_resize=true&min_zoom=0.5)

9\. Click **Enrol users**

![Step 9 image](https://www.iorad.com/api/tutorial/stepScreenshot?tutorial_id=2415641&step_number=9&width=800&height=600&mobile_width=450&mobile_height=400&apply_resize=true&min_zoom=0.5)

10\. That's it. You're done.

<div id="bkmrk-tutorial-completed.-" style="max-width: 100%; width: 800px; margin: 0 auto;"><div style="margin-top: 20px;"><div style="position: relative; text-align: center;">![Step 10 image](https://www.iorad.com/api/tutorial/stepScreenshot?tutorial_id=2415641&step_number=10&width=800&height=600&mobile_width=450&mobile_height=400&apply_resize=true&min_zoom=0.5)<div class="step-info notranslate" style="position: absolute; top: 0; left: 0; z-index: 2; width: 100%; height: 100%; display: flex; align-items: center; justify-content: center; backdrop-filter: blur(10px); color: #000000;"><div style="display: block; width: 100%; height: 100%; flex-shrink: 0; background: white; text-align: left; background-image: none; background-repeat: no-repeat; background-position: center; background-size: cover;"><div style="background-color: #ffffff; width: 100%; height: 100%; padding: 35px 25px; display: flex; flex-direction: column; overflow: hidden; color: inherit; box-sizing: border-box;"><div style="display: block; height: 45px; font-style: normal; font-weight: 400; font-size: 18px; line-height: 20px; flex-shrink: 0; color: inherit;">Tutorial completed.</div><div style="display: block; margin-top: 3px; font-style: normal; font-weight: 400; font-size: 15px; line-height: 20px; flex-grow: 1; color: inherit; overflow: overlay;">Congratulations on finishing this tutorial.</div></div></div></div></div></div></div>#### Important Notes

- You can view and edit your TA's role from the **Participants** list. Click the pencil to edit or remove their role.
- Follow the steps above for each additional course your TA needs access to.
- If working with separate groups within your course, make sure your TA is also a member of those groups.

# Permanently Deleting Old Courses

<span style="font-weight: 400;">Most online instructors do not want to delete a course site right after they have taught it since they might want to refer back to it the next time they teach the course. However, after teaching a course several times, several previous course sites will have accumulated, and it is appreciated if you mark the oldest ones for deletion. </span>

##### <span style="font-weight: 400;">Instructions</span>

- <span style="font-weight: 400;">Access your course in Moodle.</span>
- <span style="font-weight: 400;">Select </span>**Edit settings**<span style="font-weight: 400;"> from the gear icon </span><span style="font-weight: 400;">in the upper-right (or the Administration block if available) to open the </span>**Edit Course Settings**<span style="font-weight: 400;"> window.</span>
- <span style="font-weight: 400;">In the </span>**Course full name**<span style="font-weight: 400;"> box, add the word </span>***Delete***<span style="font-weight: 400;"> in front of the course number so Delete is the first thing in the box. </span>
- <span style="font-weight: 400;">i.e. Delete EDT1001 01: Digital Literacy (201617 2)</span>

- <span style="font-weight: 400;">Scroll to the bottom and select </span>**Save and display**<span style="font-weight: 400;">. </span>


<span style="font-weight: 400;">Rachel Feld will periodically search in Moodle for courses that begin with the word *Delete* and will permanently delete them from Moodle. You can also email Rachel and let her know you've marked some courses for deletion so that they're removed more quickly.</span>

<span style="text-decoration: underline;">**Caution: Once a course is deleted, it is erased and cannot be retrieved.** </span>

# Course Surveys

<span style="font-weight: 400;">A common end-of-course survey is conducted at the conclusion of all online courses in order to gather valuable feedback for course improvement. </span><span style="font-weight: 400;">The survey instructions are sent out to your students by Rachel Feld via the Announcement Forum in your course. The survey is conducted via the MLC Portal, where you will be able to view a compilation of the survey results. </span>

##### <span style="font-weight: 400;">Accessing Results</span>

- <span style="font-weight: 400;">Use </span>[<span style="font-weight: 400;">this link</span>](https://portal.mlc-wels.edu/nwpp/surveys.php)<span style="font-weight: 400;"> to access the survey area of MLC's Portal.</span>
- <span style="font-weight: 400;">Log in to the Portal with your Moodle username and password.</span>
- <span style="font-weight: 400;">If you’re not prompted to log in, the login area is in the upper right.</span>

- <span style="font-weight: 400;">Select the survey for your course and the results should appear.</span>

##### <span style="font-weight: 400;">Additional Notes</span>

- <span style="font-weight: 400;">It can be helpful for you to add additional encouragement to your students to complete the survey.</span>
- <span style="font-weight: 400;">Once the survey is completed, the results are shared with the appropriate person(s) in the MLC administration and are available for the instructor to view via the MLC Portal. </span>
- <span style="font-weight: 400;">The survey questions were shared with all online instructors at some point in time. If you would like a new copy of the survey, simply contact Rachel Feld. </span>
- <span style="font-weight: 400;">You are welcome to create your own survey and administer it in addition to the common survey.</span>

# Set Course to Hide/View

By default, all courses are initially hidden from student view. **Courses are automatically made visible to students 1 week prior to the beginning of the semester.** If you wish for your course to be hidden after the 1-week mark, follow the instructions below.

#### Instructions


<div id="bkmrk-%2A%2A-best-experienced-" style="max-width: 100%; width: 800px; margin: 0 auto;">*\*\* Best experienced in Full Screen (click the icon in the top right corner before you begin) \*\**</div>[https://www.iorad.com/player/2415651/Set-Course-Visibility](https://www.iorad.com/player/2415651/Set-Course-Visibility)

<iframe allow="camera; microphone; clipboard-write" allowfullscreen="allowfullscreen" frameborder="0" height="500px" src="https://www.iorad.com/player/2415651/Set-Course-Visibility?src=iframe&oembed=1" style="width: 100%; height: 500px;" width="100%"></iframe>

*4 STEPS*

1\. The first step is to open your course and click **Settings**

![Step 1 image](https://www.iorad.com/api/tutorial/stepScreenshot?tutorial_id=2415651&step_number=1&width=800&height=600&mobile_width=450&mobile_height=400&apply_resize=true&min_zoom=0.5)

2\. Next to **Course visibility**, choose show or hide.  
  
If <u>show</u> is selected, all students, instructors, and TAs can see the course on their Moodle dashboard. If <u>hide</u> is selected, only instructors can see the course on their Moodle dashboard.

![Step 2 image](https://www.iorad.com/api/tutorial/stepScreenshot?tutorial_id=2415651&step_number=2&width=800&height=600&mobile_width=450&mobile_height=400&apply_resize=true&min_zoom=0.5)

3\. Scroll down and click **Save and display**

![Step 3 image](https://www.iorad.com/api/tutorial/stepScreenshot?tutorial_id=2415651&step_number=3&width=800&height=600&mobile_width=450&mobile_height=400&apply_resize=true&min_zoom=0.5)

4\. That's it. You're done.

<div id="bkmrk-tutorial-completed.-" style="max-width: 100%; width: 800px; margin: 0 auto;"><div style="margin-top: 20px;"><div style="position: relative; text-align: center;">![Step 4 image](https://www.iorad.com/api/tutorial/stepScreenshot?tutorial_id=2415651&step_number=4&width=800&height=600&mobile_width=450&mobile_height=400&apply_resize=true&min_zoom=0.5)<div class="step-info notranslate" style="position: absolute; top: 0; left: 0; z-index: 2; width: 100%; height: 100%; display: flex; align-items: center; justify-content: center; backdrop-filter: blur(10px); color: #000000;"><div style="display: block; width: 100%; height: 100%; flex-shrink: 0; background: white; text-align: left; background-image: none; background-repeat: no-repeat; background-position: center; background-size: cover;"><div style="background-color: #ffffff; width: 100%; height: 100%; padding: 35px 25px; display: flex; flex-direction: column; overflow: hidden; color: inherit; box-sizing: border-box;"><div style="display: block; height: 45px; font-style: normal; font-weight: 400; font-size: 18px; line-height: 20px; flex-shrink: 0; color: inherit;">Tutorial completed.</div><div style="display: block; margin-top: 3px; font-style: normal; font-weight: 400; font-size: 15px; line-height: 20px; flex-grow: 1; color: inherit; overflow: overlay;">Congratulations on finishing this tutorial.</div></div></div></div></div></div></div>
#### Notes

- You can check if your course is hidden or shown by looking at your dashboard. Courses that are hidden say that they are hidden underneath the course name.

[![uw2hiddendashboard2.png](https://help.mlc-wels.edu/uploads/images/gallery/2021-08/scaled-1680-/uw2hiddendashboard2.png)](https://help.mlc-wels.edu/uploads/images/gallery/2021-08/uw2hiddendashboard2.png)

- After setting your course to view, you might end up with orphaned activities, making it look like content has disappeared. See [Fixing Orphaned Activities ](https://help.mlc-wels.edu/books/moodle-for-faculty/page/fixing-orphaned-activities)to remedy this issue.
- Online instructors are encouraged to make their courses visible to students a few days prior to the start of the semester so that students can become familiar with the course layout and content.
- At the end of the semester, courses should be [hidden from student view](https://bookstack.mlc-wels.edu/books/moodle/page/set-course-to-hide) to protect copywritten material.

# View Class Roster

Class rosters are available to view prior to the semester via Portal or during the semester via Portal or Moodle.

#### Instructions for Viewing the Roster in Portal

1. Visit the MLC Portal by clicking **Portal** in the top menu of your Moodle page or by going to [portal.mlc-wels.edu](https://help.mlc-wels.edu/portal.mlc-wels.edu).
2. If you are not automatically logged in, click the **Login** button near the top right corner and use your Moodle username and password to log in.
3. After logging in, click **Scheduling** and choose **Schedule Browser.**
4. Click your name.
5. Scroll down below the course schedule and click the blue people icon ![peopleicon.png](https://help.mlc-wels.edu/uploads/images/gallery/2021-05/scaled-1680-/peopleicon.png) to the left of the course name. 
    - If you do not see any courses in the schedule, you likely need to switch the semester being shown. Click the semester name on the right side underneath the gear menu and choose a different semester. 
        - *The summer semester is semester 3.*
6. Your course roster will be displayed on the resulting page. 
    - For further directions on emailing your students, please see [Initial Communication with Students.](https://help.mlc-wels.edu/books/moodle-for-faculty/page/initial-communication-with-students)

#### Instructions for Viewing the Roster in Moodle

1. After logging into Moodle, click on the course whose roster you want to view.
2. From the menu on the top, click **Participants**.
3. If the resulting list is blank, the course has not yet been populated with students. Courses are typically populated with students 4 weeks prior to the start of the course. This process is automatic.

- - Both the Portal and Moodle rosters will be updated as new students enroll in the course.
    - If a student drops a course, that change takes place once the information is changed in the database, and the database syncs with Moodle.


#### Moodle Enrollment Process

- When students enroll in an MLC course, they are automatically enrolled in the corresponding Moodle course. Instructors and students do not need anything to enroll in Moodle courses.
- Enrollments appear in Moodle 4 weeks prior to the start of the semester. Any enrollment changes made after the 4-week mark will appear in Moodle the next time the database and Moodle sync, which happens numerous times a day.
- If a student drops a course via the MLC Records Office, the roster change will automatically take place in Moodle.
- Enrollment changes are not instantaneous. They can take up to 24 hours to appear. For the most accurate enrollment, [view your course roster in Portal](https://bookstack.mlc-wels.edu/books/moodle/page/view-class-roster).

# Initial Communication with Students

For online courses, please contact your students about two weeks prior to the start of the semester, following the guidelines below.

##### Initial Email Communication

- [Access your course roster in Portal.](https://help.mlc-wels.edu/books/moodle-for-faculty/page/view-class-roster#bkmrk-instructions-for-vie)
- Click the blue **Email all (Personal)** link. Your email program should open with the student-preferred email addresses populated in the BCC box. 
    - For information on how to make Gmail your default email handler in Google Chrome, please see this [MLC Knowledge Base article](https://kb.mlc-wels.edu/google-apps/default-gmail-in-chrome).
    - If you have difficulty accessing your course roster and/or email addresses, please let the MLC Office of Continuing Education know at <continuinged@mlc-wels.edu>.
- In your initial email, please: 
    - Welcome your students to the course
    - Mention the date when the course will begin.
    - Attach a copy of the course syllabus.
    - Mention the required textbook information, and any other information you think they would like to know.
    - Inform them when you will make your course visible in Moodle so they can look around at the preliminary course information.
    - Ask them to reply to your email message so that you know they received it.
- If you have some students that have not responded after several days, please contact them by phone to make sure they are receiving the information. Online students appreciate personal contact from the course instructor. If you still do not receive a response, please contact the [Office of Continuing Education.](mailto:continuinged@mlc-wels.edu)

##### Notes

- When viewing the class roster, you can also click on individual students to view their address, phone number, etc.
- Emailing (messaging) students directly from within Moodle uses whatever email address is currently listed in their Moodle profile, which might not yet be their preferred email address. Students are instructed to update their email address in their Moodle profile during the online orientation for new students.

### Here's an interactive tutorial

<div id="bkmrk-%2A%2A-best-experienced-" style="max-width: 100%; width: 800px; margin: 0 auto;">*\*\* Best experienced in Full Screen (click the icon in the top right corner before you begin) \*\**</div>[https://www.iorad.com/player/2111287/Initial-Email-Contact---Online-Course](https://www.iorad.com/player/2111287/Initial-Email-Contact---Online-Course)

<iframe allow="camera; microphone; clipboard-write" allowfullscreen="allowfullscreen" frameborder="0" height="500px" src="https://www.iorad.com/player/2111287/Initial-Email-Contact---Online-Course?src=iframe&oembed=1" style="width: 100%; height: 500px;" width="100%"></iframe>

*10 STEPS*

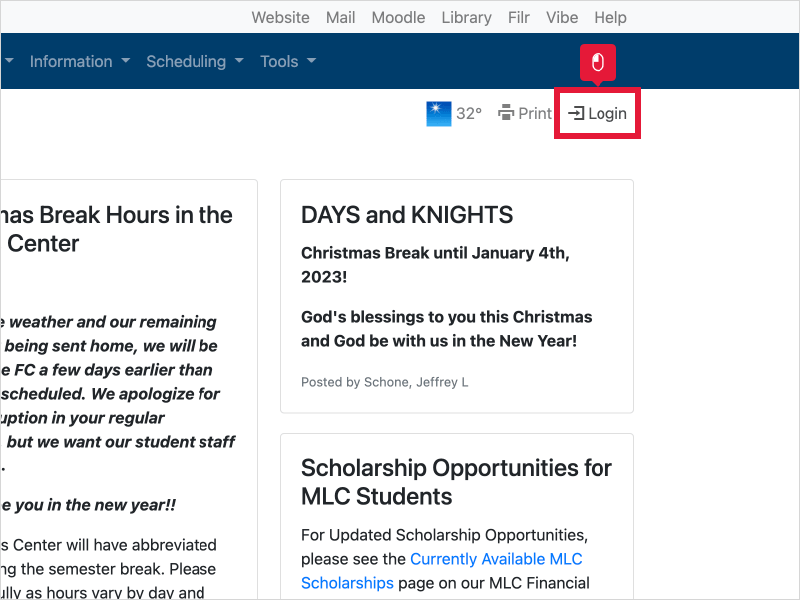
1\. The first step is to go to **[portal.mlc-wels.edu](https://portal.mlc-wels.edu)** and click **Login**

![Step 1 image](https://www.iorad.com/api/tutorial/stepScreenshot?tutorial_id=2111287&step_number=1&width=800&height=600&mobile_width=450&mobile_height=400&apply_resize=true&min_zoom=0.5)

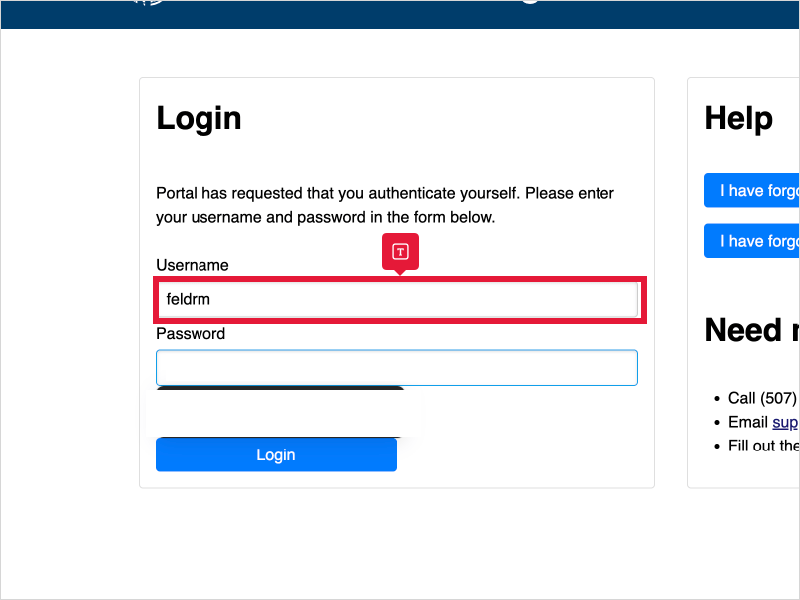
2\. Enter your **Username**

![Step 2 image](https://www.iorad.com/api/tutorial/stepScreenshot?tutorial_id=2111287&step_number=2&width=800&height=600&mobile_width=450&mobile_height=400&apply_resize=true&min_zoom=0.5)

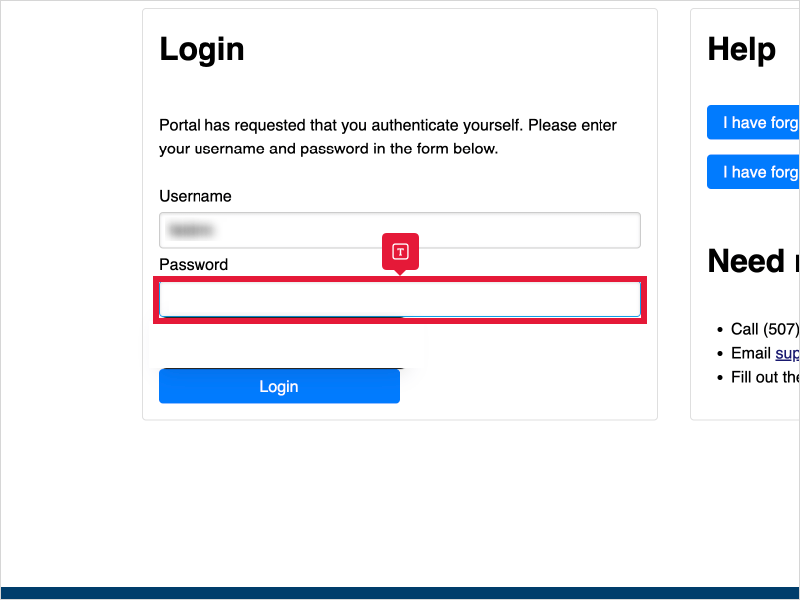
3\. Enter your **Password**
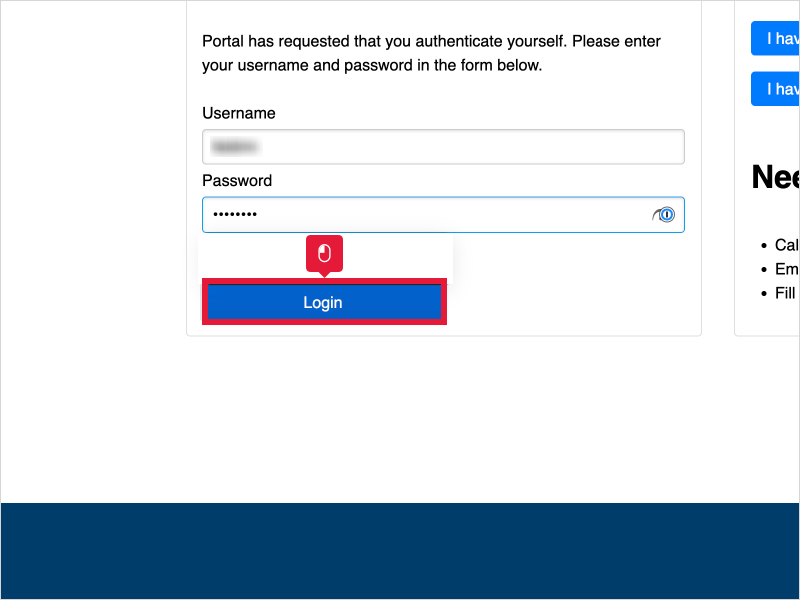
![Step 3 image](https://www.iorad.com/api/tutorial/stepScreenshot?tutorial_id=2111287&step_number=3&width=800&height=600&mobile_width=450&mobile_height=400&apply_resize=true&min_zoom=0.5)

4\. Click **Login**

![Step 4 image](https://www.iorad.com/api/tutorial/stepScreenshot?tutorial_id=2111287&step_number=4&width=800&height=600&mobile_width=450&mobile_height=400&apply_resize=true&min_zoom=0.5)

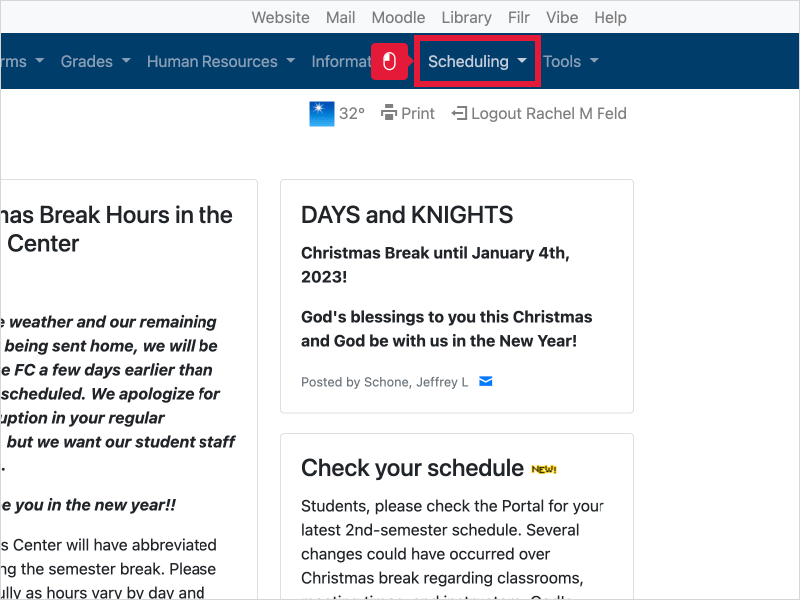
5\. Click **Scheduling**

![Step 5 image](https://www.iorad.com/api/tutorial/stepScreenshot?tutorial_id=2111287&step_number=5&width=800&height=600&mobile_width=450&mobile_height=400&apply_resize=true&min_zoom=0.5)

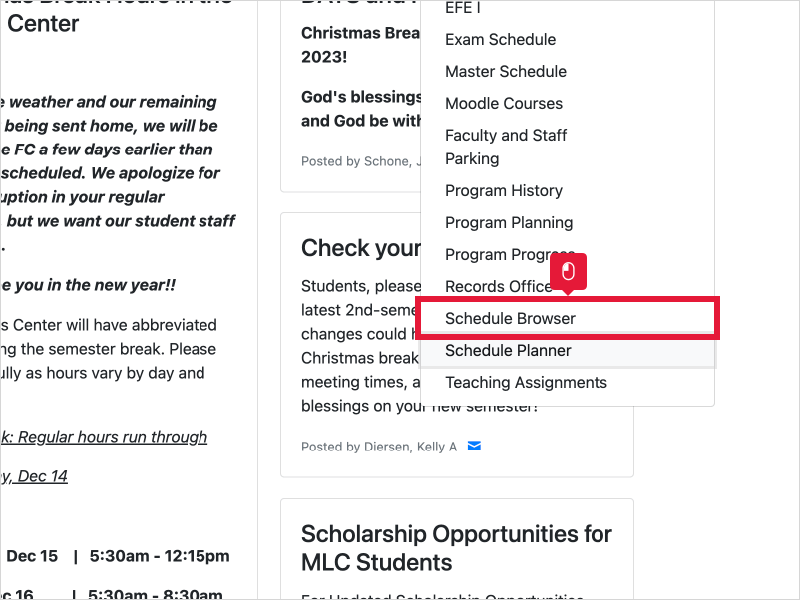
6\. Click **Schedule Browser**

![Step 6 image](https://www.iorad.com/api/tutorial/stepScreenshot?tutorial_id=2111287&step_number=6&width=800&height=600&mobile_width=450&mobile_height=400&apply_resize=true&min_zoom=0.5)

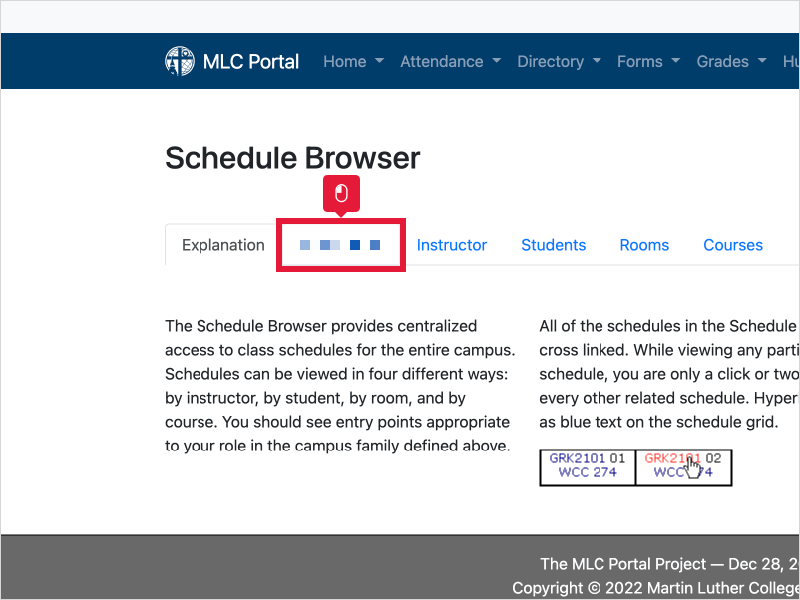
7\. Click **Your Name**

![Step 7 image](https://www.iorad.com/api/tutorial/stepScreenshot?tutorial_id=2111287&step_number=7&width=800&height=600&mobile_width=450&mobile_height=400&apply_resize=true&min_zoom=0.5)

8\. Scroll down to the bottom of your schedule and click **the blue people icon.**

![Step 8 image](https://www.iorad.com/api/tutorial/stepScreenshot?tutorial_id=2111287&step_number=8&width=800&height=600&mobile_width=450&mobile_height=400&apply_resize=true&min_zoom=0.5)

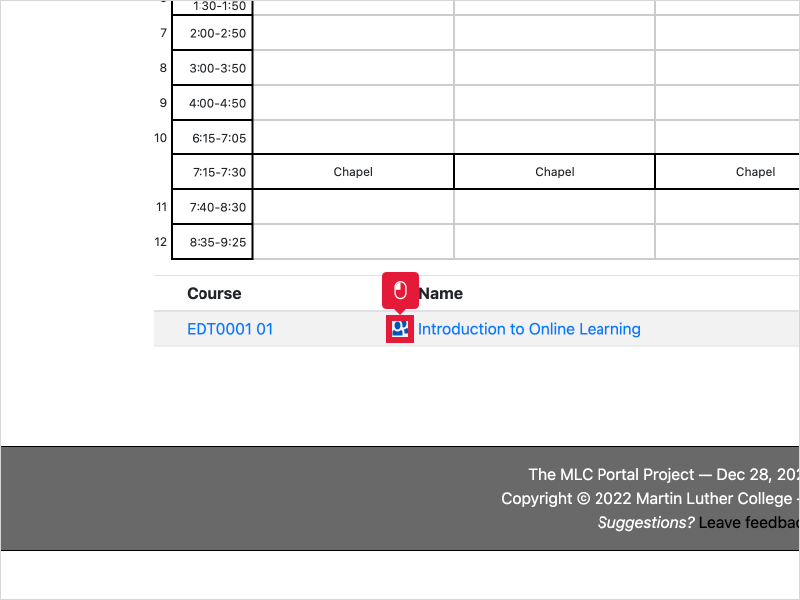
9\. Click **E-mail All (Personal)**

![Step 9 image](https://www.iorad.com/api/tutorial/stepScreenshot?tutorial_id=2111287&step_number=9&width=800&height=600&mobile_width=450&mobile_height=400&apply_resize=true&min_zoom=0.5)

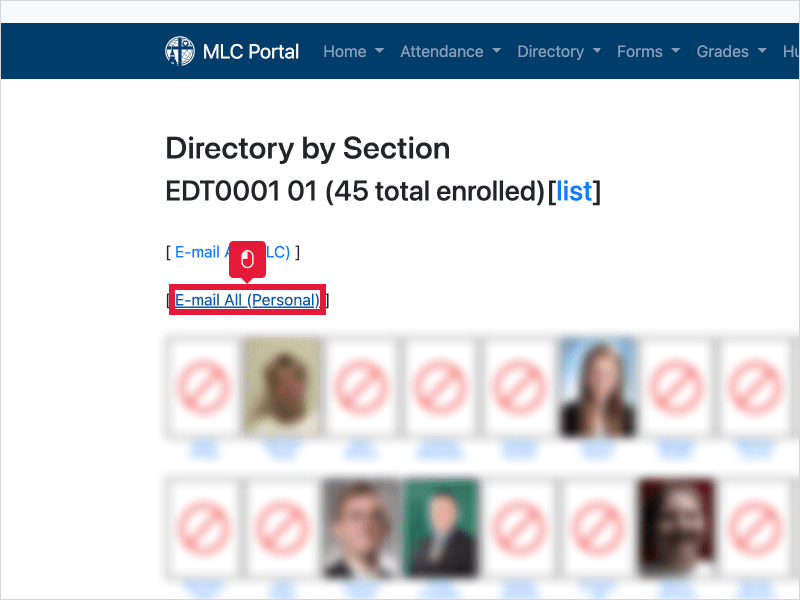
10\. The email addresses should populate into a new email from whatever email client you typically use.   
  
If it's not the right email address (i.e. it's not your MLC email address), copy and paste the email addresses into a new email from your MLC account.

![Step 10 image](https://www.iorad.com/api/tutorial/stepScreenshot?tutorial_id=2111287&step_number=10&width=800&height=600&mobile_width=450&mobile_height=400&apply_resize=true&min_zoom=0.5)

# Fixing Orphaned Activities

After importing and opening up a course, sometimes activities appear as **orphaned**. Please follow these directions to fix the issue.

#### Instructions

1. Log in to Moodle as usual and click on the course.
2. Click on the **gear** in the upper right corner and choose **Edit Settings**.
3. Scroll down and click on the blue heading **Course Format**.
4. Next to the second option, **Number of sections**, choose a number bigger than what is currently there. Many courses have 8 topics, but it depends on how you have organized your content. If you remember how many sections your course had, choose that number. If not, take your best guess -- the number can be changed again if needed. 
    - **Number of sections** refers to the number of topics in your course. Depending on how your course is designed, this is likely the number of weeks in the semester or units in your class.
5. Scroll to the bottom of the page and choose **Save and display**.
6. Check to see that all your course content is displayed/no longer <span class="il">orphaned</span>. If not, the course likely had more sections. Repeat steps 2-5 as necessary.

---

### Here's an interactive tutorial

<div id="bkmrk-%2A%2A-best-experienced-"><div>*\*\* Best experienced in Full Screen (click the icon in the top right corner before you begin) \*\**</div></div>[https://www.iorad.com/player/2111278/Fixing-Orphaned-Content](https://www.iorad.com/player/2111278/Fixing-Orphaned-Content)

<iframe allowfullscreen="allowfullscreen" frameborder="0" height="500px" src="https://www.iorad.com/player/2111278/Fixing-Orphaned-Content?src=iframe&oembed=1" style="width: 100%; height: 500px;" width="100%"></iframe>

*7 STEPS*

1\. The first step is to open your course and click **the gear icon.**

![Step 1 image](https://www.iorad.com/api/tutorial/stepScreenshot?tutorial_id=2111278&step_number=1&width=800&height=600&mobile_width=450&mobile_height=400&apply_resize=true&min_zoom=0.5)

2\. Click **Edit settings**

![Step 2 image](https://www.iorad.com/api/tutorial/stepScreenshot?tutorial_id=2111278&step_number=2&width=800&height=600&mobile_width=450&mobile_height=400&apply_resize=true&min_zoom=0.5)

3\. Scroll down and click **Course format**

![Step 3 image](https://www.iorad.com/api/tutorial/stepScreenshot?tutorial_id=2111278&step_number=3&width=800&height=600&mobile_width=450&mobile_height=400&apply_resize=true&min_zoom=0.5)

4\. Scroll down and click the dropdown by **Number of Sections.**

![Step 4 image](https://www.iorad.com/api/tutorial/stepScreenshot?tutorial_id=2111278&step_number=4&width=800&height=600&mobile_width=450&mobile_height=400&apply_resize=true&min_zoom=0.5)

5\. Select a number larger than what is currently highlighted.

![Step 5 image](https://www.iorad.com/api/tutorial/stepScreenshot?tutorial_id=2111278&step_number=5&width=800&height=600&mobile_width=450&mobile_height=400&apply_resize=true&min_zoom=0.5)

6\. Scroll down and click **Save and display**

![Step 6 image](https://www.iorad.com/api/tutorial/stepScreenshot?tutorial_id=2111278&step_number=6&width=800&height=600&mobile_width=450&mobile_height=400&apply_resize=true&min_zoom=0.5)

7\. Check to see if all of your course sections are visible. If not, repeat the process with a bigger number.

![Step 7 image](https://www.iorad.com/api/tutorial/stepScreenshot?tutorial_id=2111278&step_number=7&width=800&height=600&mobile_width=450&mobile_height=400&apply_resize=true&min_zoom=0.5)

<div id="bkmrk-next-step">  
  
 **Next step**    
  
<div><div>[ ![Go Live](https://www.iorad.com/golive.svg) ](http://ior.ad/live/8ReS)</div></div></div>

# Using a Meta-Course

Some MLC courses have several sections of the same course. These can be combined into a single course, called a meta-course. Using a meta-course eliminates the need for posting/creating content in multiple locations for multiple sections.

#### Instructions

1. Request a meta-course through [this form](https://docs.google.com/forms/d/e/1FAIpQLSf2LsRJJDBx8JAJAjH5y4i-ARPrVMS6T81xFbQ6hjYCC9iBGw/viewform).
2. That's it :)

- *The individual sections will still appear on your dashboard, but you can safely ignore them. Do all updating, grading, etc. in the meta-course.*
- *Meta-courses cannot be created until the single sections are created in Moodle through the database. This happens approximately 6 weeks before the start of each semester.*

# Add Course Sections to a Meta-Site

Meta-courses can be reused from one semester or year to the next by removing the sections that are attached from the previous semester and then attaching the sections for the new semester.

#### Instructions

1. If you have not previously used a meta-site, please see [these instructions](https://help.mlc-wels.edu/books/moodle/page/using-a-meta-course).
2. If you are reusing a meta-site from a previous semester, please [remove the existing course sections](https://help.mlc-wels.edu/books/moodle/page/remove-course-sections-from-a-meta-site) before continuing.
3. [Activate each course section](https://help.mlc-wels.edu/books/moodle/page/course-activation) via the MLC Portal. Continue with the next steps once the sections appear in Moodle. This can take up to 24 hours.
4. Log into Moodle and enter the meta-site.
5. Click on the **Participants** tab on the left menu.
6. Click on the **Gear** in the upper right corner and choose **Enrollment methods**.
7. From the **Add method** dropdown menu, choose **Course meta link**.
8. From the top **Link course** dropdown menu, search for the [course name](https://help.mlc-wels.edu/books/moodle/page/course-name) of the first section you want to add. Pay careful attention to the section, school year, and semester to ensure you choose the right section. If the search window won't disappear after you select the proper course, press the Escape button.
9. From the bottom **Add to group** dropdown menu, choose **Create new group**. This will allow you to separate some assignments and activities by section.
10. Click the blue **Add method** at the bottom.
11. Repeat steps 5-10 until you've added all your sections to the meta-site.

# Edit Multiple Due Dates

The **Edit Dates** report lets you review and update due dates, cut-off dates, and other timed events for multiple assignments, activities, or resources all on one screen. This feature is especially helpful if you’re reusing a previous course.

#### Instructions

- - Log into Moodle and select your course from the Dashboard.
    - Click **Reports** on the top green menu.
    - Click **Dates** on the resulting screen.
    - Click the drop down menu by **Activity Type** to filter your view by activity.
    - Click your course sections to expand the content of each section, or click **Expand All** to view everything.
    - The date options for each course item will be displayed under each item. Make adjustments as needed.
    - When you’re done adjusting the date, click the blue **Save changes** button.

# Open a Course for One Student

In general, courses should be [hidden](https://help.mlc-wels.edu/books/moodle-for-faculty/page/set-course-to-hide) after they are completed. Sometimes, a student might need access to a closed course if they have an incomplete or are studying for their comprehensive exam. Instead of setting the course to view, which opens it up for all students, follow the directions below to open the course for an individual student. The access should be removed when the student no longer needs the content.

#### Instructions

##### Opening the Course

- - - Log into Moodle and click on the course you want to make visible to the student.
        - From the course home page, click on **Participants** in the left hand menu.
        - In the list, locate the student who needs access to the course.
        - In the **Roles** column, click the pencil icon next to "Student".
        - Click the **down arrow** to see the drop-down menu choices and choose **Single Viewer**.
        - Click the **save** icon [![saveicon.png](https://help.mlc-wels.edu/uploads/images/gallery/2023-02/scaled-1680-/saveicon.png)](https://help.mlc-wels.edu/uploads/images/gallery/2023-02/saveicon.png)

##### Closing the Course

- - - Log into Moodle and click on the course you want to make visible to the student.
        - From the course home page, click on **Participants** in the left hand menu.
        - In the list, locate the student who needs access to the course removed.
        - In the **Roles** column, click the pencil icon next to "Student".
        - Click the **x** next to **Single Viewer**.
        - Click the **save** icon [![saveicon.png](https://help.mlc-wels.edu/uploads/images/gallery/2023-02/scaled-1680-/saveicon.png)](https://help.mlc-wels.edu/uploads/images/gallery/2023-02/saveicon.png)

# Fix the "Not part of a Group" Error

In discussion forums, sometimes a student will get an error that says they cannot post because they are not part of a group. There are two ways to address this problem.

##### If the Discussion Forum **IS** Using Groups

- - Add the student to one of the groups being used in the discussion forum by following [these instructions](https://help.mlc-wels.edu/books/moodle-for-faculty/page/adding-or-removing-an-individual-student-from-a-pre-existing-group).

#####  

##### If the Discussion Forum is **NOT** Using Groups

- - Turn on editing in your course if it isn't already turned on.
    - Check the small blue icon next to the forum's edit button. Make sure that it's a solid blue person icon without a circle. This is the "No Groups" icon in the image below.
    - If it is a different icon, either the "Separate Groups" or "Visible Groups" icon in the image below, click the icon until it is a solid blue person.

[![Moodle-Groups.png](https://help.mlc-wels.edu/uploads/images/gallery/2019-09/scaled-1680-/Moodle-Groups.png)](https://help.mlc-wels.edu/uploads/images/gallery/2019-09/Moodle-Groups.png)

# Show/Hide Course Content

When content is not ready for students to view, you can hide whole sections or individual items from student view. You can also use the bulk edit feature to hide course content.

##### Instructions

<div id="bkmrk-%2A%2A-best-experienced-" style="max-width: 100%; width: 800px; margin: 0 auto;">*\*\* Best experienced in Full Screen (click the icon in the top right corner before you begin) \*\**</div>[https://www.iorad.com/player/2415696/Change-availability-of-course-items](https://www.iorad.com/player/2415696/Change-availability-of-course-items)

<iframe allow="camera; microphone; clipboard-write" allowfullscreen="allowfullscreen" frameborder="0" height="500px" src="https://www.iorad.com/player/2415696/Change-availability-of-course-items?src=iframe&oembed=1" style="width: 100%; height: 500px;" width="100%"></iframe>

*10 STEPS*

1\. The first step is to open your course and click to turn on **Edit mode**

![Step 1 image](https://www.iorad.com/api/tutorial/stepScreenshot?tutorial_id=2415696&step_number=1&width=800&height=600&mobile_width=450&mobile_height=400&apply_resize=true&min_zoom=0.5)

2\. Scroll to the item you want to hide/show and click **the three dots**

![Step 2 image](https://www.iorad.com/api/tutorial/stepScreenshot?tutorial_id=2415696&step_number=2&width=800&height=600&mobile_width=450&mobile_height=400&apply_resize=true&min_zoom=0.5)

3\. Click **Hide on course page** to <u>hide</u> the item or **Show on course page** to <u>show</u> the item

![Step 3 image](https://www.iorad.com/api/tutorial/stepScreenshot?tutorial_id=2415696&step_number=3&width=800&height=600&mobile_width=450&mobile_height=400&apply_resize=true&min_zoom=0.5)

4\. Once hidden, you can also adjust the availability by clicking **Hidden from students** and choosing **Show on course page**

![Step 4 image](https://www.iorad.com/api/tutorial/stepScreenshot?tutorial_id=2415696&step_number=4&width=800&height=600&mobile_width=450&mobile_height=400&apply_resize=true&min_zoom=0.5)

5\. To change availability for multiple items, click **Bulk actions** near the top of the page

![Step 5 image](https://www.iorad.com/api/tutorial/stepScreenshot?tutorial_id=2415696&step_number=5&width=800&height=600&mobile_width=450&mobile_height=400&apply_resize=true&min_zoom=0.5)

6\. Click the boxes to **Select** the items you want to show/hide

![Step 6 image](https://www.iorad.com/api/tutorial/stepScreenshot?tutorial_id=2415696&step_number=6&width=800&height=600&mobile_width=450&mobile_height=400&apply_resize=true&min_zoom=0.5)

7\. After you've selected the items you want, click **Availability** at the bottom of the page

![Step 7 image](https://www.iorad.com/api/tutorial/stepScreenshot?tutorial_id=2415696&step_number=7&width=800&height=600&mobile_width=450&mobile_height=400&apply_resize=true&min_zoom=0.5)

8\. Click **Hide** or **Show**, depending on what you want to do

![Step 8 image](https://www.iorad.com/api/tutorial/stepScreenshot?tutorial_id=2415696&step_number=8&width=800&height=600&mobile_width=450&mobile_height=400&apply_resize=true&min_zoom=0.5)

9\. Click **Apply**

![Step 9 image](https://www.iorad.com/api/tutorial/stepScreenshot?tutorial_id=2415696&step_number=9&width=800&height=600&mobile_width=450&mobile_height=400&apply_resize=true&min_zoom=0.5)

10\. That's it. You're done.

<div id="bkmrk-tutorial-completed.-" style="max-width: 100%; width: 800px; margin: 0 auto;"><div style="margin-top: 20px;"><div style="position: relative; text-align: center;">![Step 10 image](https://www.iorad.com/api/tutorial/stepScreenshot?tutorial_id=2415696&step_number=10&width=800&height=600&mobile_width=450&mobile_height=400&apply_resize=true&min_zoom=0.5)<div class="step-info notranslate" style="position: absolute; top: 0; left: 0; z-index: 2; width: 100%; height: 100%; display: flex; align-items: center; justify-content: center; backdrop-filter: blur(10px); color: #000000;"><div style="display: block; width: 100%; height: 100%; flex-shrink: 0; background: white; text-align: left; background-image: none; background-repeat: no-repeat; background-position: center; background-size: cover;"><div style="background-color: #ffffff; width: 100%; height: 100%; padding: 35px 25px; display: flex; flex-direction: column; overflow: hidden; color: inherit; box-sizing: border-box;"><div style="display: block; height: 45px; font-style: normal; font-weight: 400; font-size: 18px; line-height: 20px; flex-shrink: 0; color: inherit;">Tutorial completed.</div><div style="display: block; margin-top: 3px; font-style: normal; font-weight: 400; font-size: 15px; line-height: 20px; flex-grow: 1; color: inherit; overflow: overlay;">Congratulations on finishing this tutorial.</div></div></div></div></div></div></div>