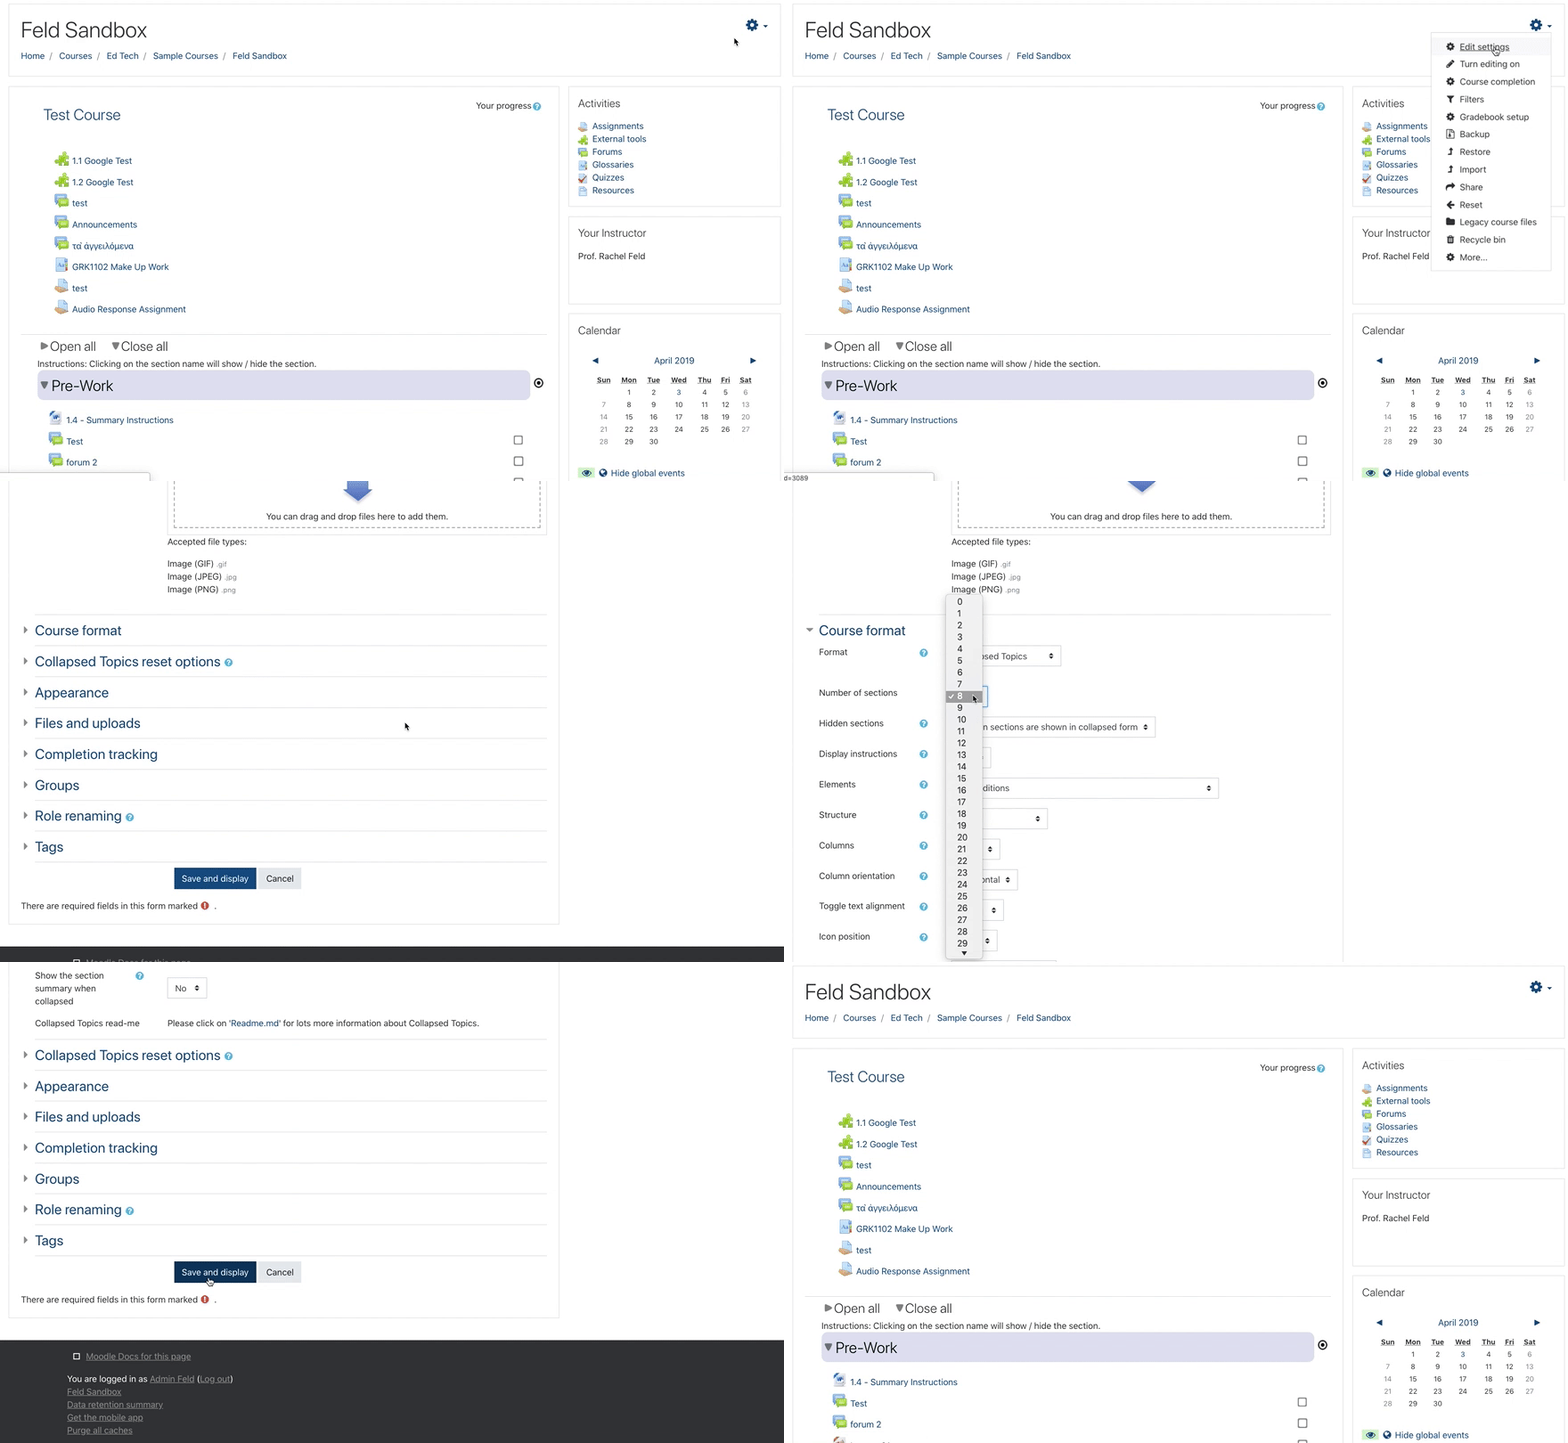
Fixing Orphaned Content
Orphaned content can appear when the number of sections in a current course does not match the number of sections from an imported course. To fix this, follow the directions below to change the number of sections in the course.
Interactive Tutorial
Instructions:
9 STEPS
1. FromThe thefirst step is to open your course homeand page,click identifyto howturn manyon sectionsEdit aremode
2. ClickScroll and click Close all. This will make scrolling to the settingsbottom gear inof the upperpage rightfaster.
3. Scroll down to the bottom and find the last orphaned section. In this example, it's section 10. Remember this number.
4. Click Settings
5. Scroll and click to expand Course format
6. itScroll isdown notand already expanded, click Course format to expandclick the options.
4.menu Nextnext to Number of sections, choose the appropriate number from the drop-down menu. If you're not sure, choose a number larger than what is already there. The number can always be adjusted again.
- to Number of sections
refersto7. Select the number of
topicssectionsinyouyourmadecourse. Depending on how your course is designed, this is likely the numbernote ofweeksin thesemesterpreviousorstep.unitsForinthisyourexample,class.choose
5.
8. Scroll to the bottom of the pagedown and choose click Save and display.
6. The course home page will appear. Scroll to the bottom. If orphaned sections still exist, repeat steps 2-5, adjusting the number accordingly.

