Document Cameras
There are currently two types of document cameras being utilized in classrooms on campus. Please reference either the room number or picture of the document camera to identify which type is in the classroom.
HDMI Document Camera
These document cameras can be found in WCC 168 and the Art Lab.
Instructions
- Turn on the TV and document camera.
- Use the input button on the TV remote and choose HDMI 2.
- Put whatever you'd like to display underneath the camera.
- Adjust the brightness using the arrows on the document camera.
- Zoom in or out using the grey knob on the end.
USB Document Camera
These document cameras can be found in MC 217, MC 123, MH 205, WCC 278, WCC 276, WCC 162, WCC 181, and other classrooms.
Instructions
- Turn on the TV.
- Plug your Surface Pro into the docking station.
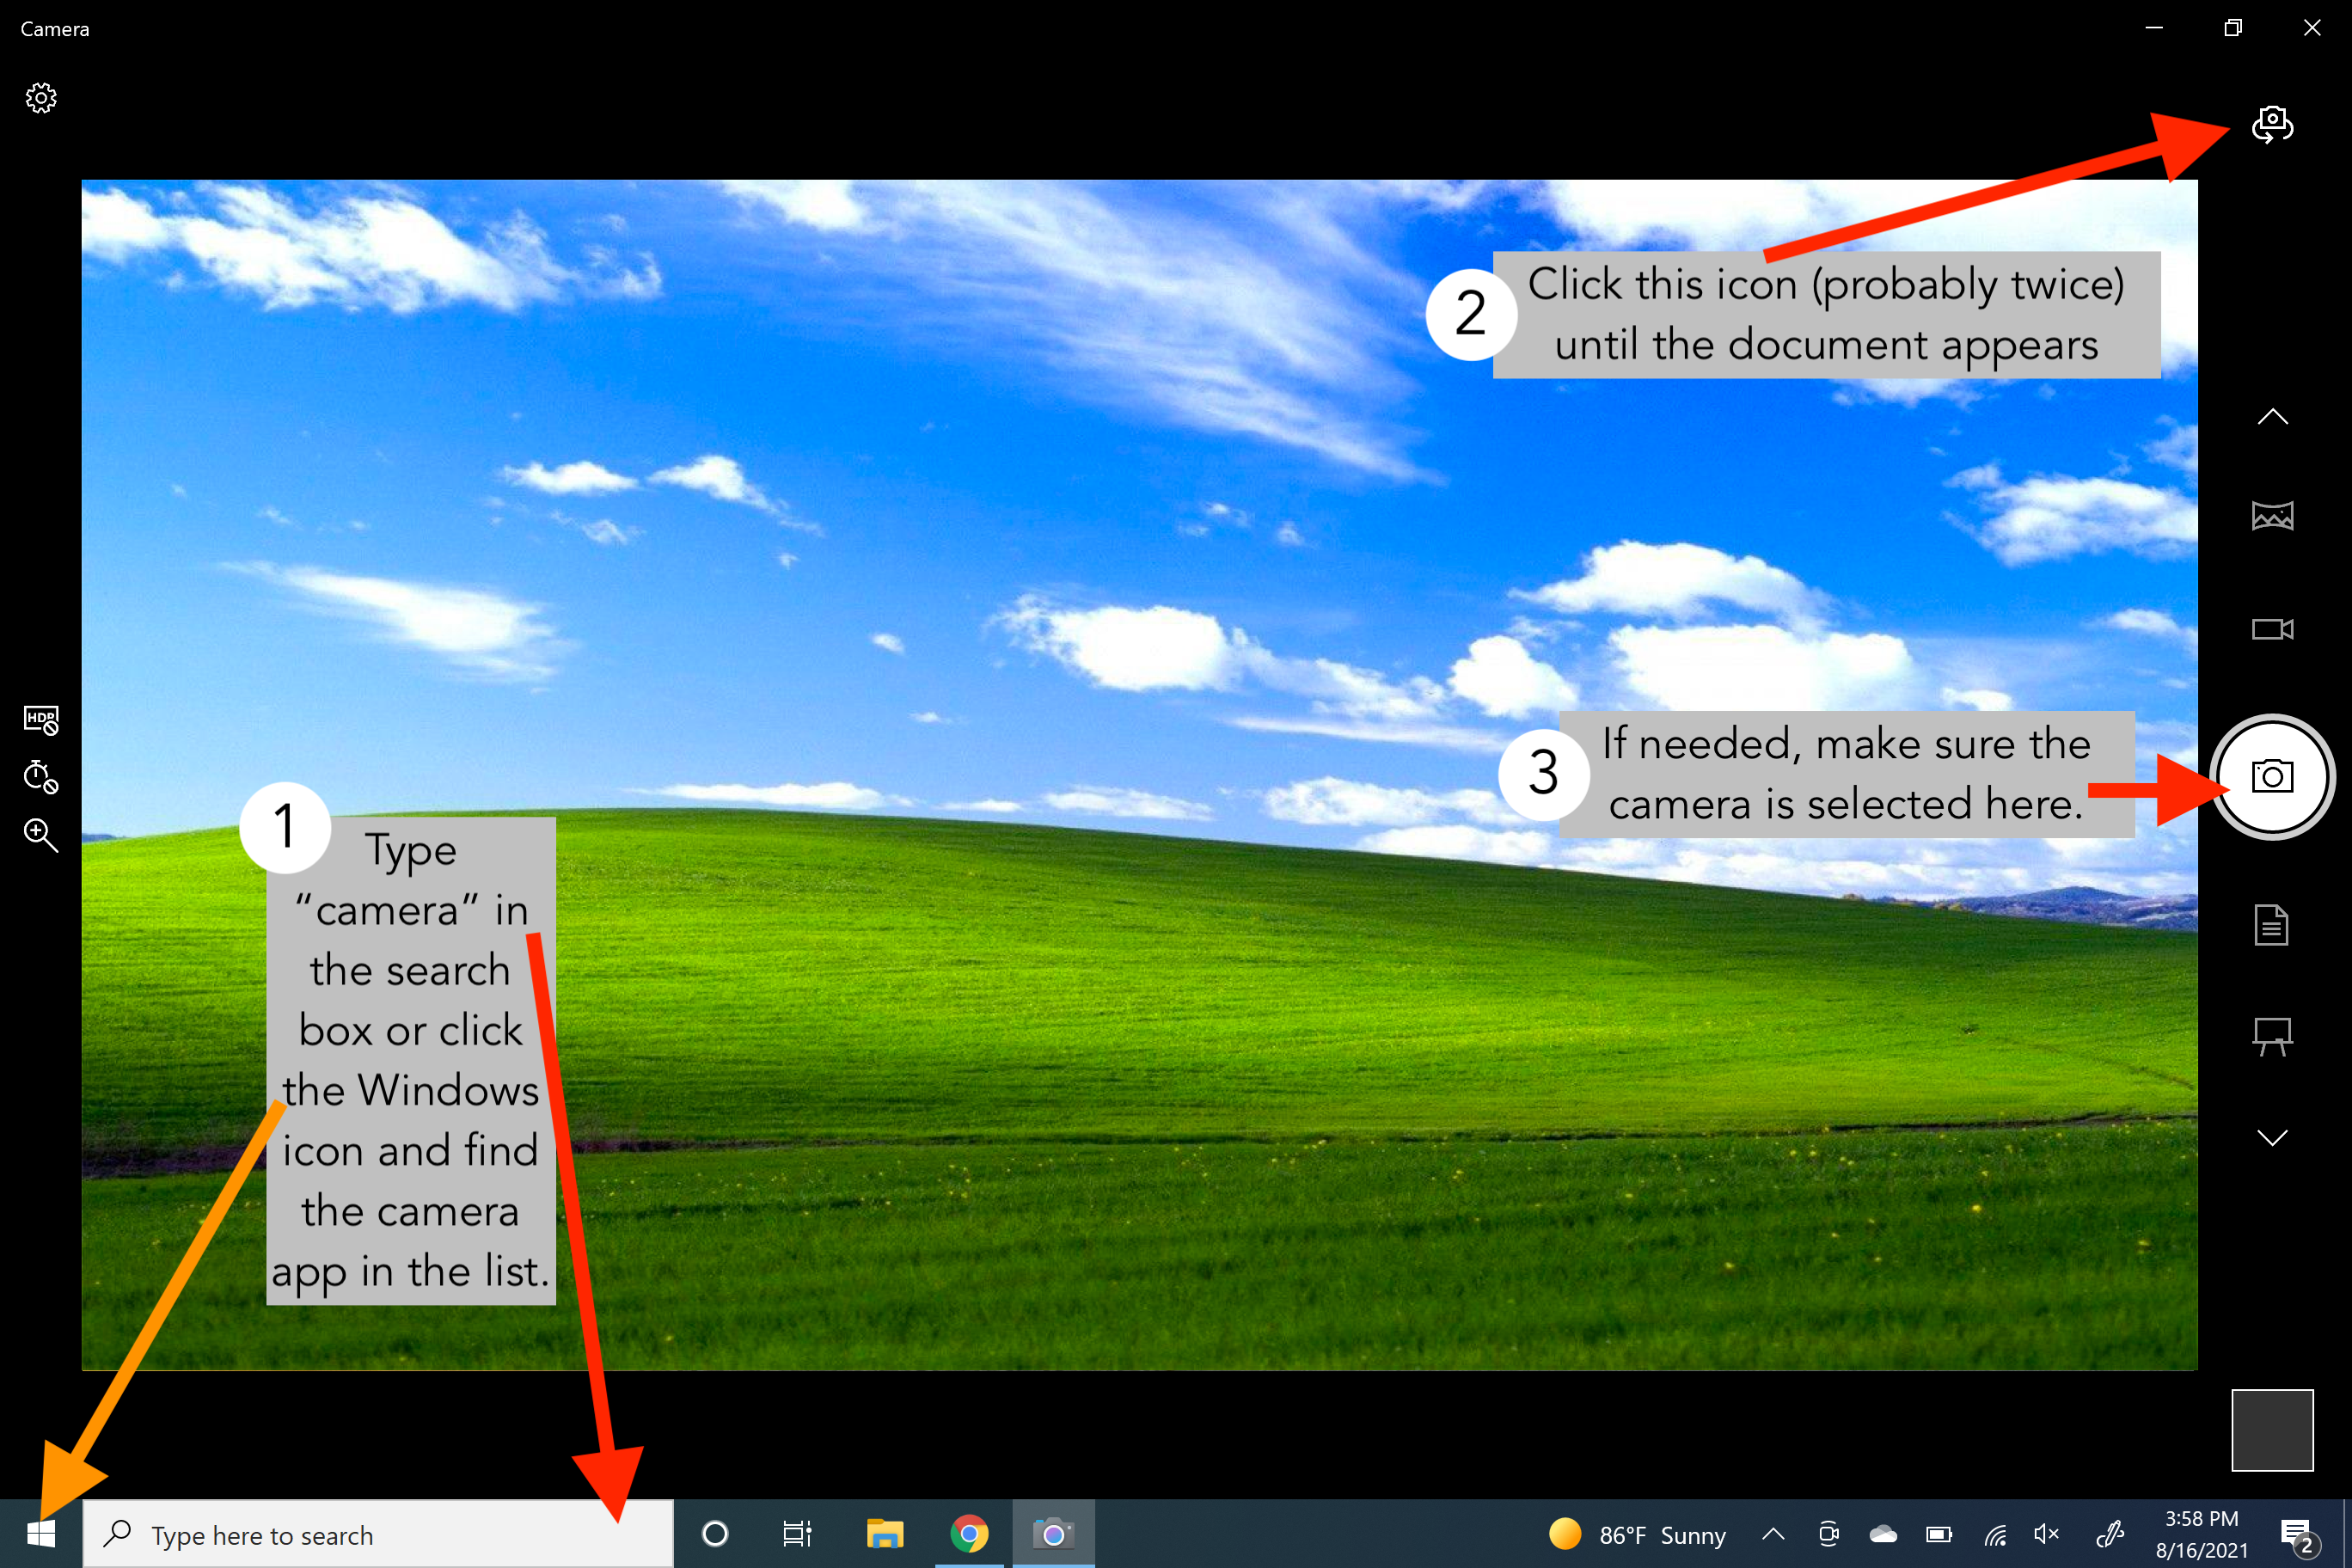
- Open the Camera App on your Surface Pro
- You can do this by typing camera into the search bar or clicking the Windows button in the lower-left corner and choosing Camera.
- The camera app will open on your Surface Pro. It will default to your webcam.
- Click the camera icon
 in the upper right corner until the document camera appears on the screen. You will probably need to click it twice.
 - If you are getting strange blue highlights on your image, make sure that the round camera icon
 is selected on the right side of the screen.
 - If the image on your screen appears upsidedown, press the teal button on the side of the document camera.