Set Course to Hide/View
By default, all courses are initially hidden from student view. Courses are automatically made visible to students 1 week prior to the beginning of the semester. If you wish for your course to be hidden after the 1-week mark, follow the instructions below.
Instructions
** Best experienced in Full Screen (click the icon in the top right corner before you begin) **
4 STEPS
1. The first step is to open your course and click Settings
2. Next to Course visibility, choose show or hide.
If show is selected, all students, instructors, and TAs can see the course on their Moodle dashboard. If hide is selected, only instructors can see the course on their Moodle dashboard.
3. Scroll down and click Save and display
4. That's it. You're done.
Notes
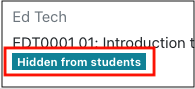
- You can check if your course is hidden or shown by looking at your dashboard. Courses that are hidden say that they are hidden underneath the course name.
- After setting your course to view, you might end up with orphaned activities, making it look like content has disappeared. See Fixing Orphaned Activities to remedy this issue.
- Online instructors are encouraged to make their courses visible to students a few days prior to the start of the semester so that students can become familiar with the course layout and content.
- At the end of the semester, courses should be hidden from student view to protect copywritten material.