Using Blocks
Course blocks are the boxes of information on the right side of the course page. These blocks can be edited to fit the needs of the course. Many of these blocks can also be added to your Moodle Dashboard.
Adding New Blocks
- Log into Moodle and enter your course site.
- Click on the Edit mode toggle in the upper right corner to turn editing on.
- Click the arrow button on the right side of the page to expand the blocks drawer.
- Click the name of the block you want to add to your course
- The block will be added to the list of blocks on the right side of your course page. Information on specific blocks can be found below.
Editing Existing Blocks
- Log into Moodle and enter your course site.
- Click on the Edit mode toggle in the upper right corner to turn editing on.
- Click the arrow button on the right side of the page to expand the blocks drawer.
- Click on the gear in the block you wish to edit and choose the appropriate option.
- Configure block: access the options for the particular block.
- Hide block: the block will no longer be visible for students.
- Permissions: change permissions within the block.
- Check permissions: view the permissions within the block for specific users.
- Delete block: remove block from the course site.
Instructor Information Block
Students find having a block with information about the instructor on the course home page is helpful, especially in an online course. Please follow these instructions to add this block to your course. If you already have an instructor block but need to update it, please see the next section.
- Log into Moodle and enter your course site.
- Click on the Edit mode toggle in the upper right corner to turn editing on.
- Click the arrow button on the right side of the page to expand the blocks drawer.
- Choose Text from the list.
- A block with the title (new Text block)should appear at the top of your course blocks.
- Click the Gear in the HTML block and choose Configure (new Text block) block.
- On the next page, enter the title for the block. Your Instructor is typically used.
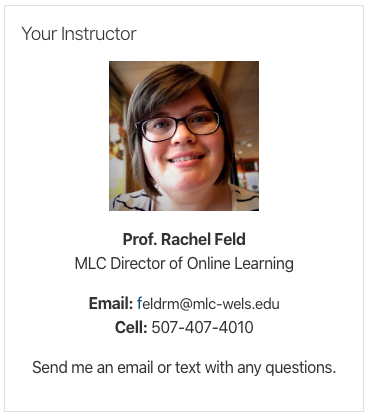
- In the Content textbox, enter the information you'd like your students to see. This could include your name, photo, email address, preferred method of communication, etc. See the sample below. Use the toolbar in the textbox to format your text.
- Scroll to the bottom and click Save changes.
- Repeat steps 6-9 to adjust the formatting as needed. Note that some formatting will depend on the size of the screen the student is viewing your course from.
Updating the Your Instructor Block
- Log into Moodle and enter your course site.
- Click on the Edit mode toggle in the upper right corner to turn editing on.
- Click the arrow button on the right side of the page to expand the blocks drawer.
- Click the Gear in the Your Instructor block and choose Configure Your Instructor block. Note: If your block is named something different, the Configure option will include the name of the block.
- In the Content textbox, edit your contact information.
- Scroll to the bottom and click Save changes.
- Repeat steps 3-5 to adjust the formatting as needed. Note that some formatting will depend on the size of the screen the student is viewing your course from.
Available Blocks
The most commonly used blocks are listed below. Please follow the link for more information on the block.